Kali Purple SOC: Part 1 – Installing and Configuring Proxmox & OPNsense


Install Proxmox
I've linked below a quick guide below to quickly get up and running with Proxmox, as well as a phenomenal crash course video by NetworkChuck on virtualization, featuring Proxmox. For the written guide below, do not perform step 5 or beyond; only perform steps 1-4.

Click Datacenter
Click Storage
Click local-lvm then Remove
Click your Proxmox node name, then Shell
Type these commands:
lvremove /dev/pve/datatype y when prompted
lvresize -l +100%FREE /dev/pve/rootresize2fs /dev/mapper/pve-rootInstall OPNsense
Navigate to https://opnsense.org/download/ click Download.
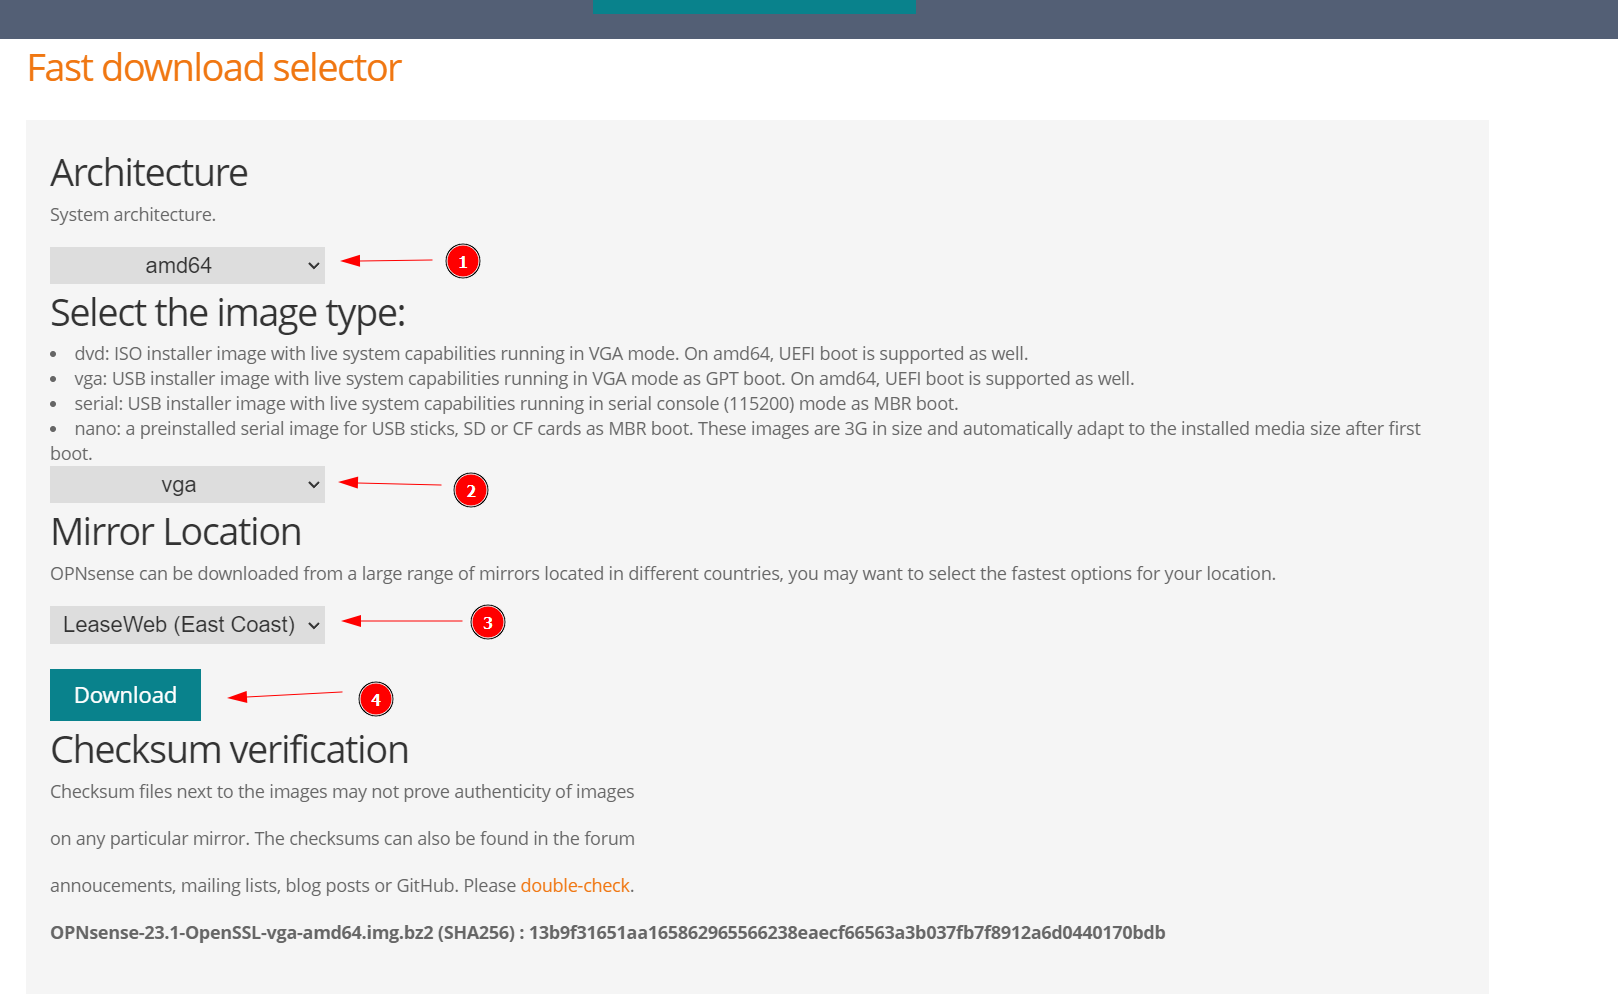
Select amd64 as the architecture, select VGA as the installer, select the nearest location to download the image from, and Download.
Use 7zip to extract the contents of the download, which should result in obtaining a .img file.

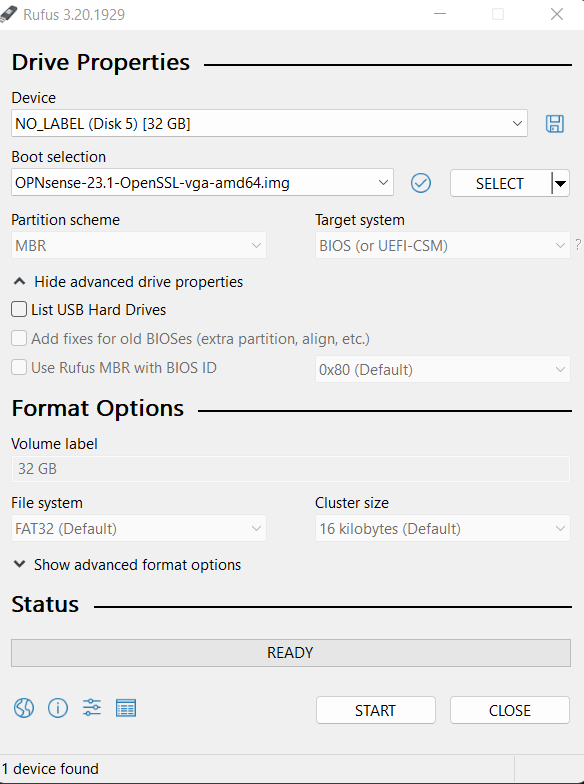
Download and install Rufus. Select the install device. Click Select and point it to the OPNsense .img file. Click Start.
Once it's finished, you can pull the USB drive and insert it into the device you want to install OPNsense on. Here's a quick video from the creators of OPNsense on how to install it to your device.
Once the setup is complete and you're able to login to the web interface, let's take a look at next steps.
OPNsense Setup Wizard
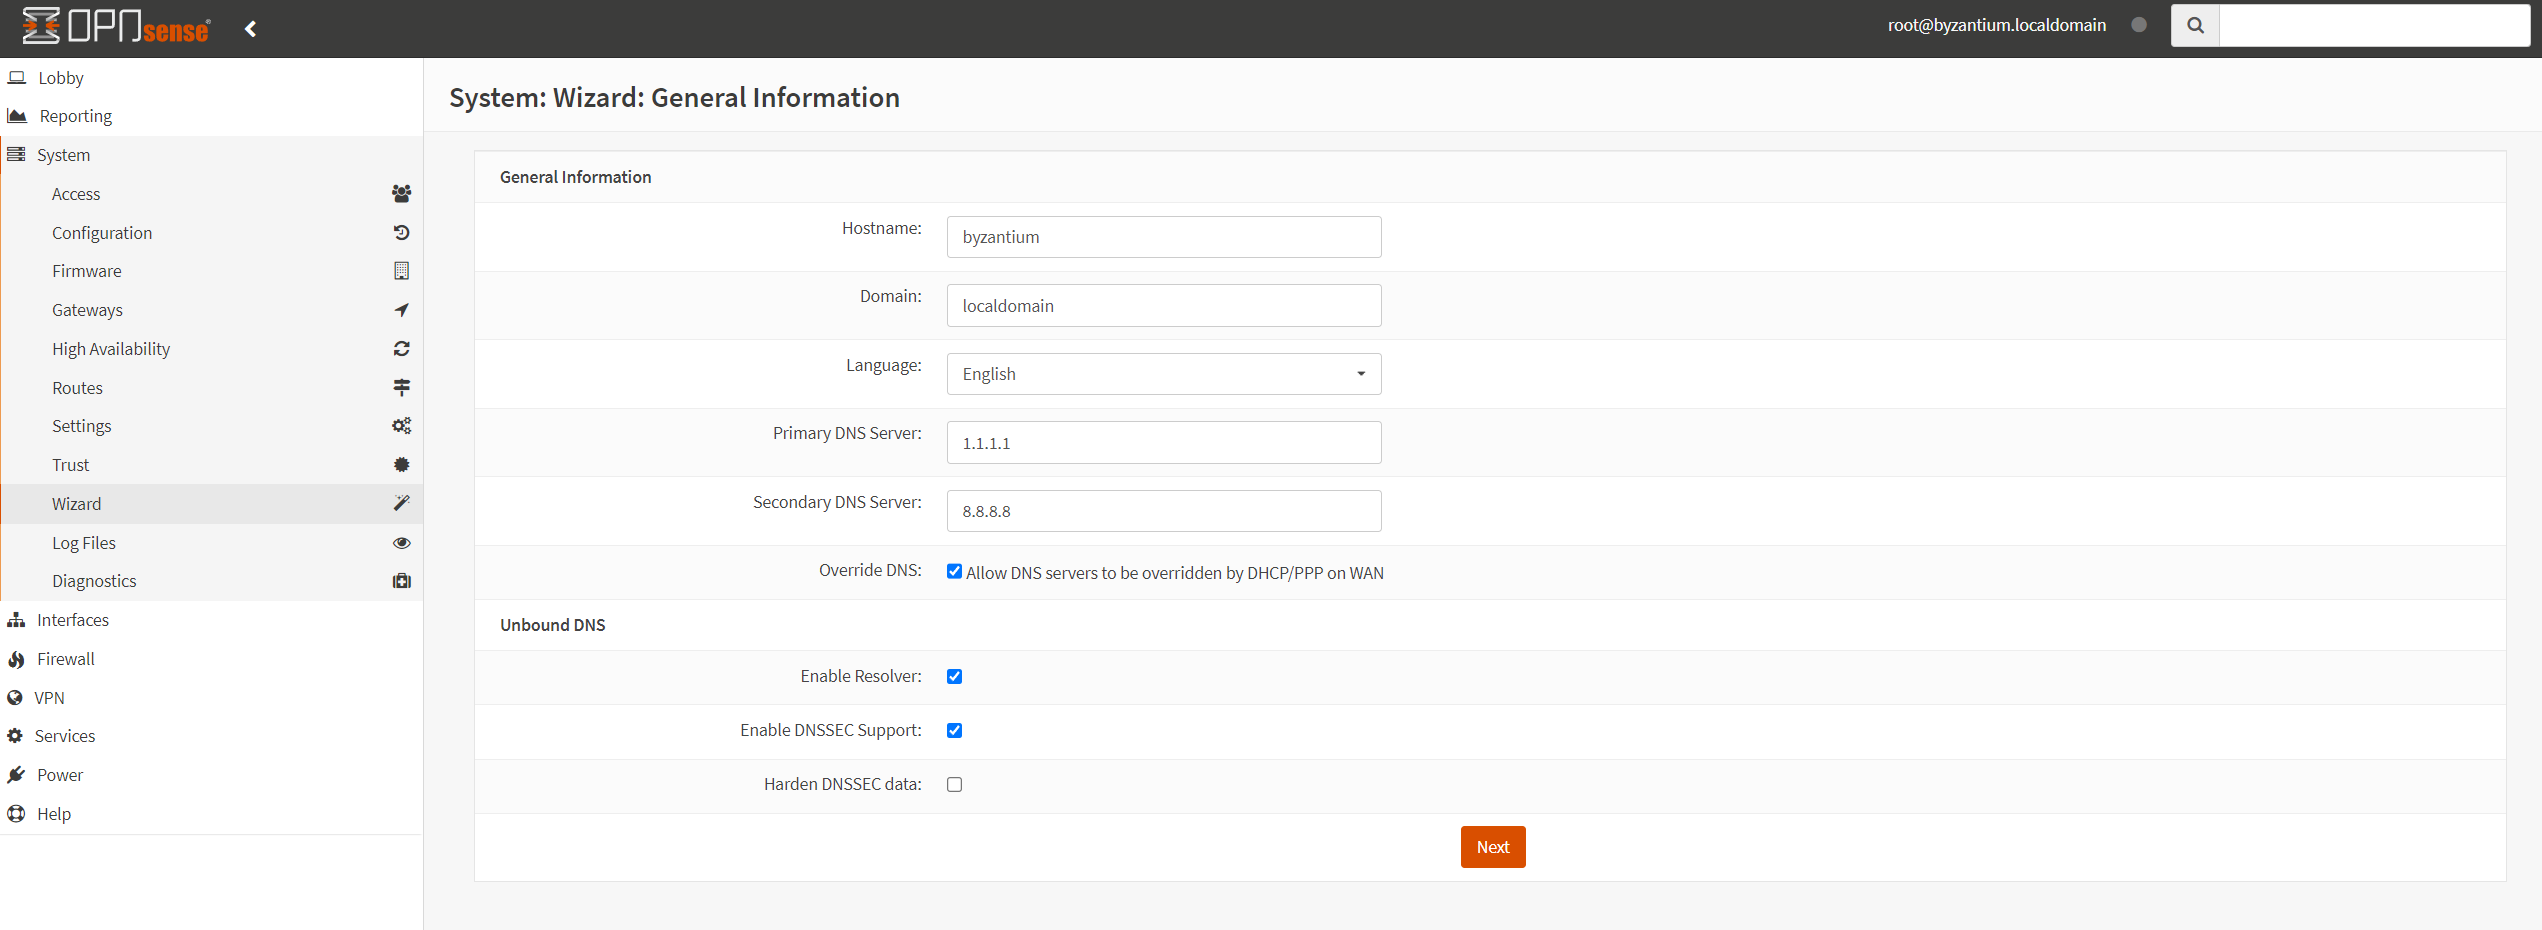
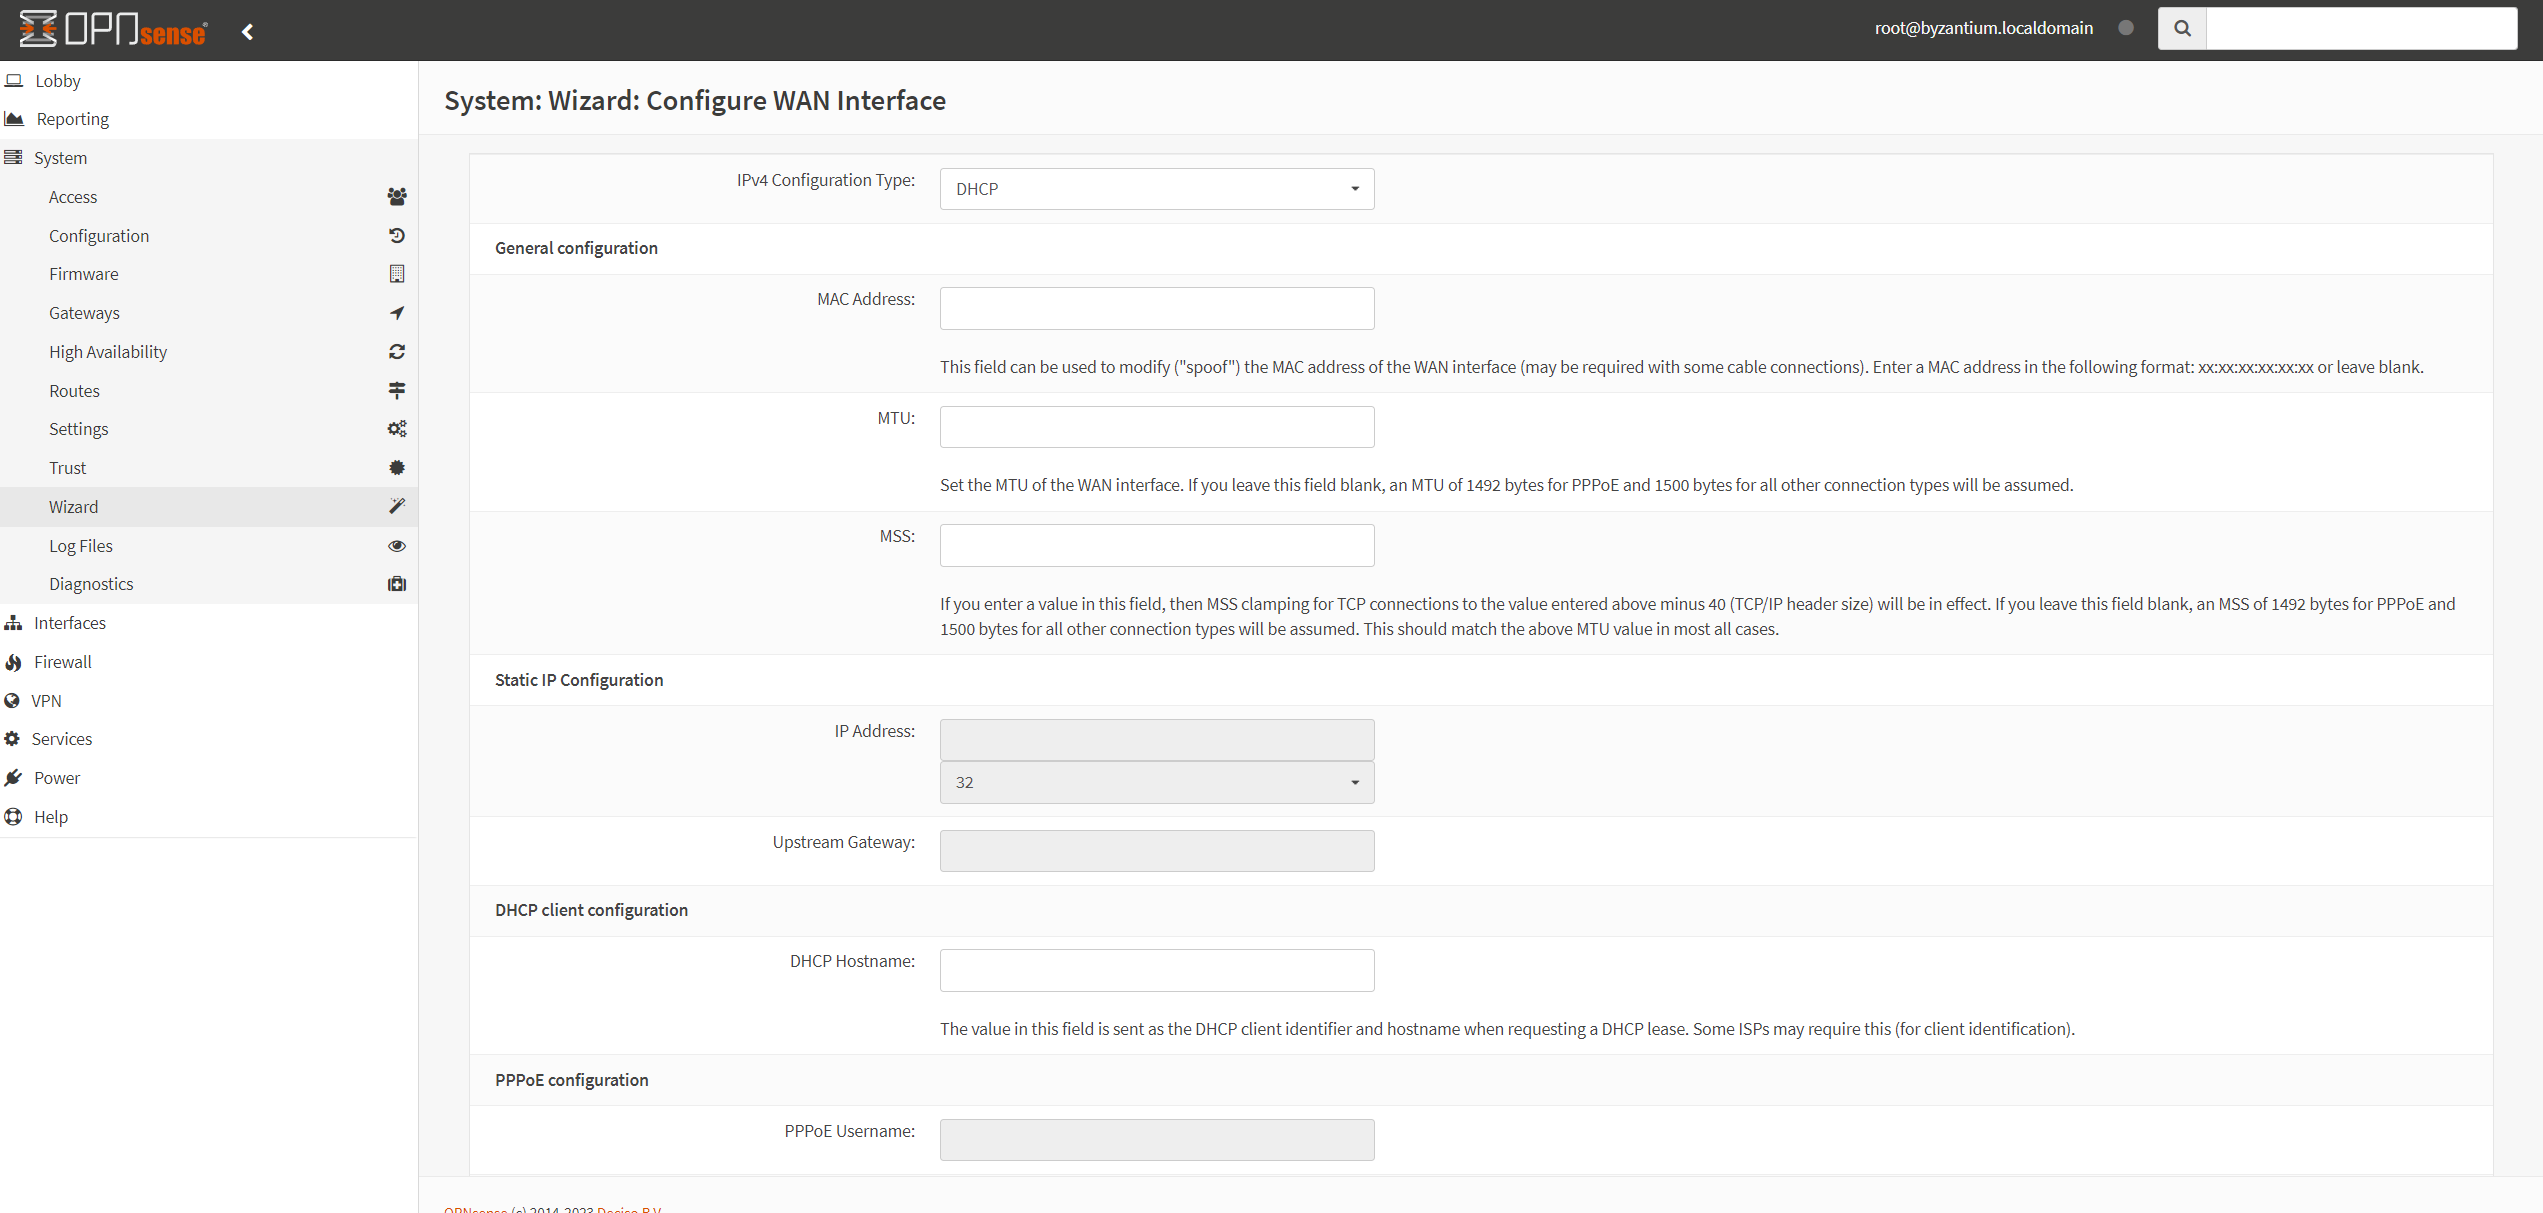
Let's look at the options we need to select during the Setup Wizard.

You can use whichever DNS servers you want. Cloudflare and Google are just quick and easy ones.
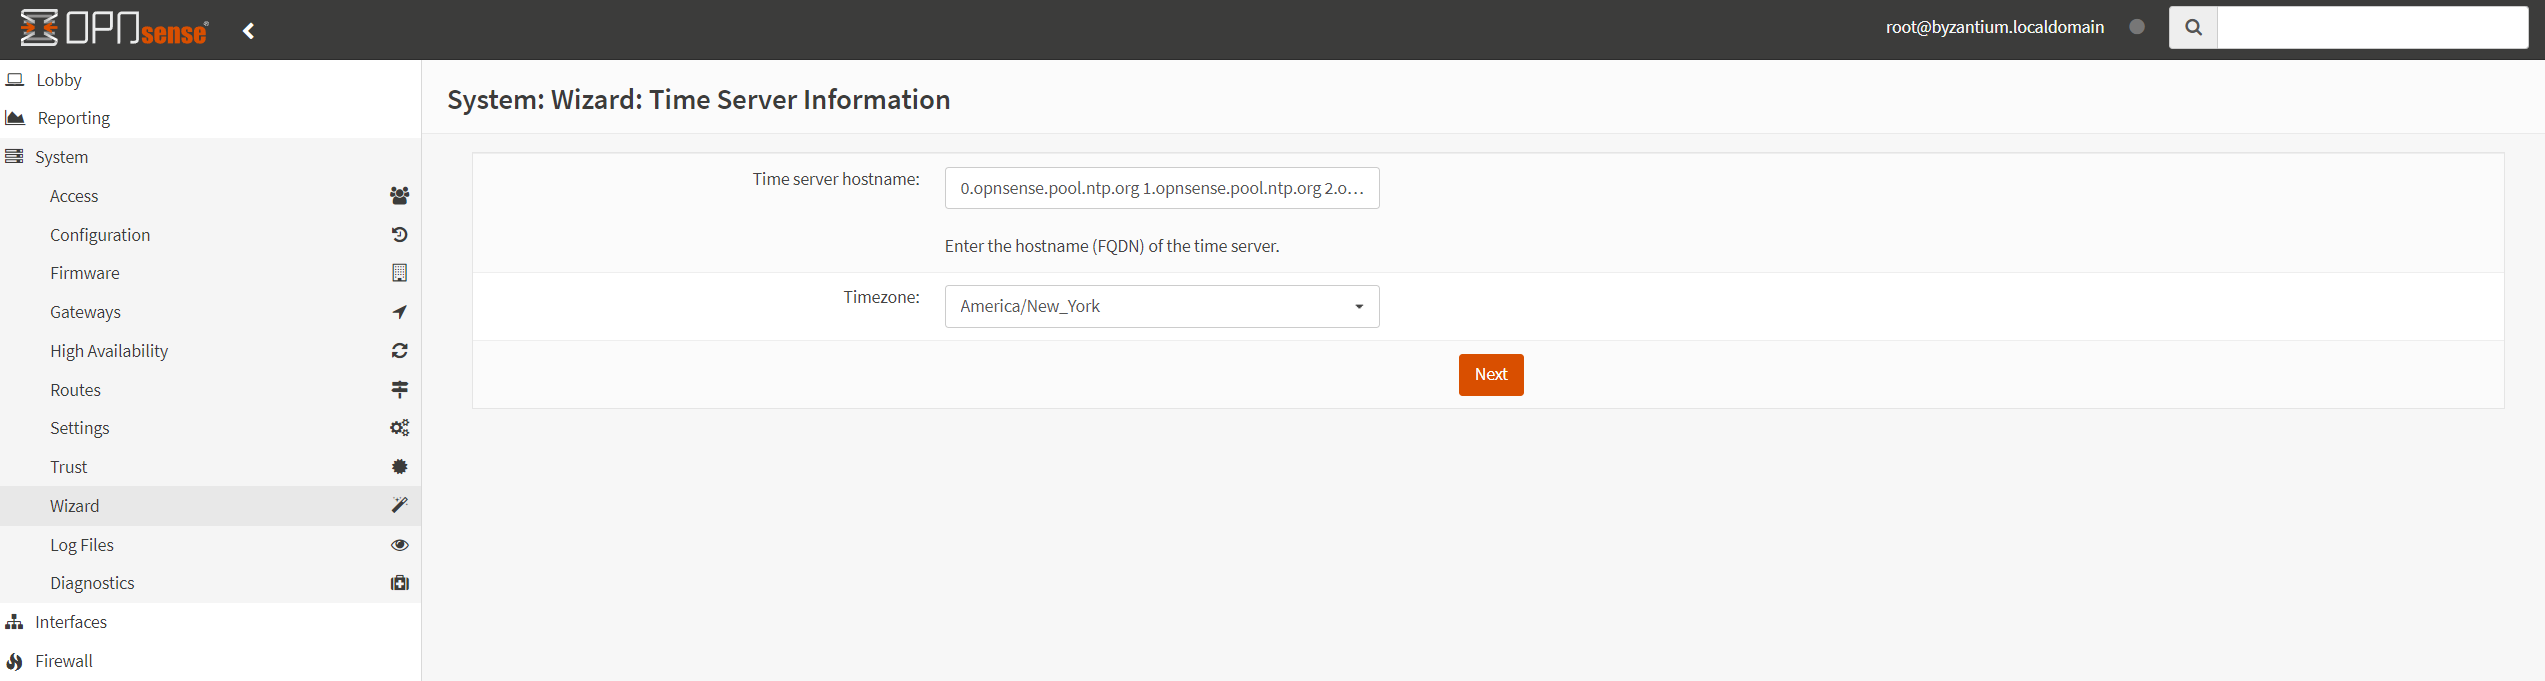
Set the timezone relevant to you.
Set what you want your LAN IP range to be. I did a 192 range.

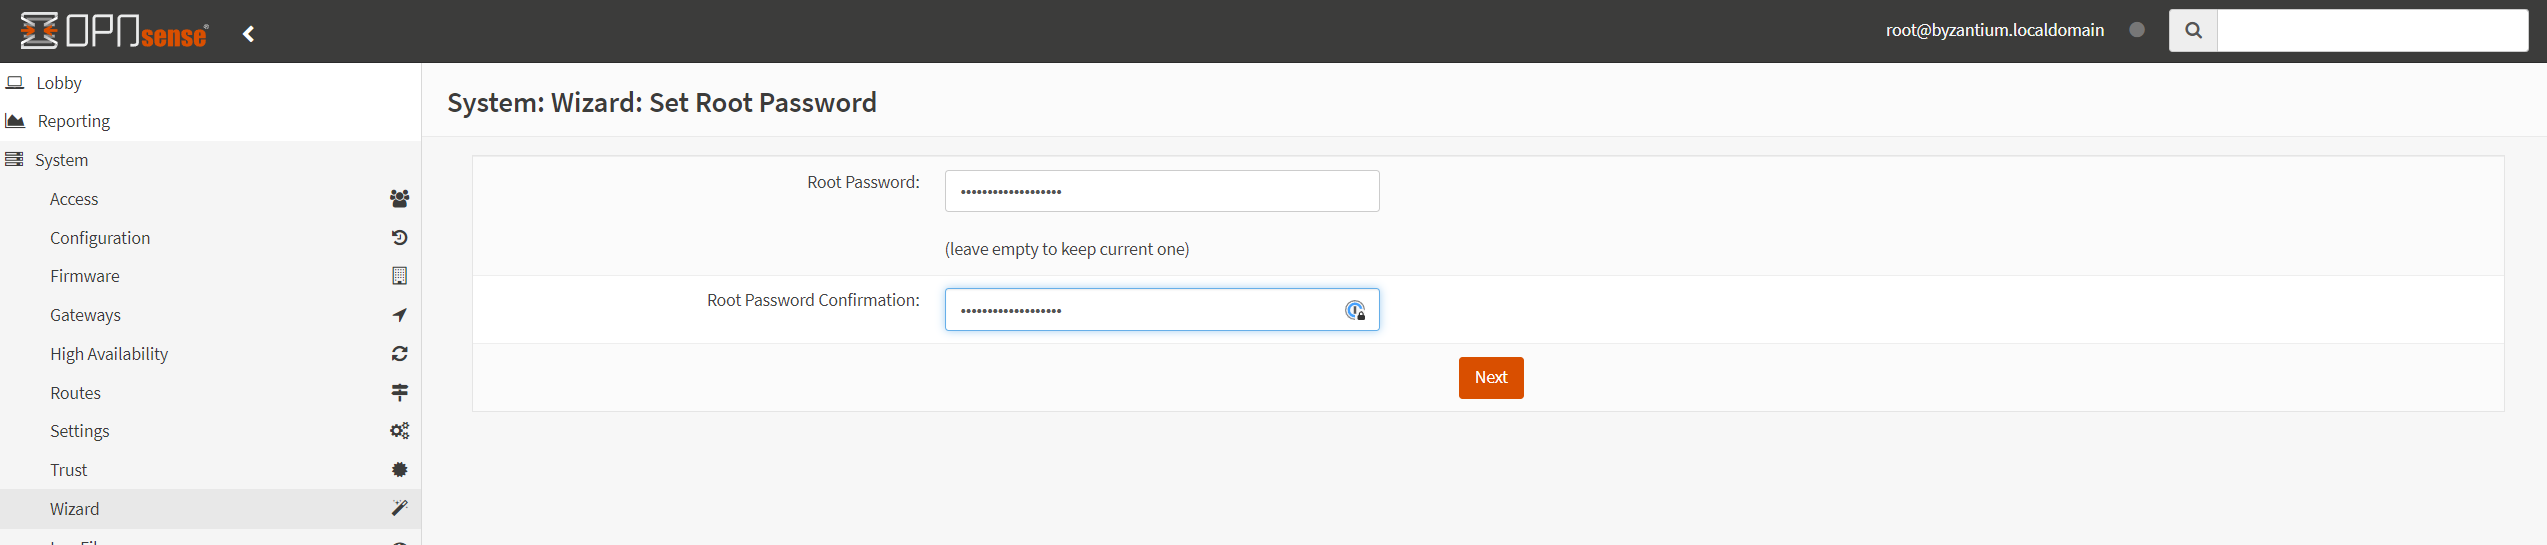
Set a root password for the OPNsense GUI login.
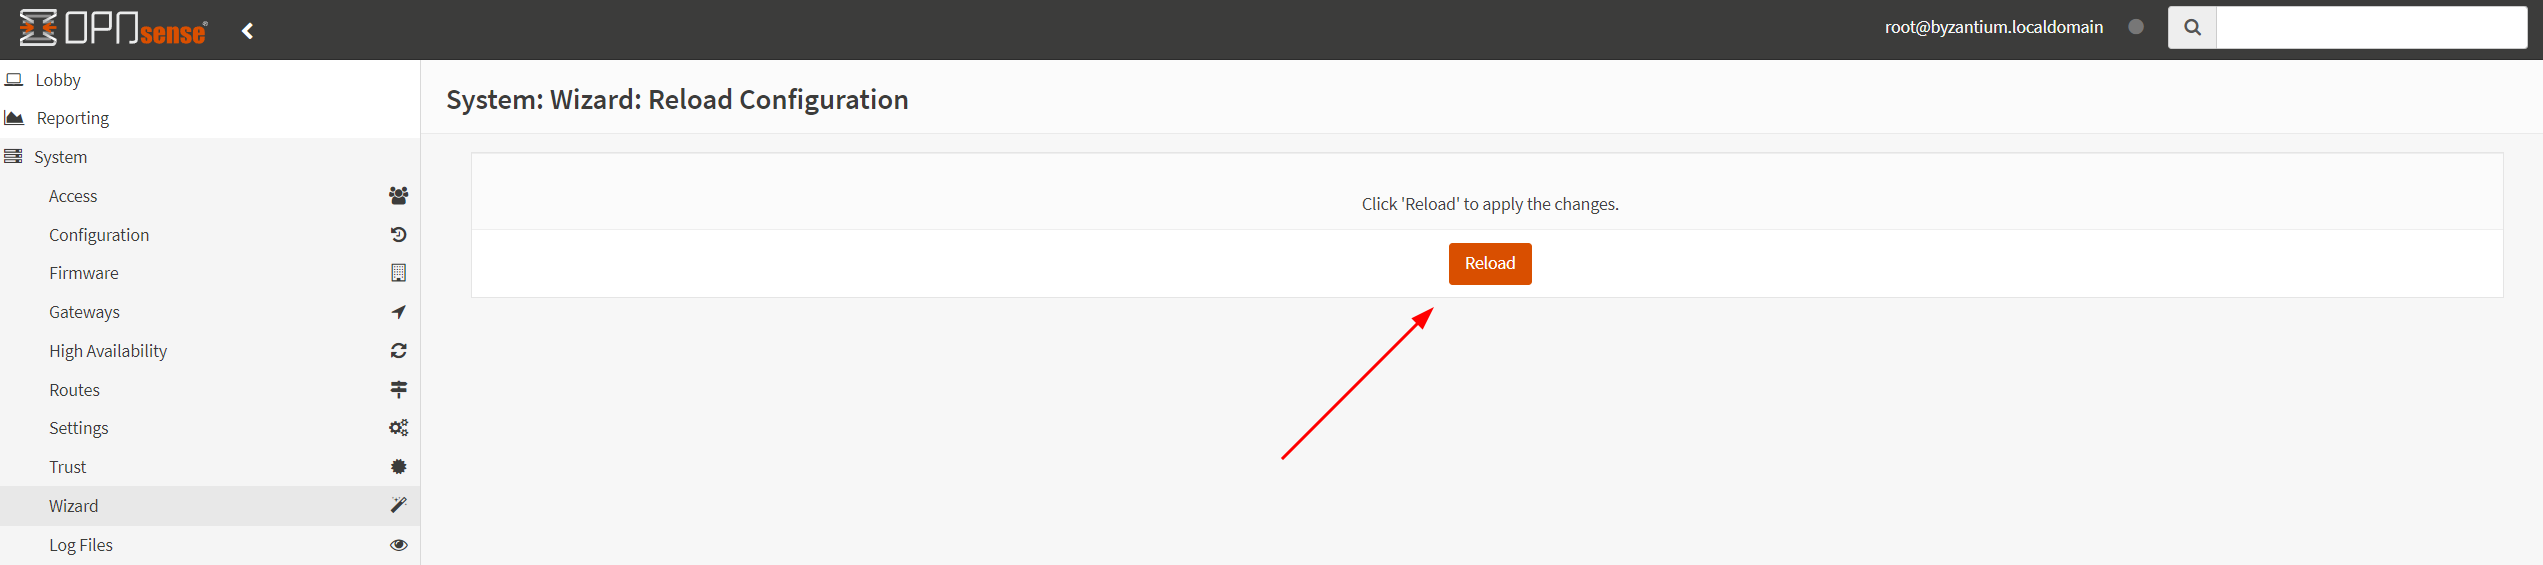
Click Reload.
VLAN Configuration
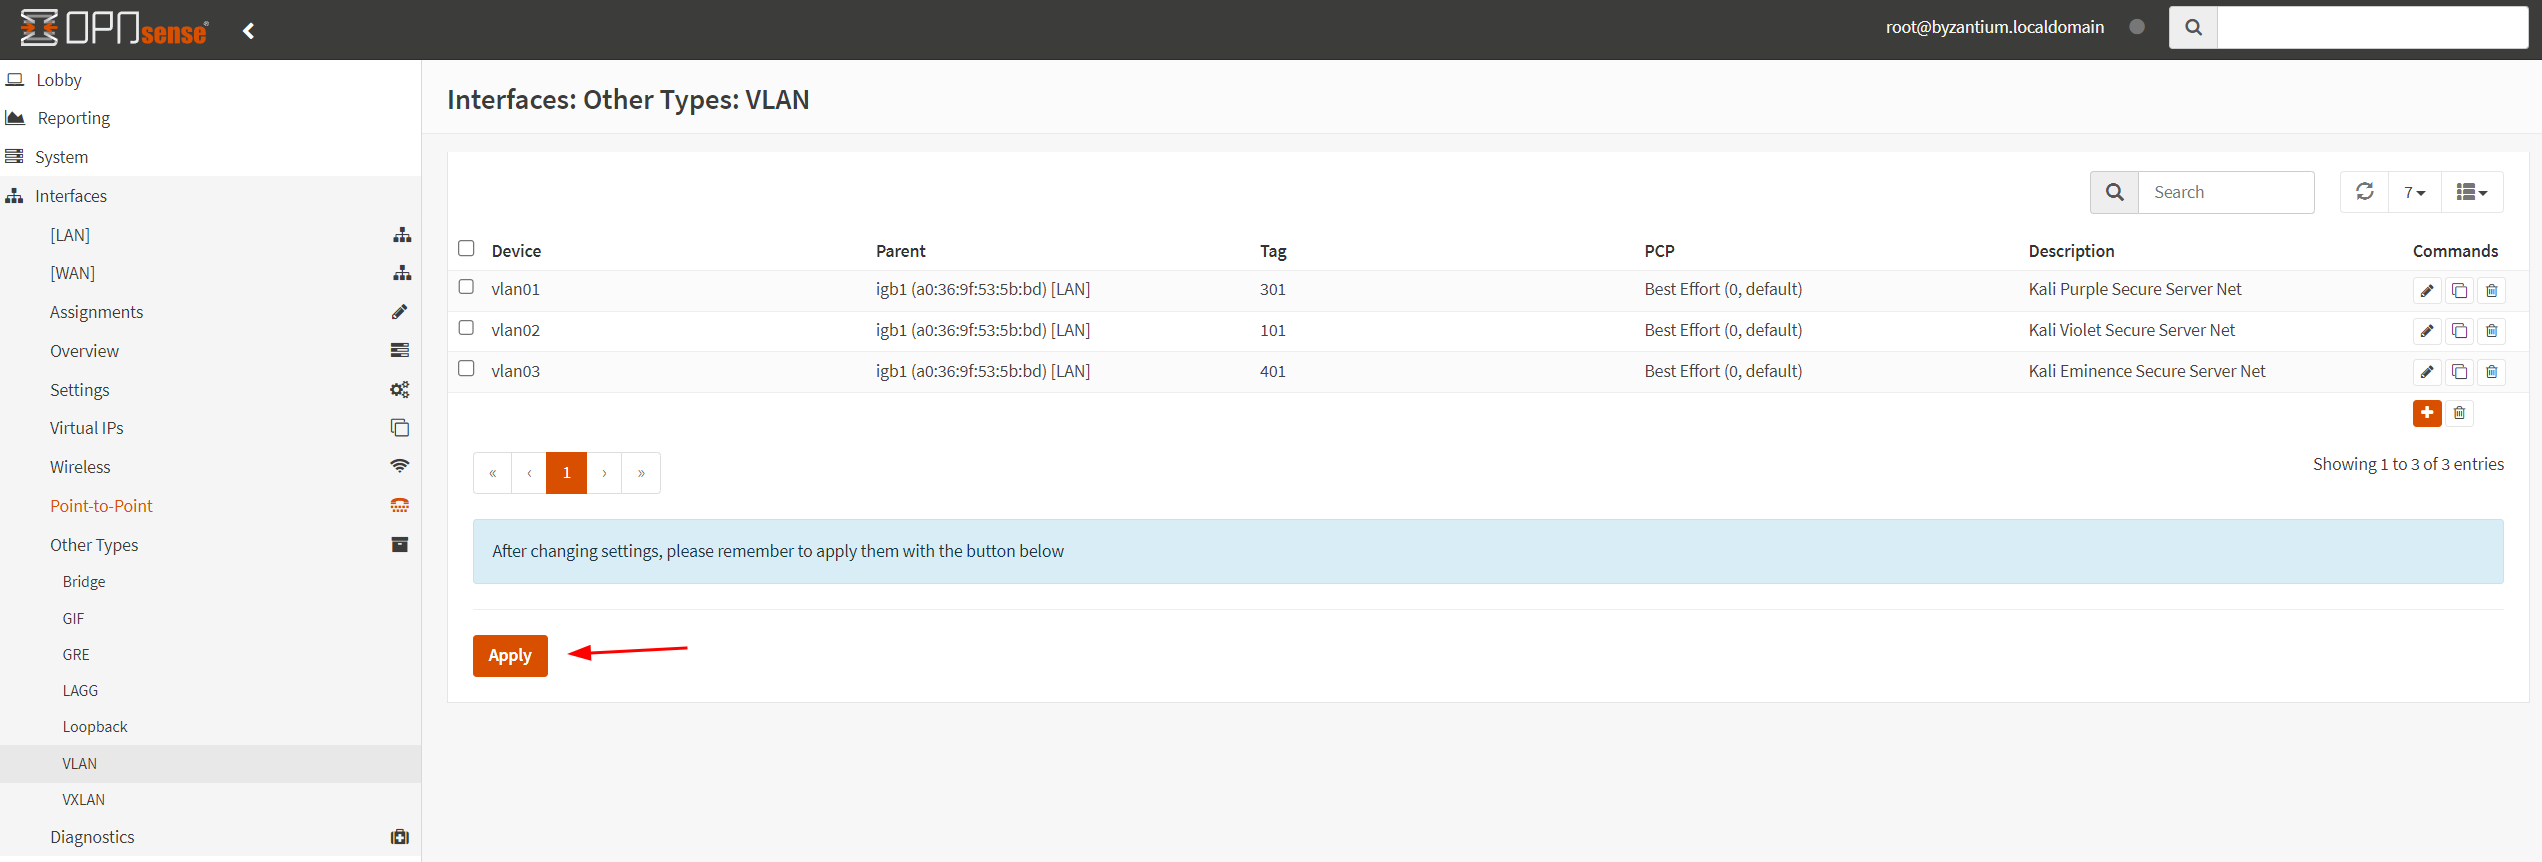
Go to Interfaces > Other Types > VLAN then +
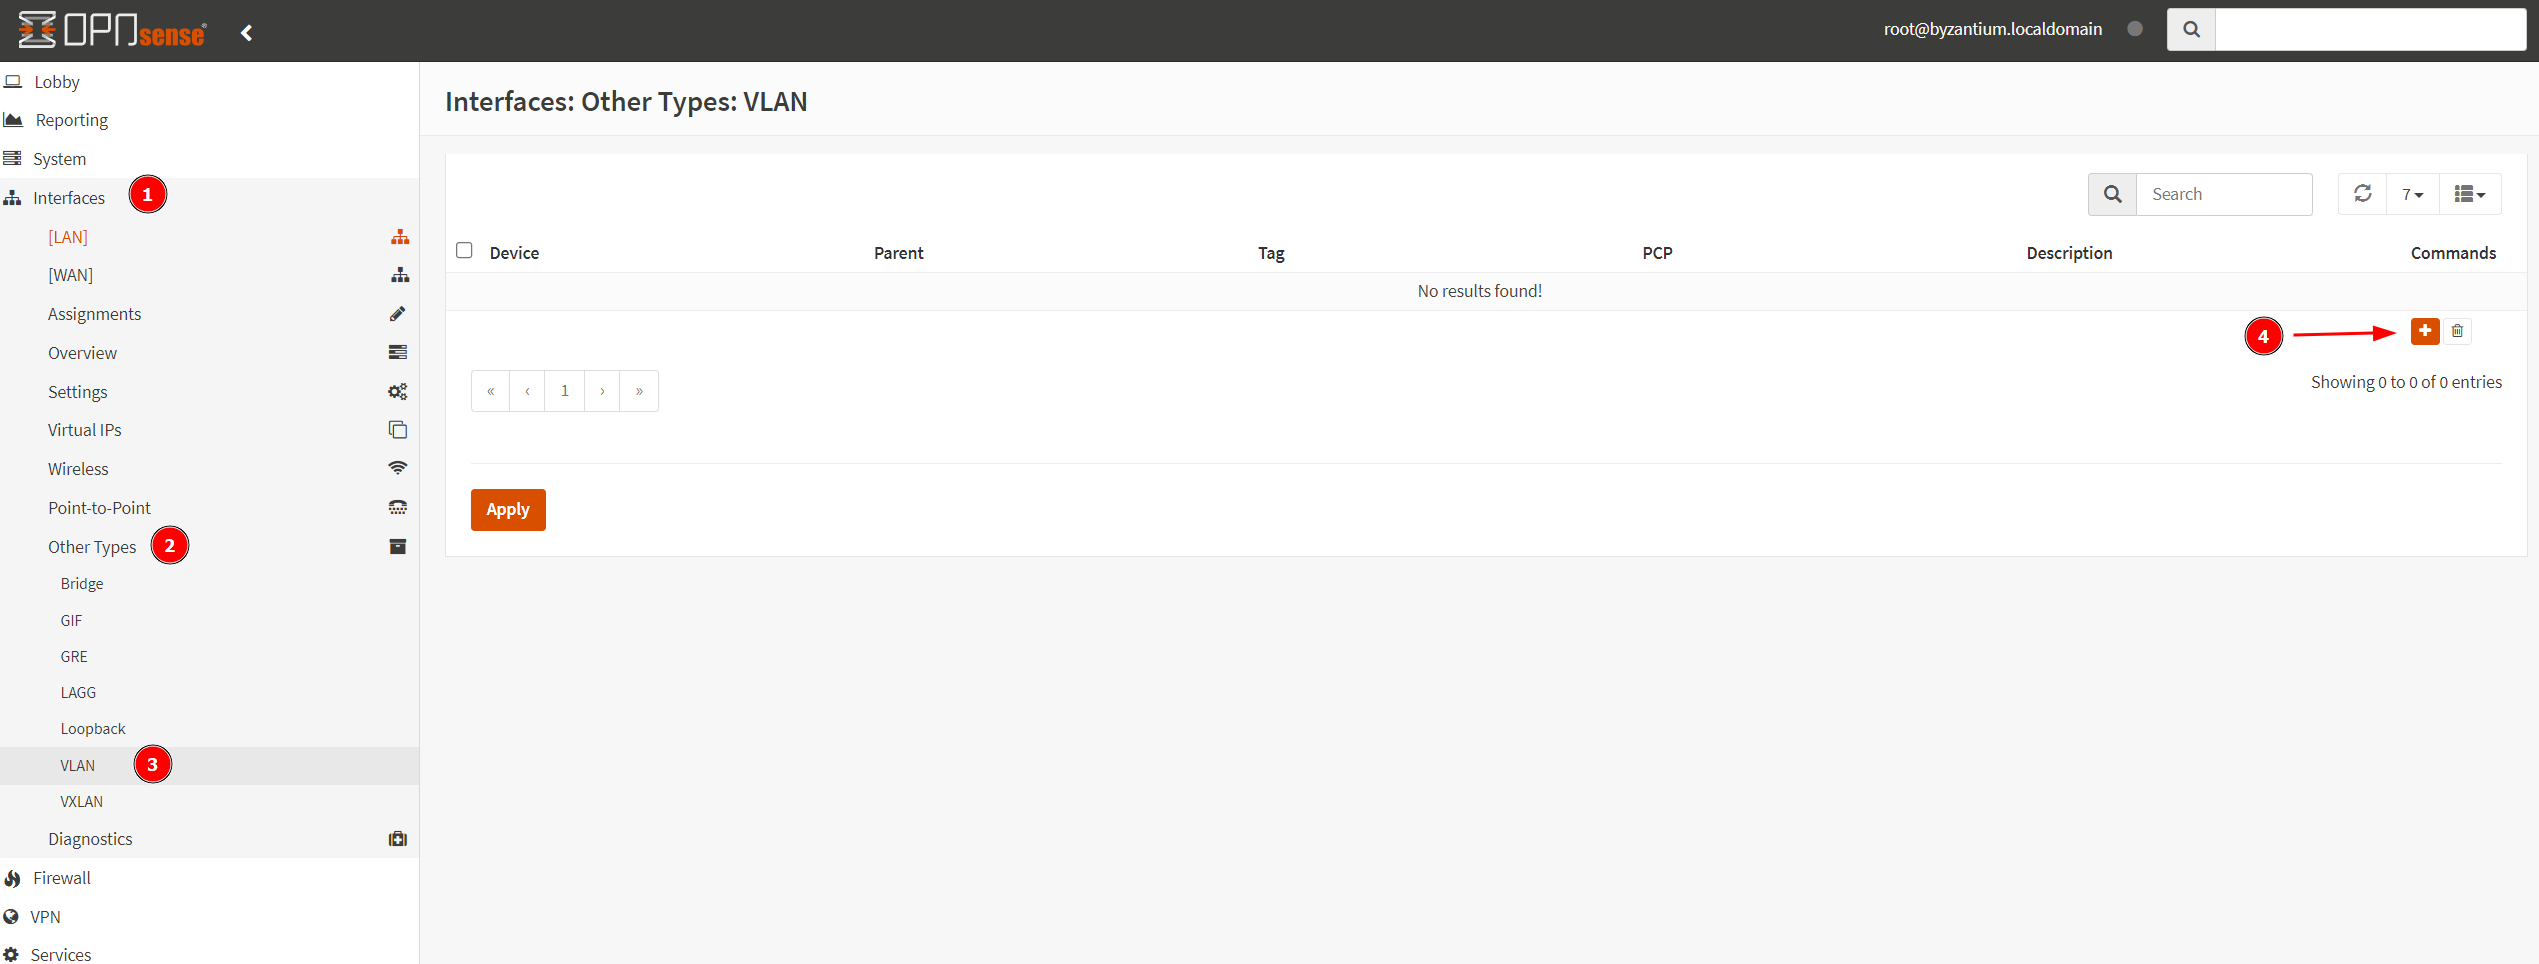
Let's add the first VLAN here, as seen below.
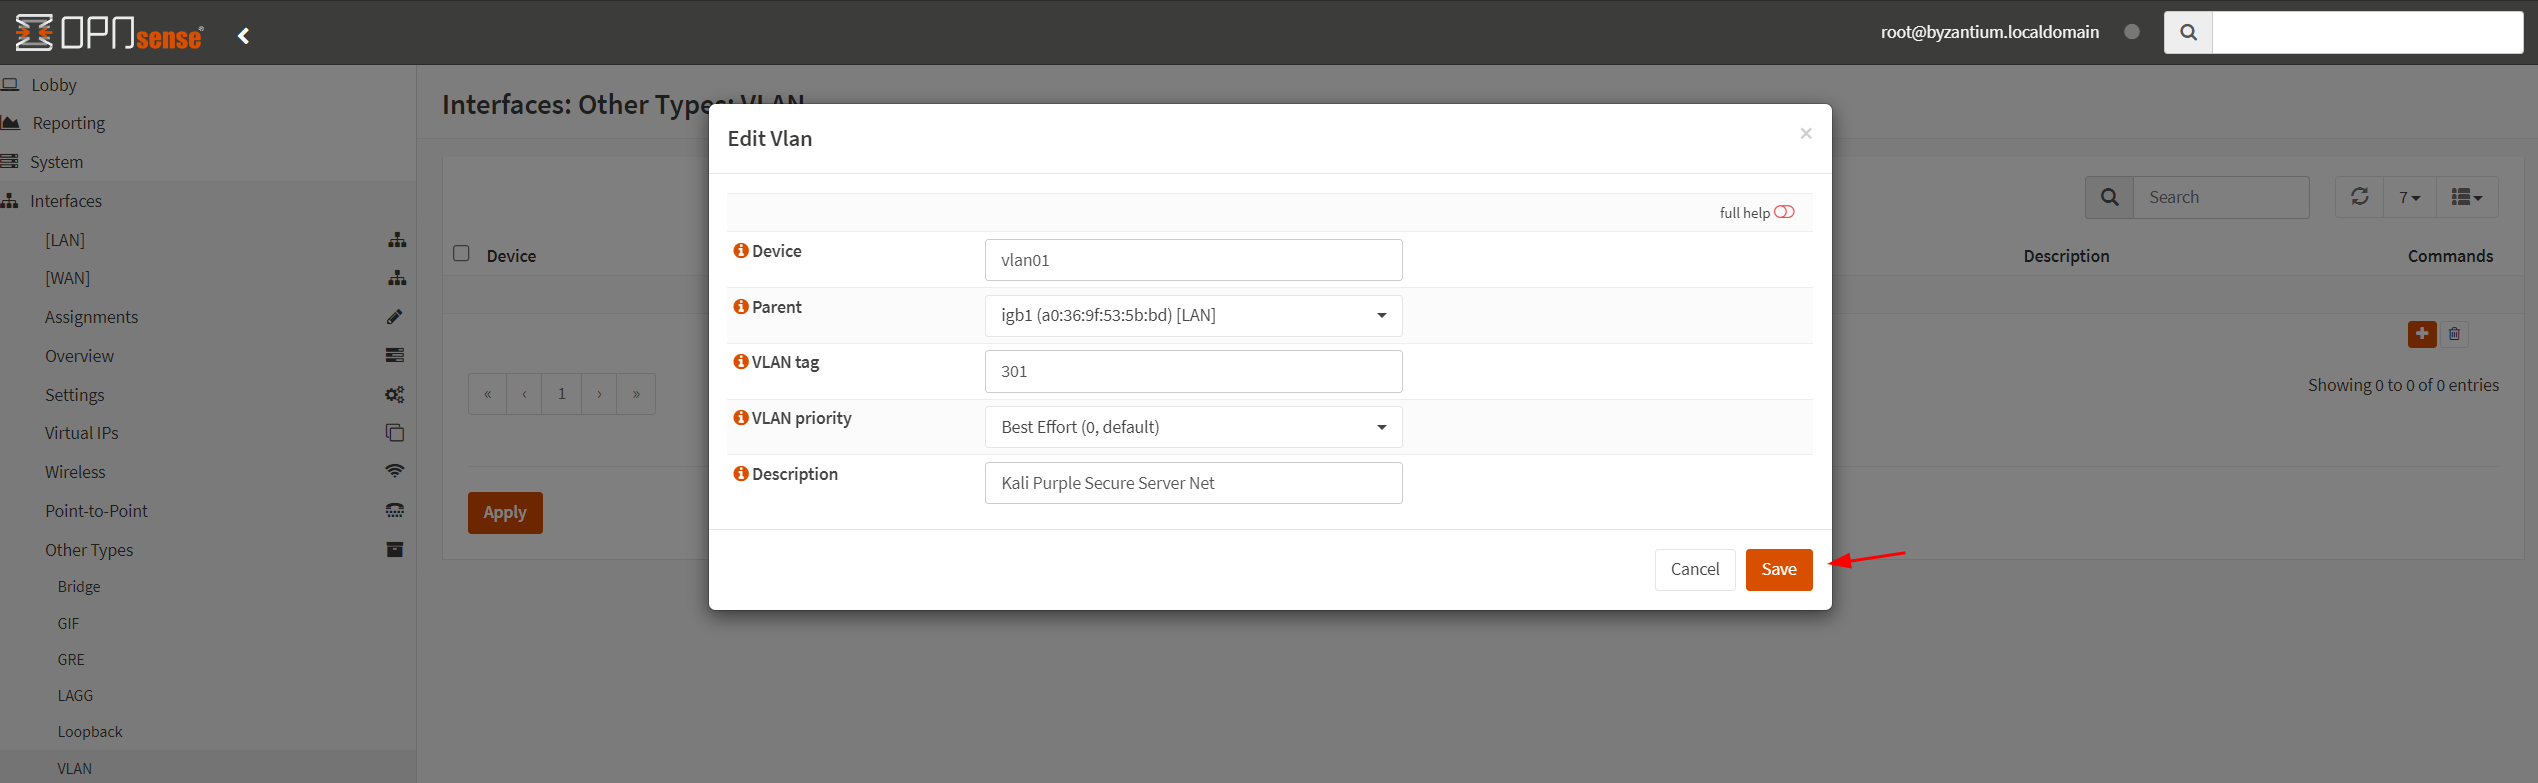
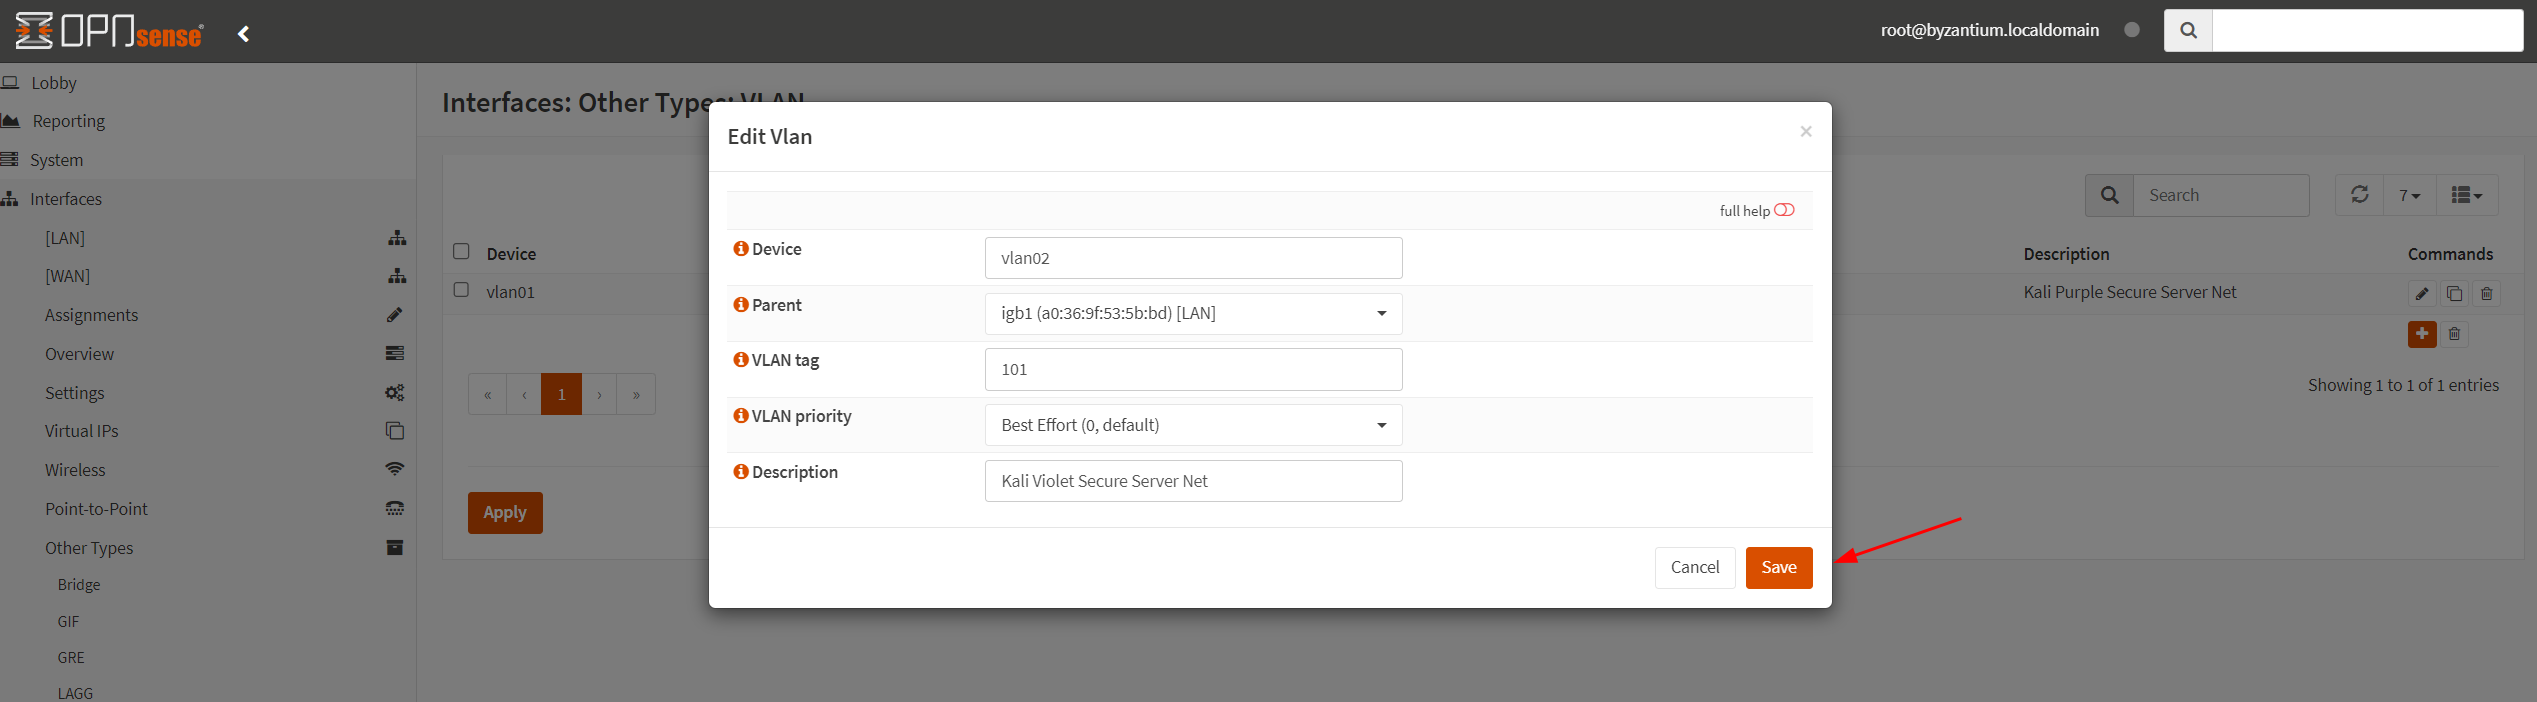
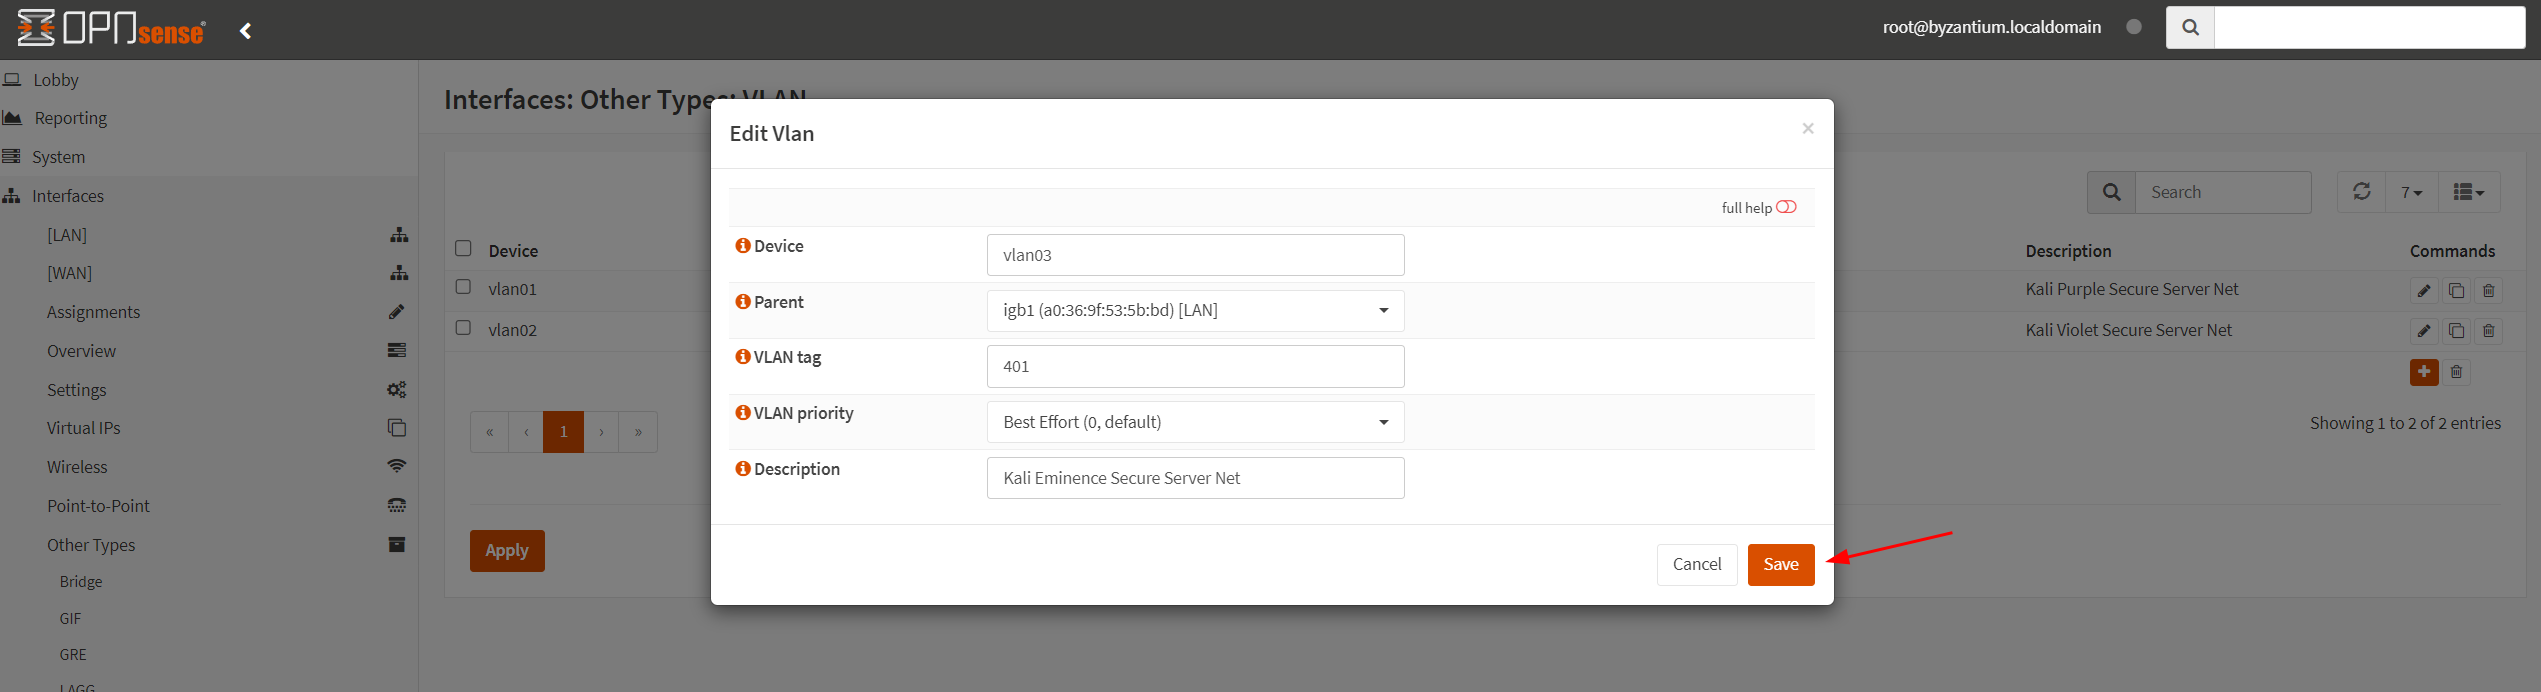
Click Apply after all VLANs are created.
Add Interfaces
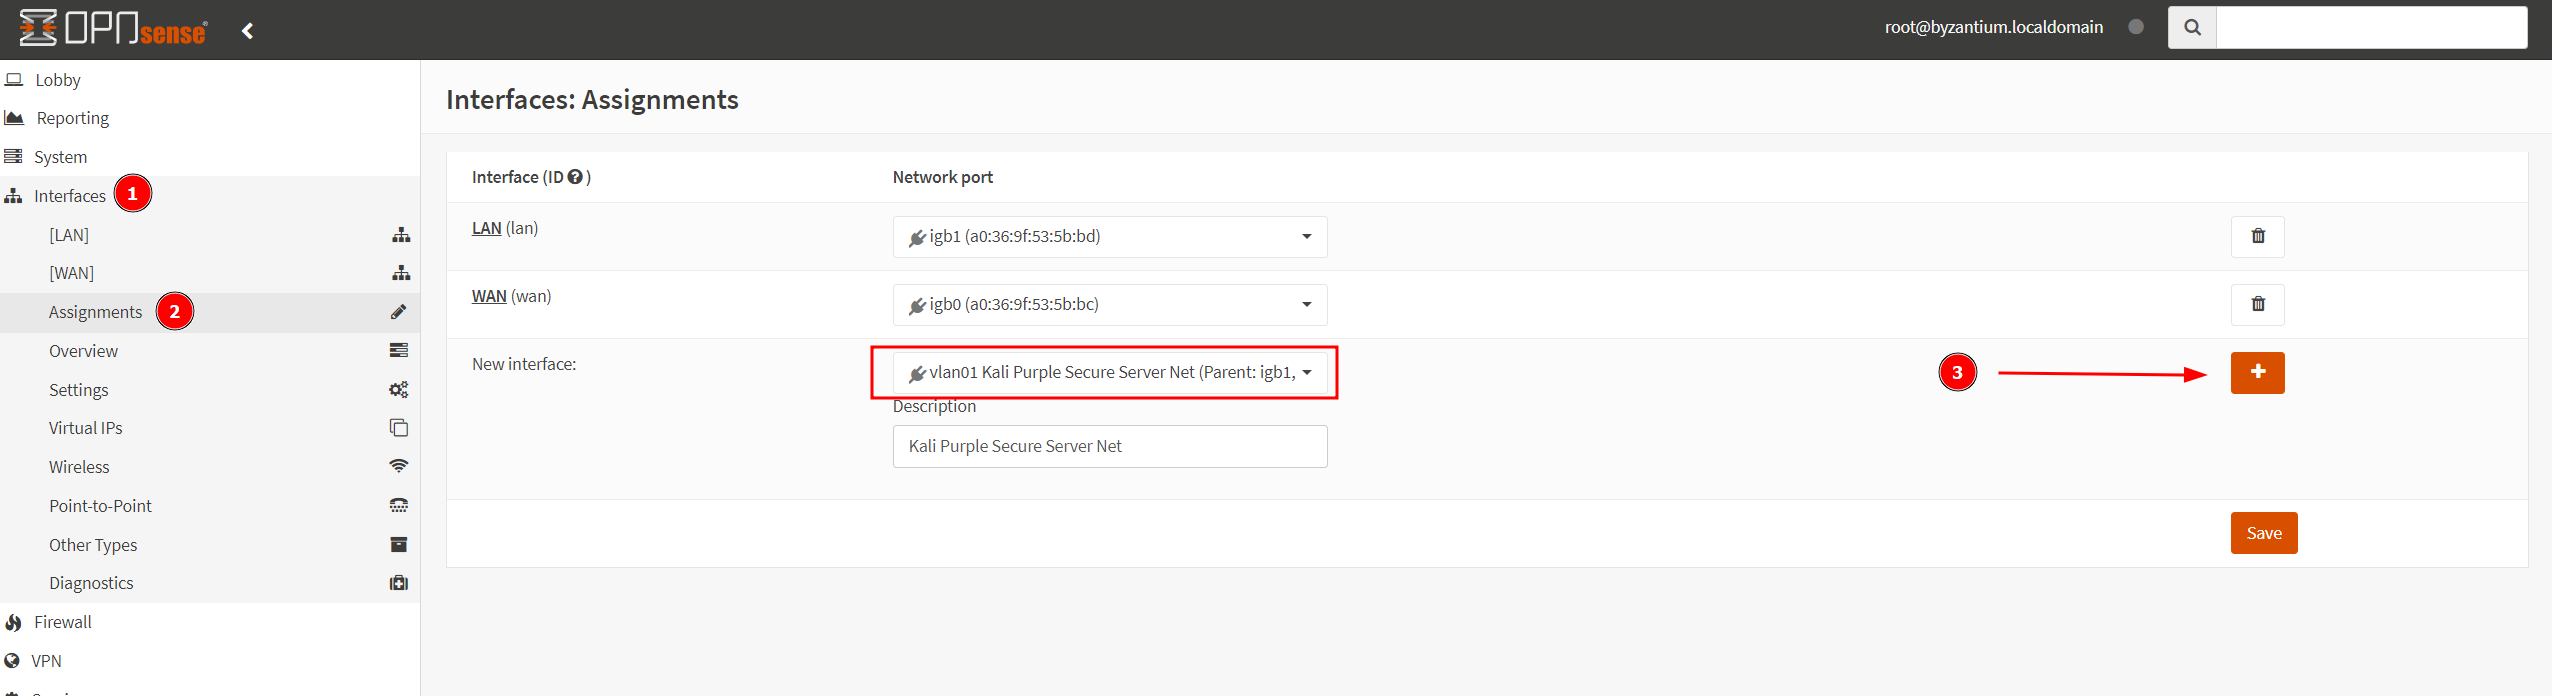
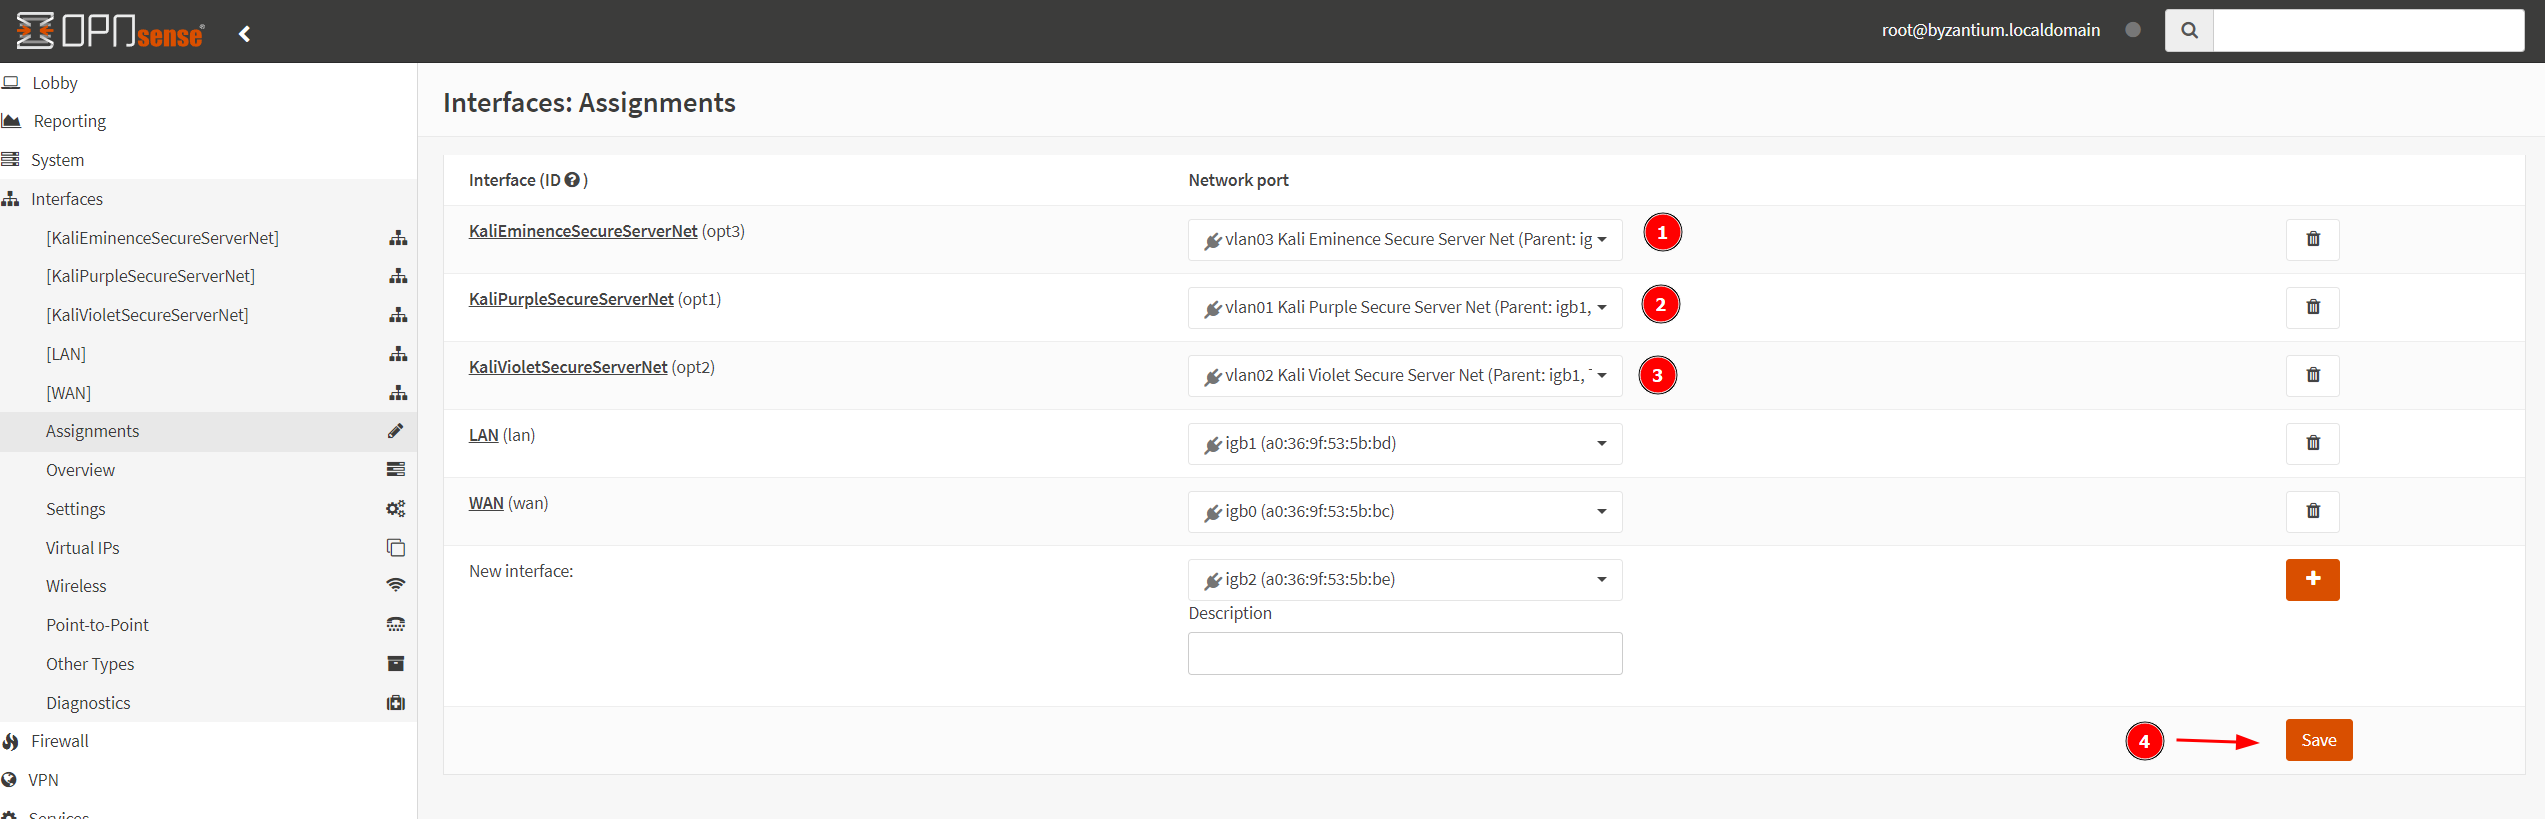
Click Interfaces > Assignments then +
Add the Purple, Violet and Eminence interfaces, then click Save.
Edit Interfaces
I decided to use a different network range than the one in the official documentation. The ranges are as follows:
The IP address 192.168.253.1/30 represents a subnet with 4 addresses, which are:

Network address: 192.168.253.0
First usable address: 192.168.253.1
Second usable address: 192.168.253.2
Broadcast address: 192.168.253.3
The IP address 192.168.253.4/30 represents a subnet with 4 addresses, which are:
Network address: 192.168.253.4
First usable address: 192.168.253.5
Second usable address: 192.168.253.6
Broadcast address: 192.168.253.7The IP address 192.168.253.8/30 represents a subnet with 4 addresses, which are:
Network address: 192.168.253.8
First usable address: 192.168.253.9
Second usable address: 192.168.253.10
Broadcast address: 192.168.253.11Follow the steps in the screenshots below to properly edit the interfaces.
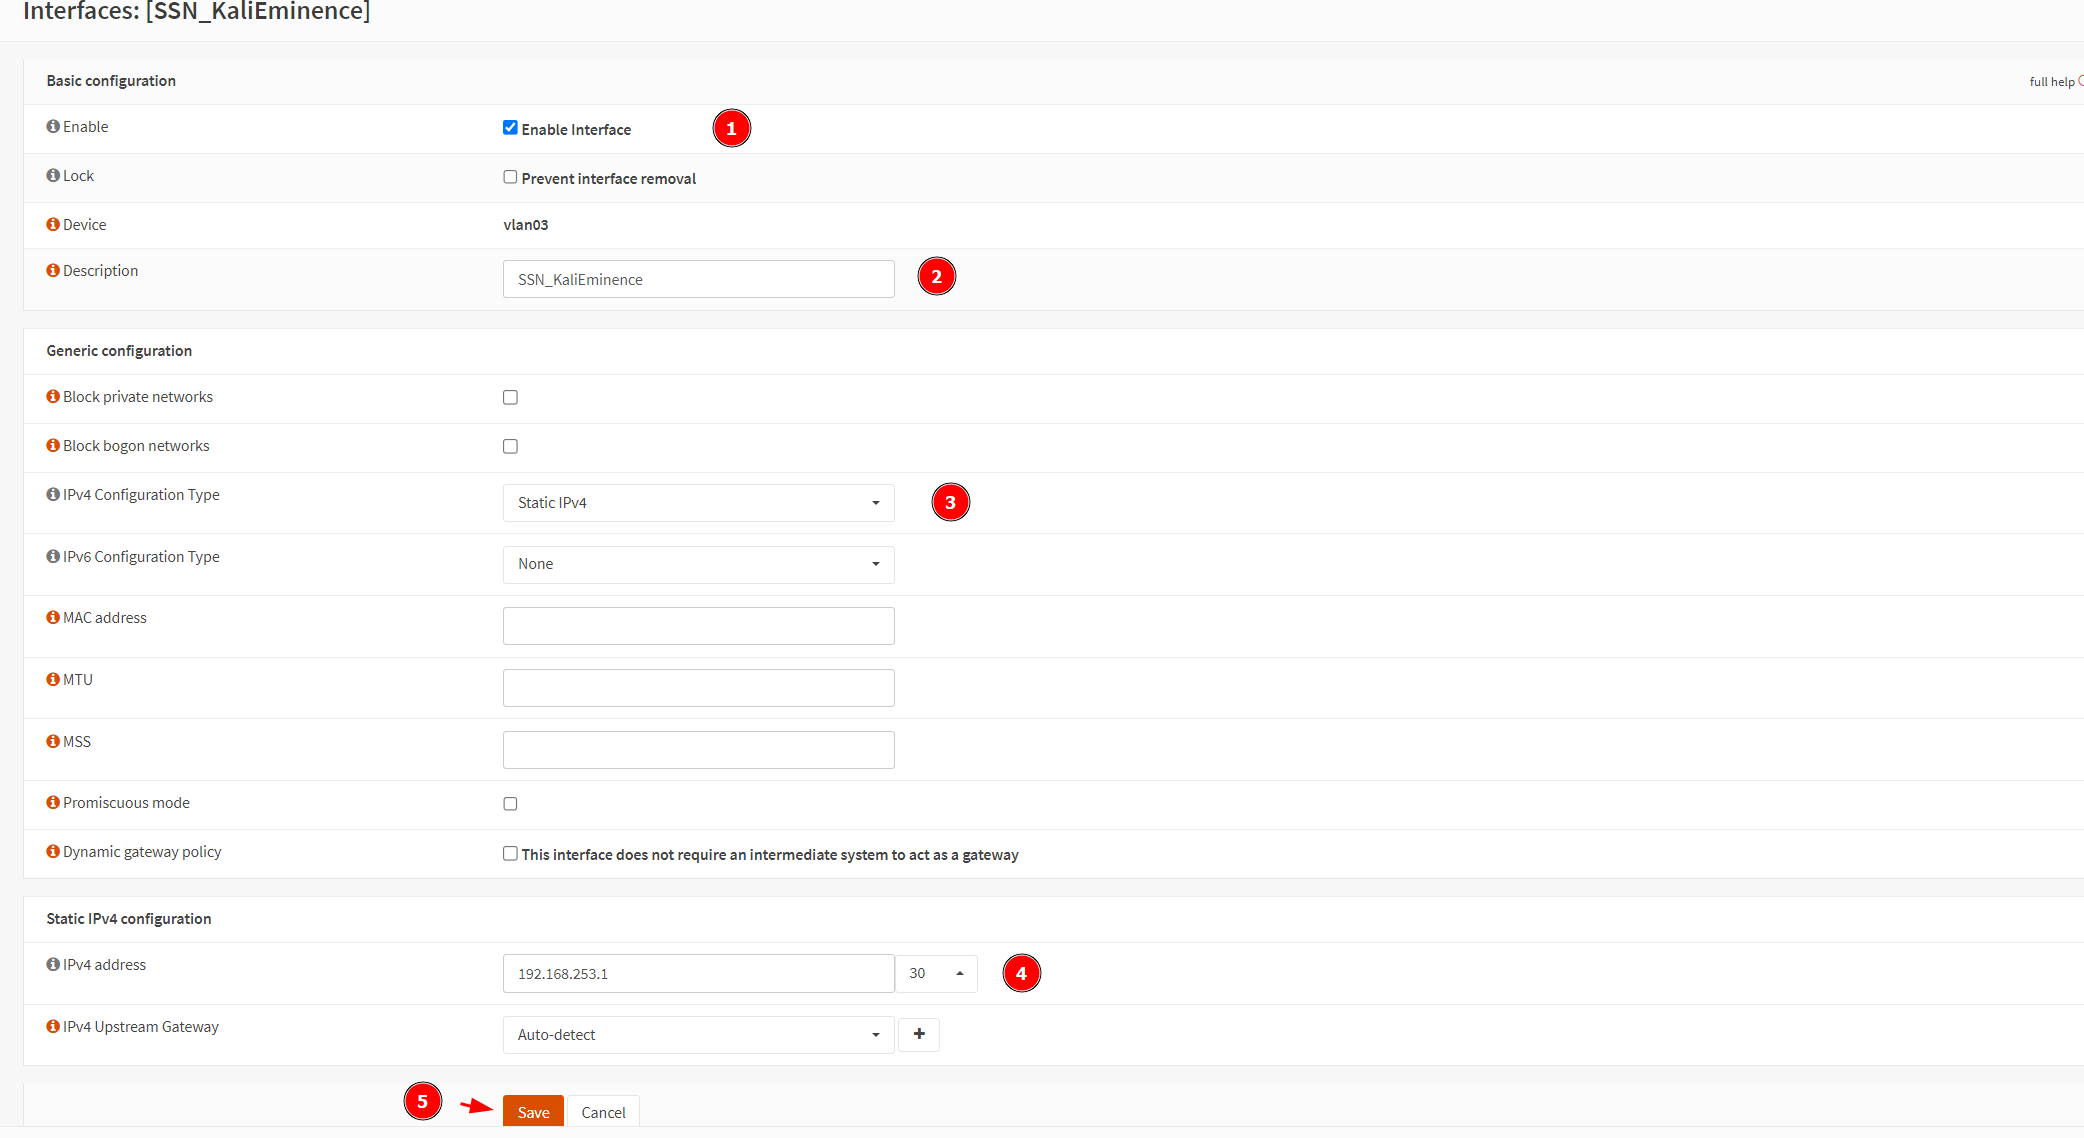

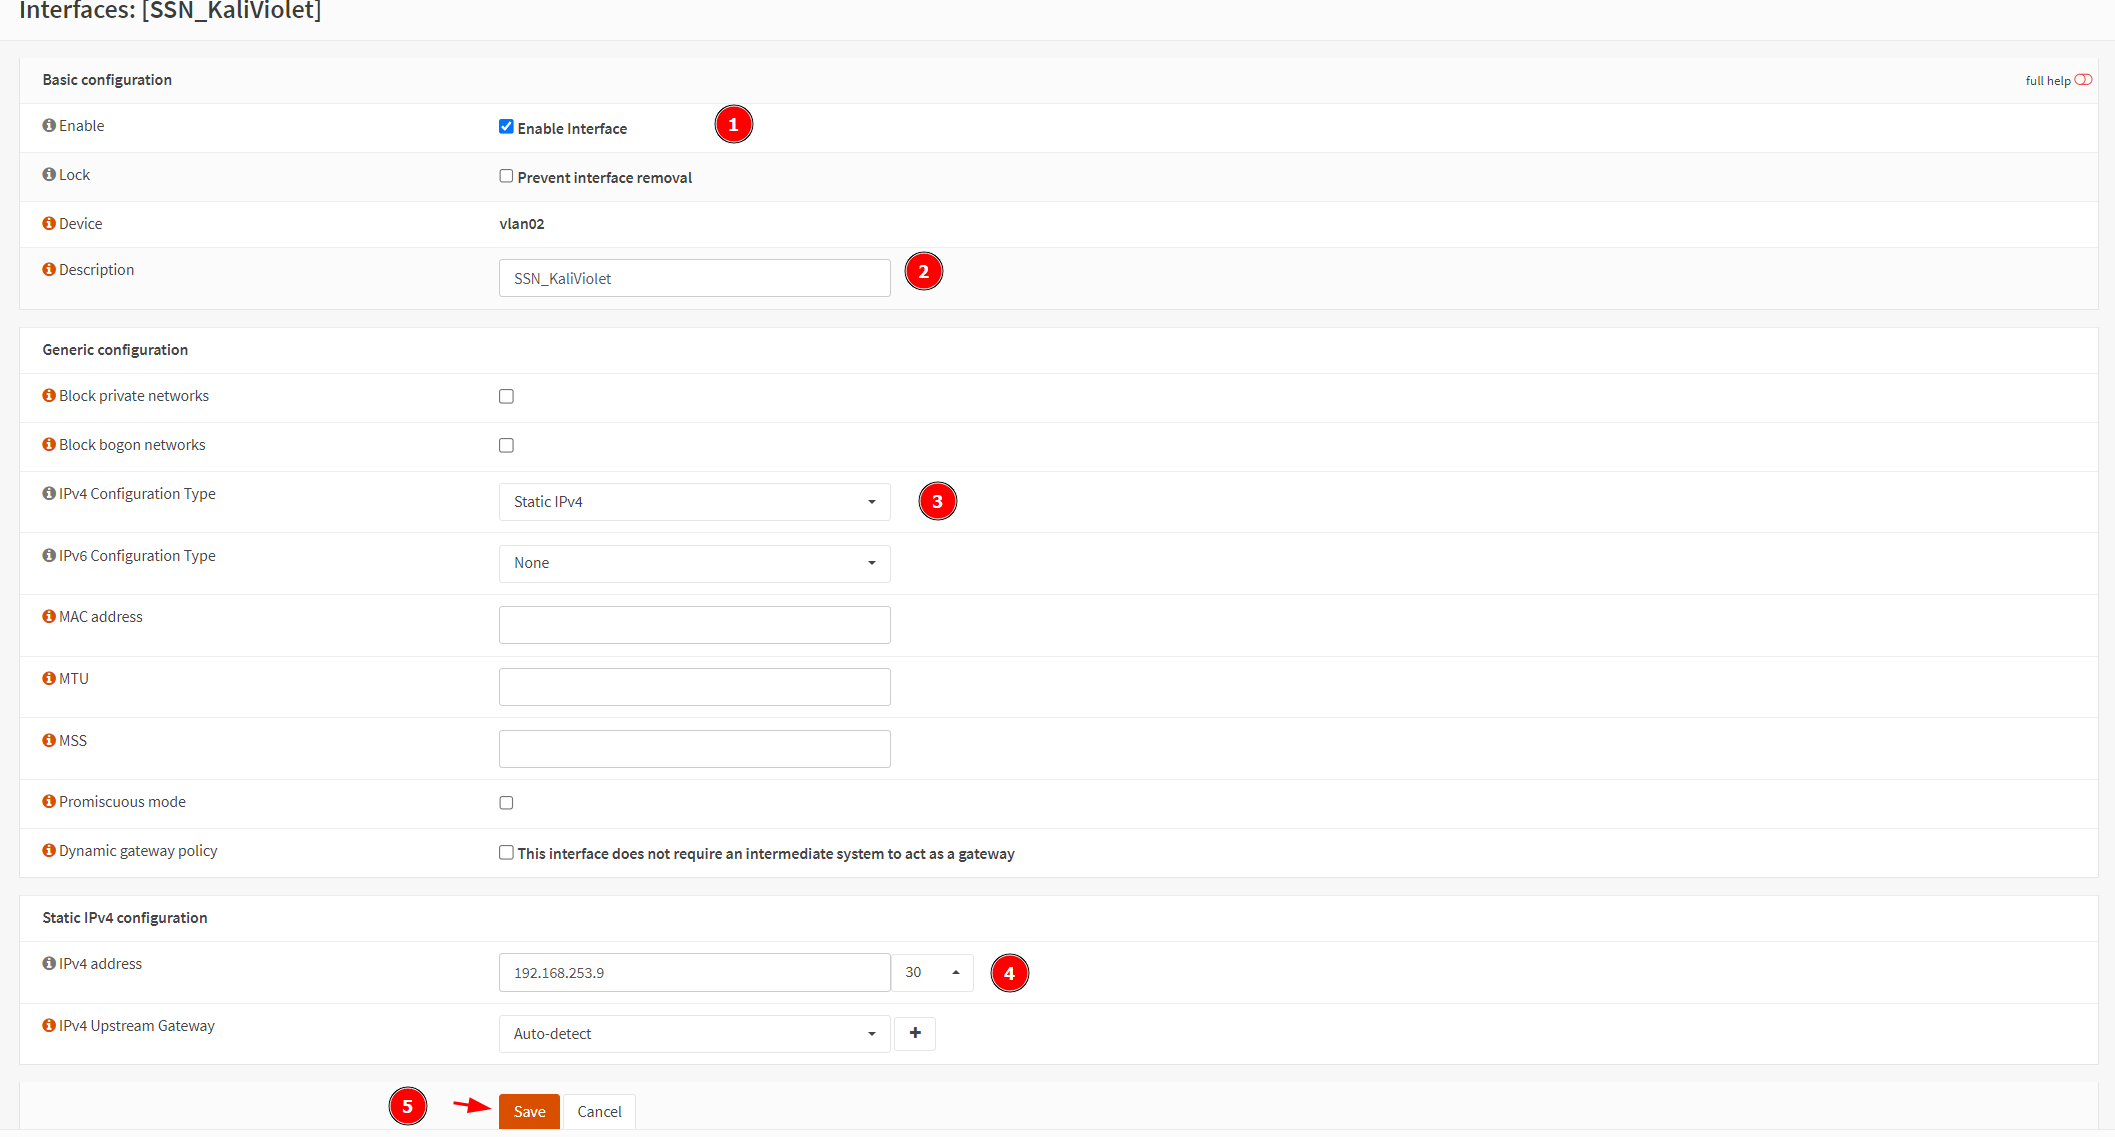
Afterward all this is complete, Apply changes.
Add Aliases
These aliases are added so we can more efficiently organize our firewall rules in the next steps. Go to Firewall > Aliases. Follow the screenshots below to properly add them.
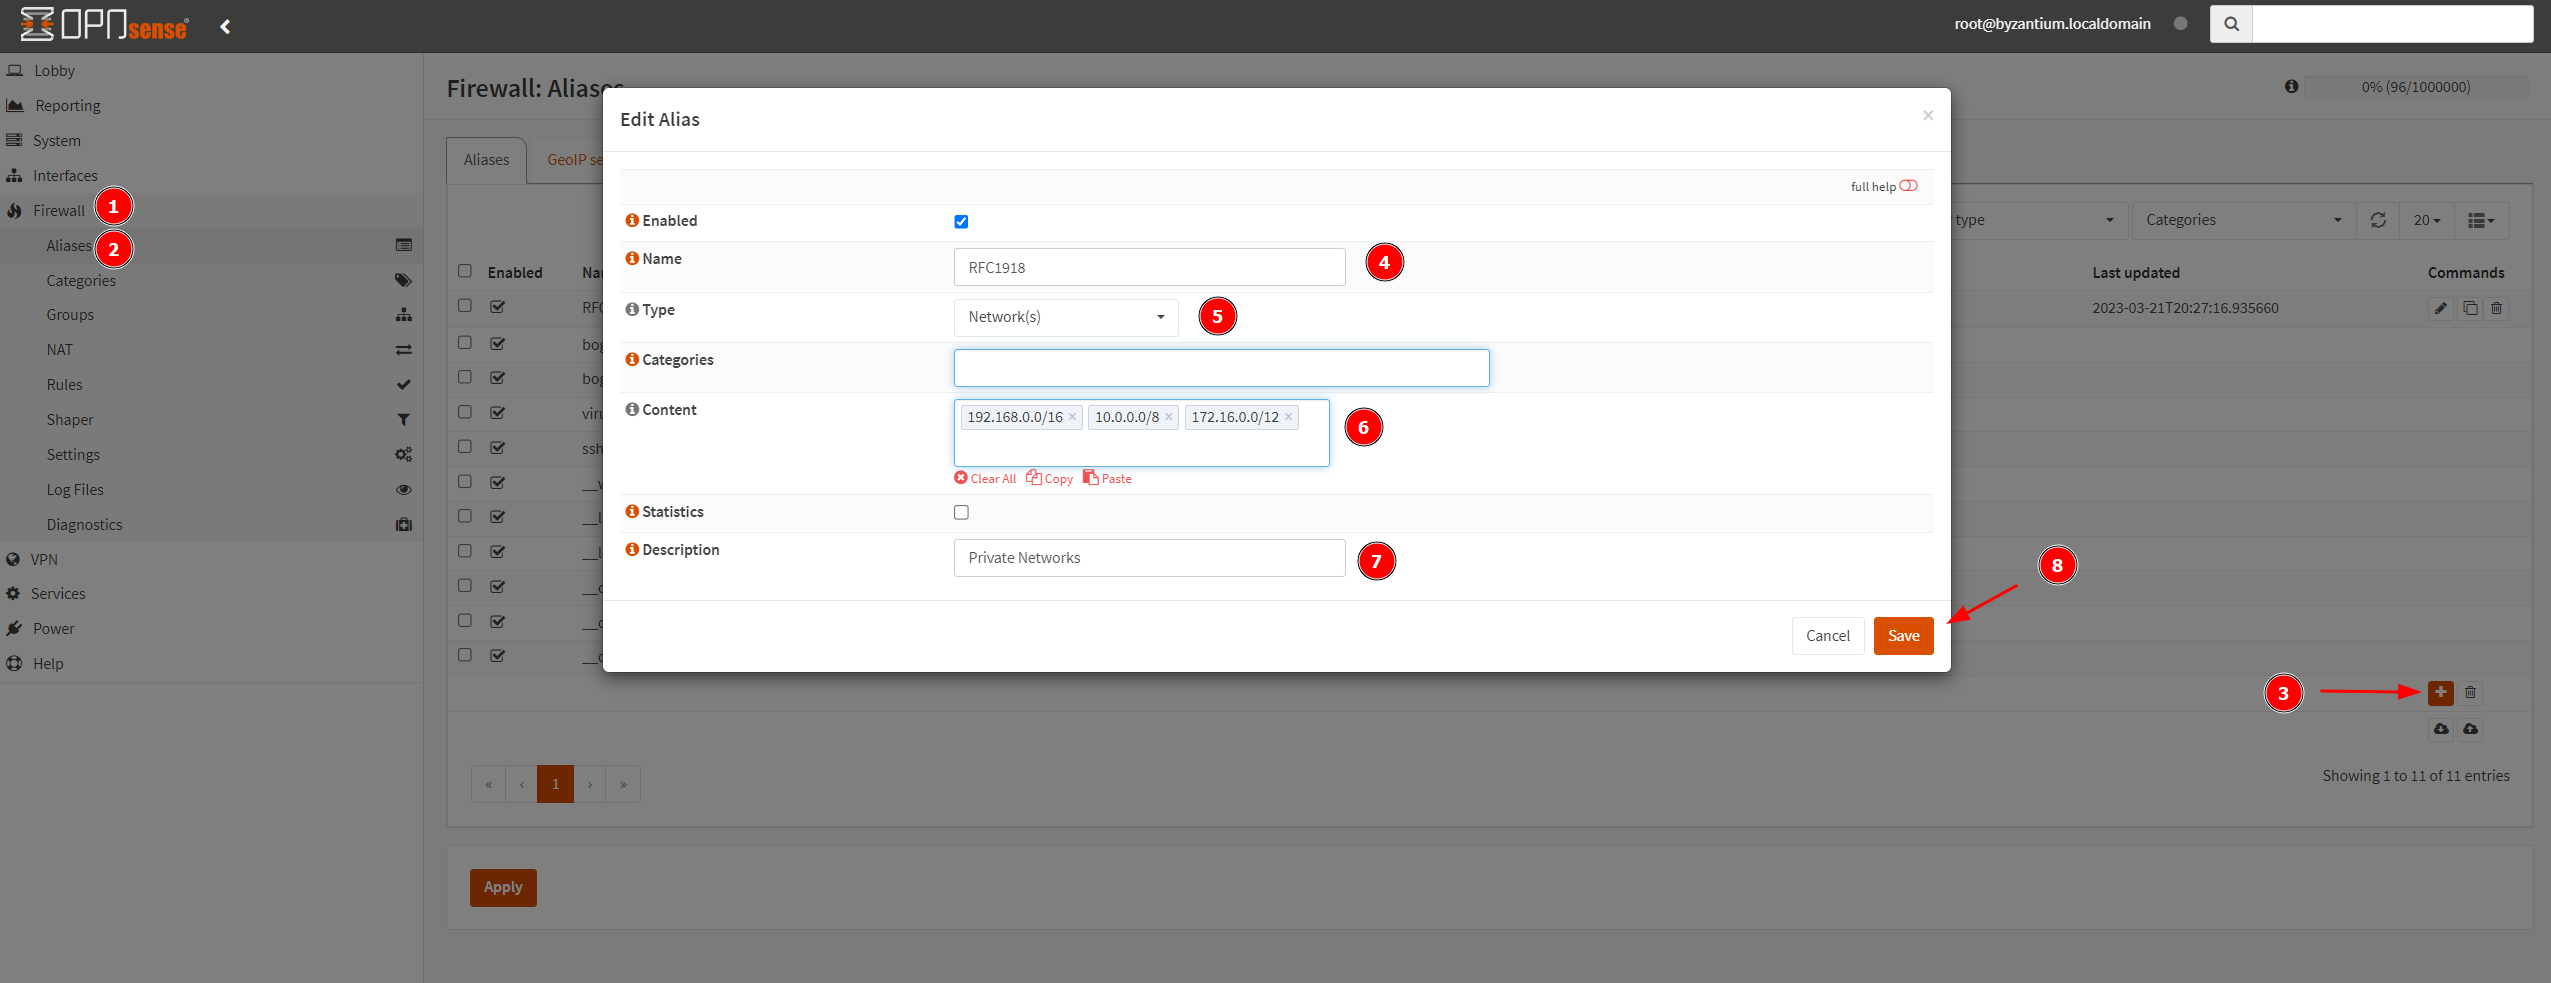
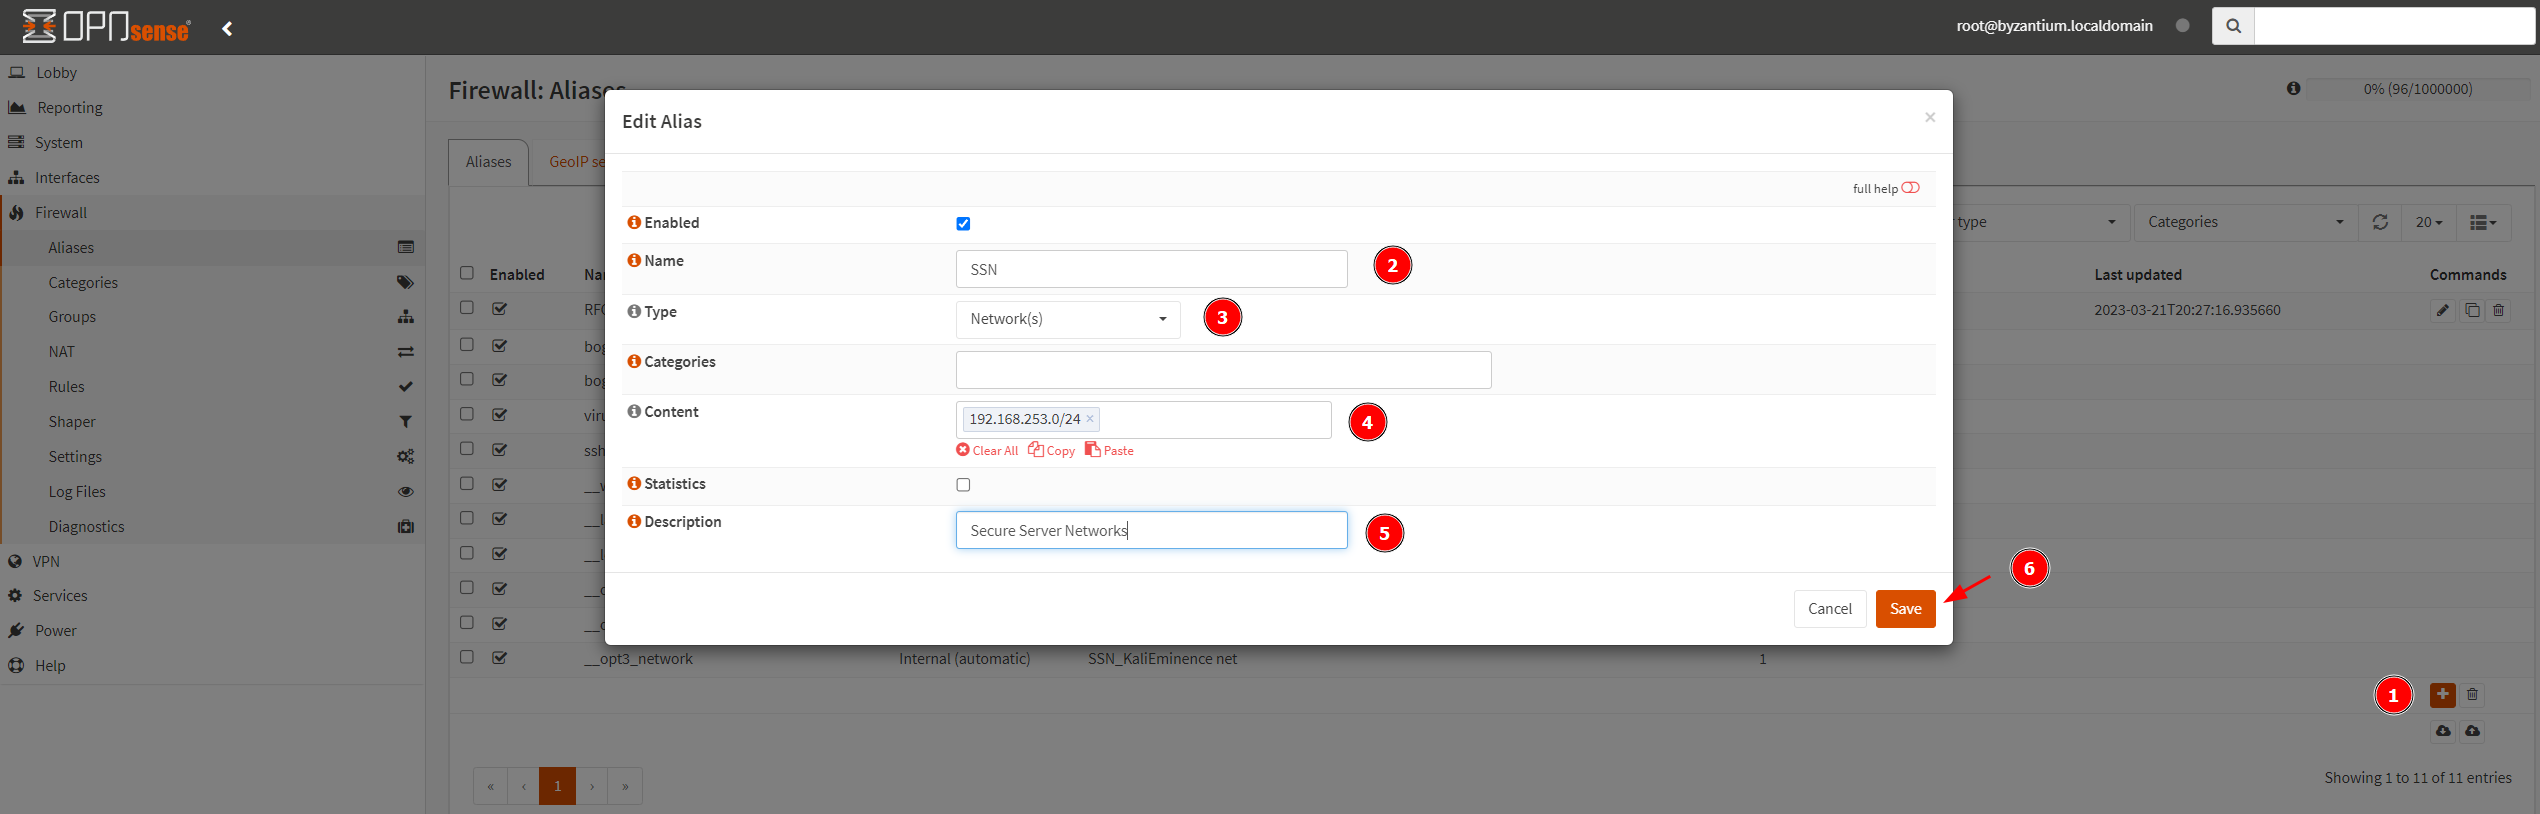
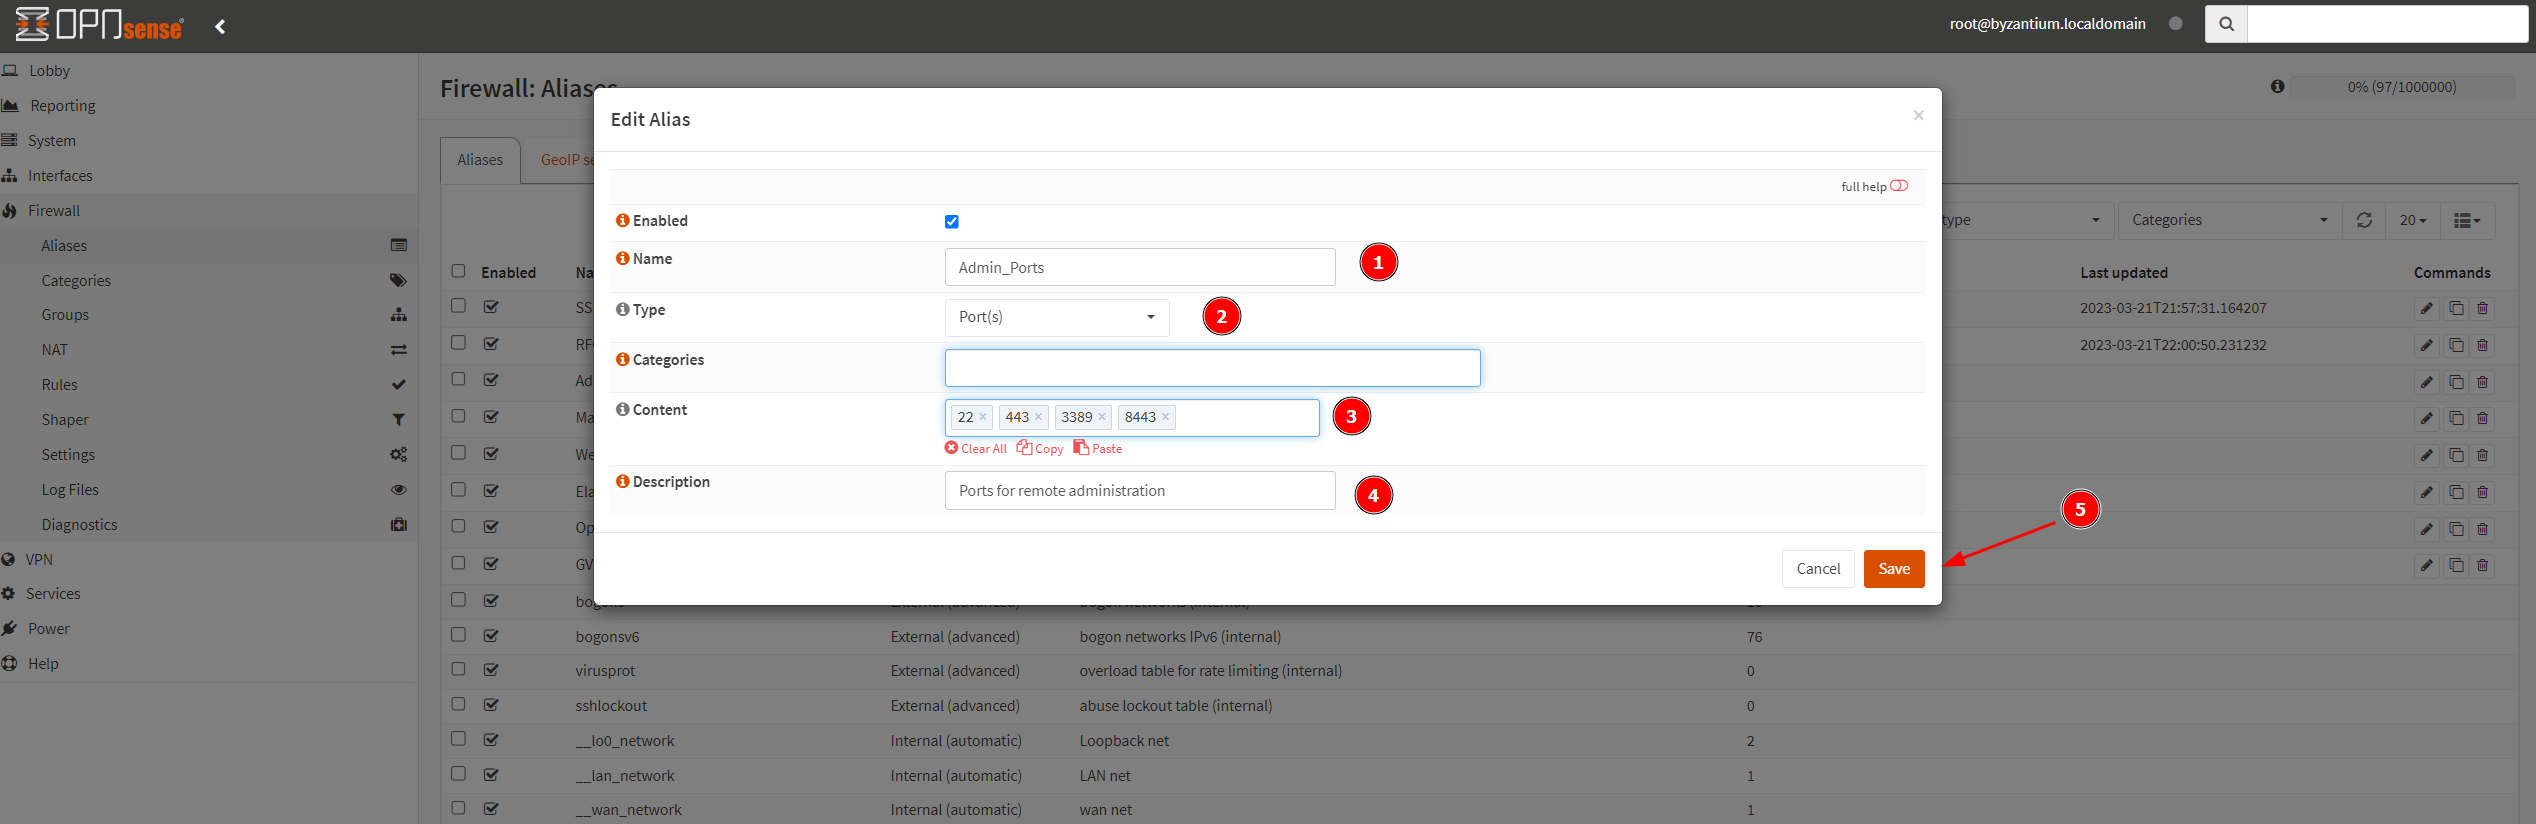

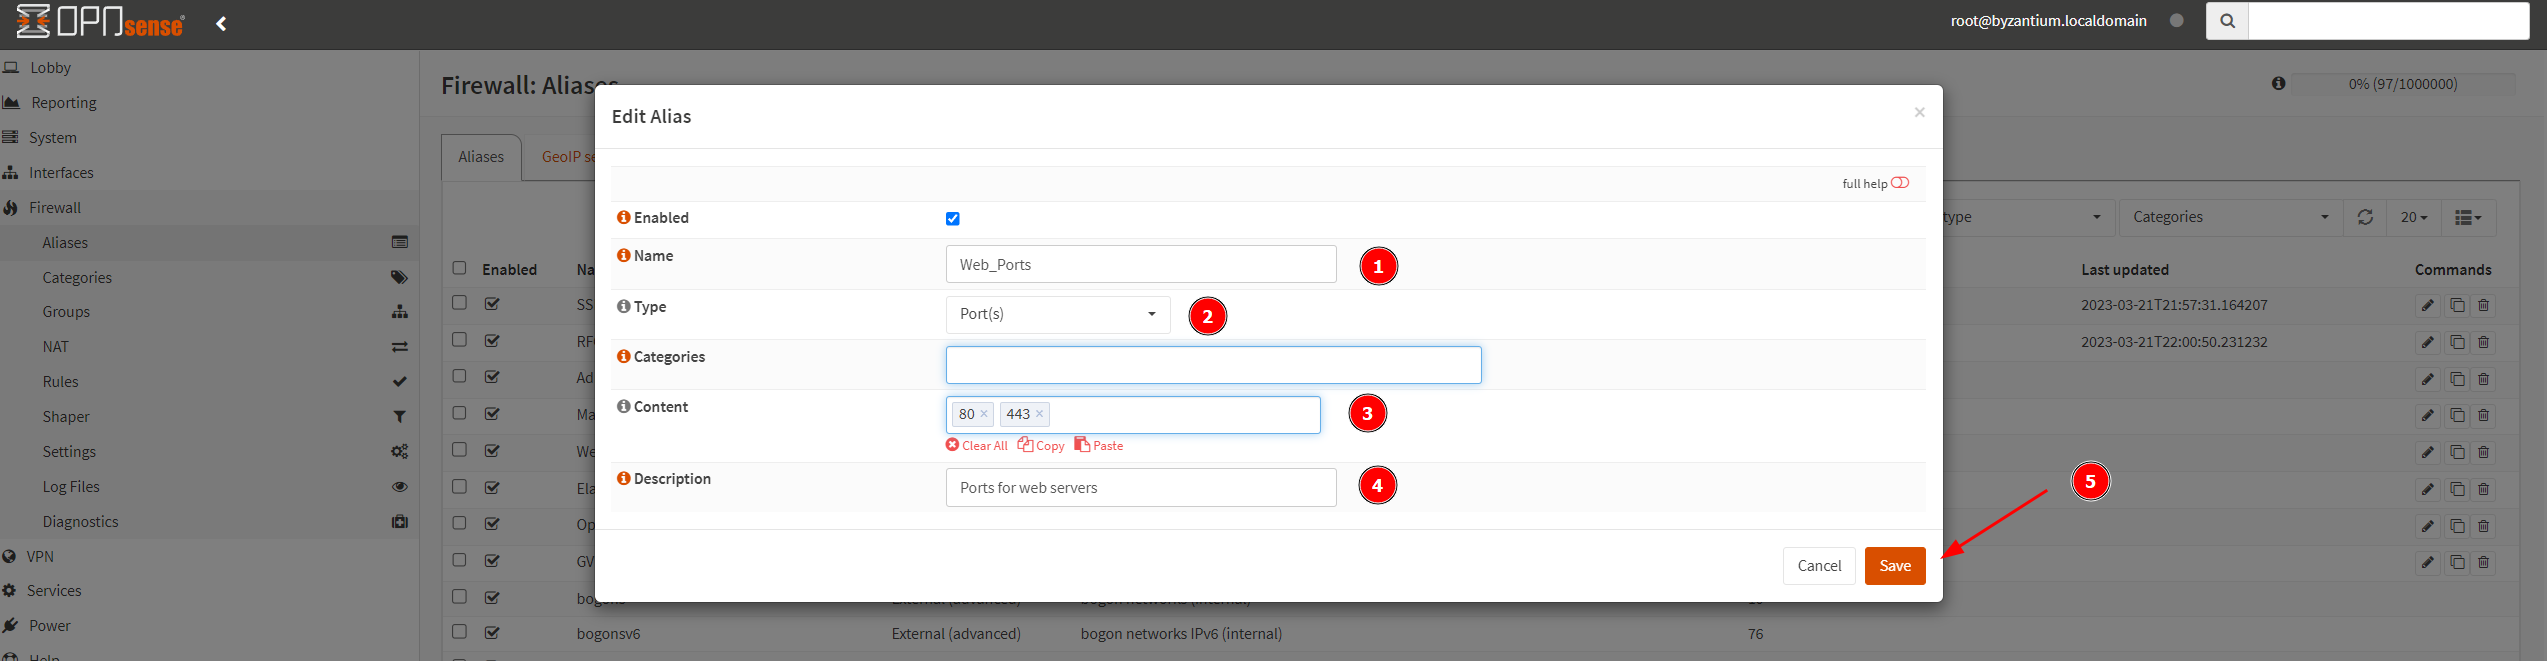

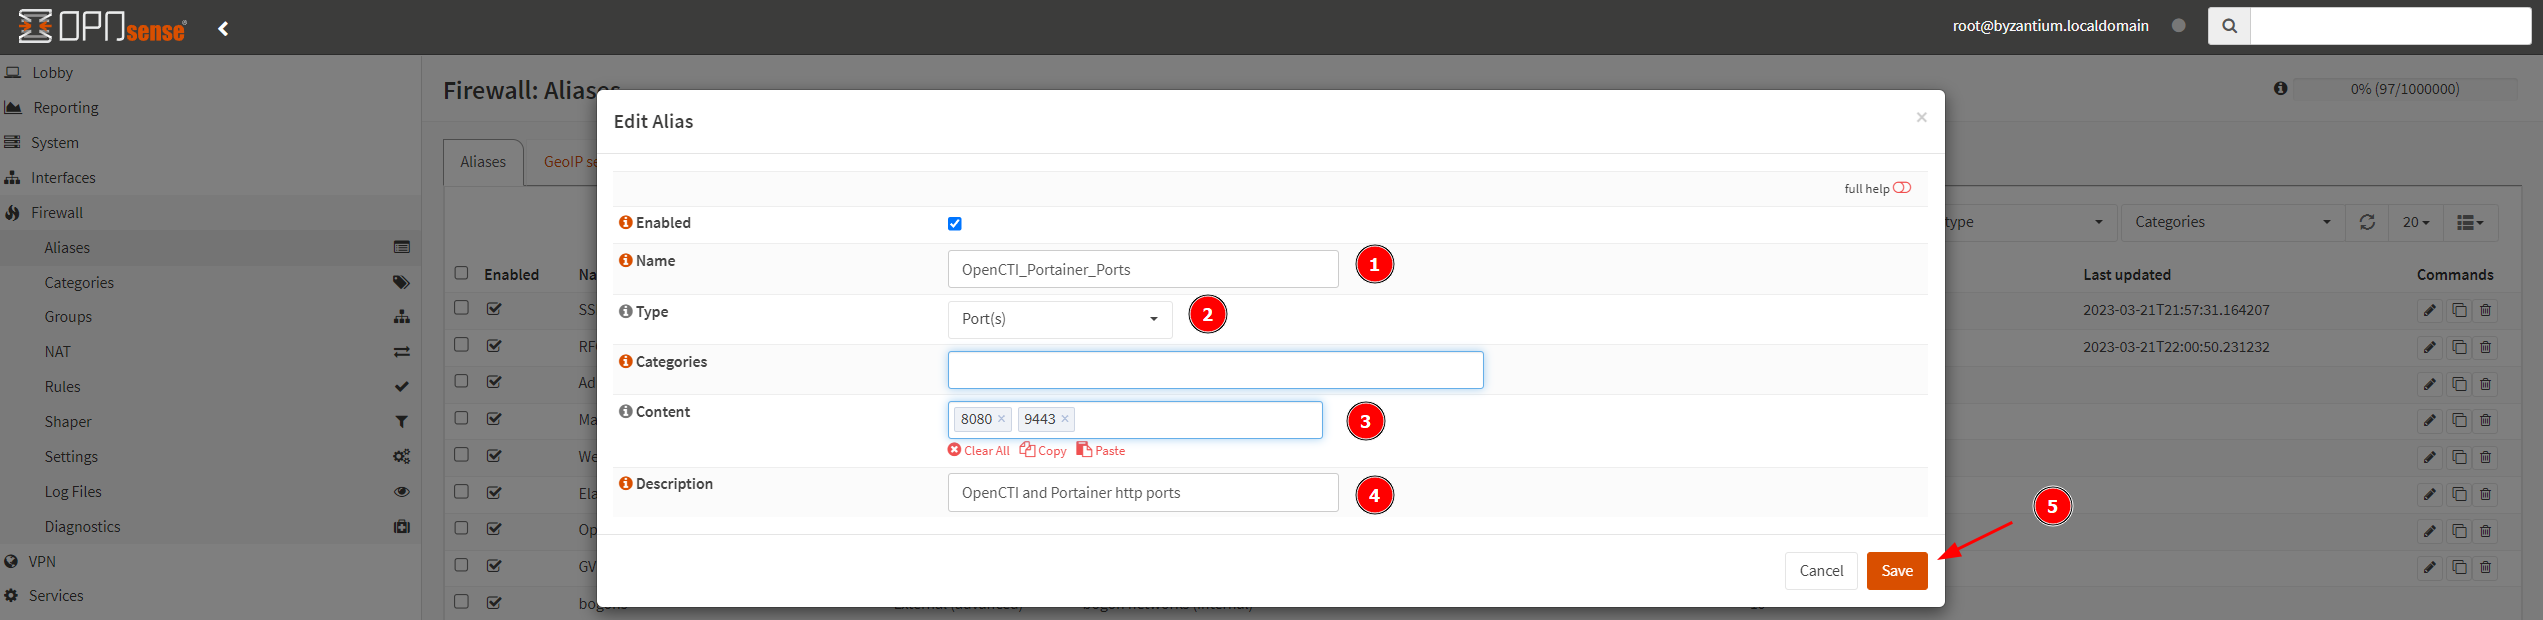
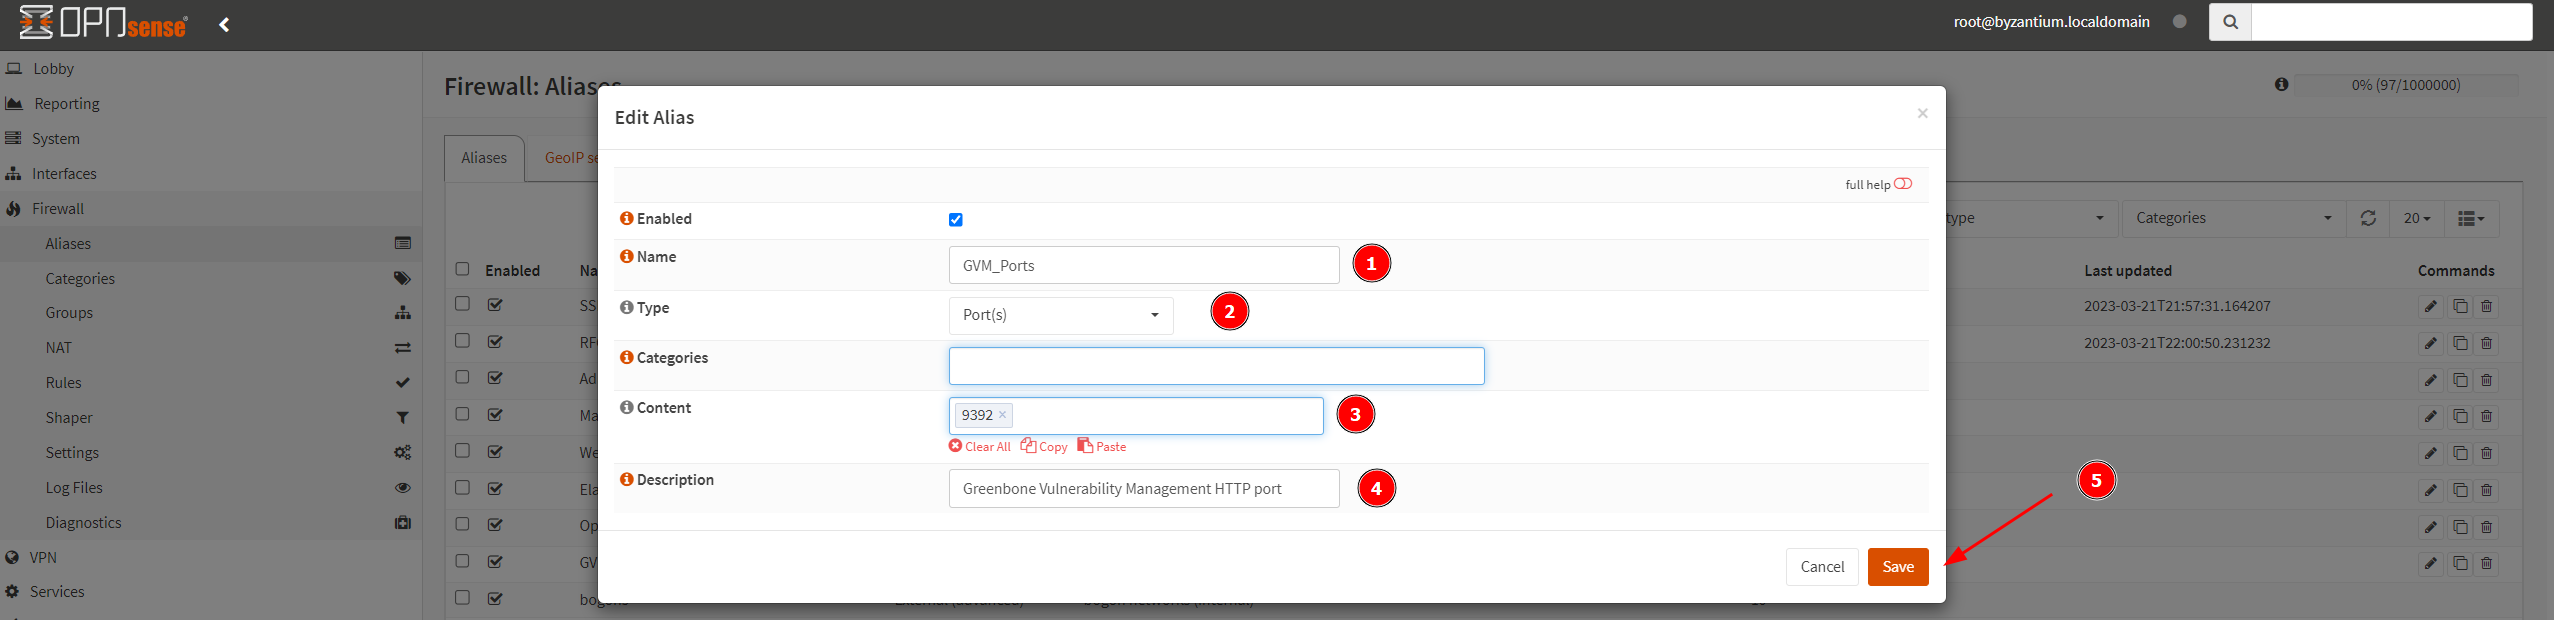
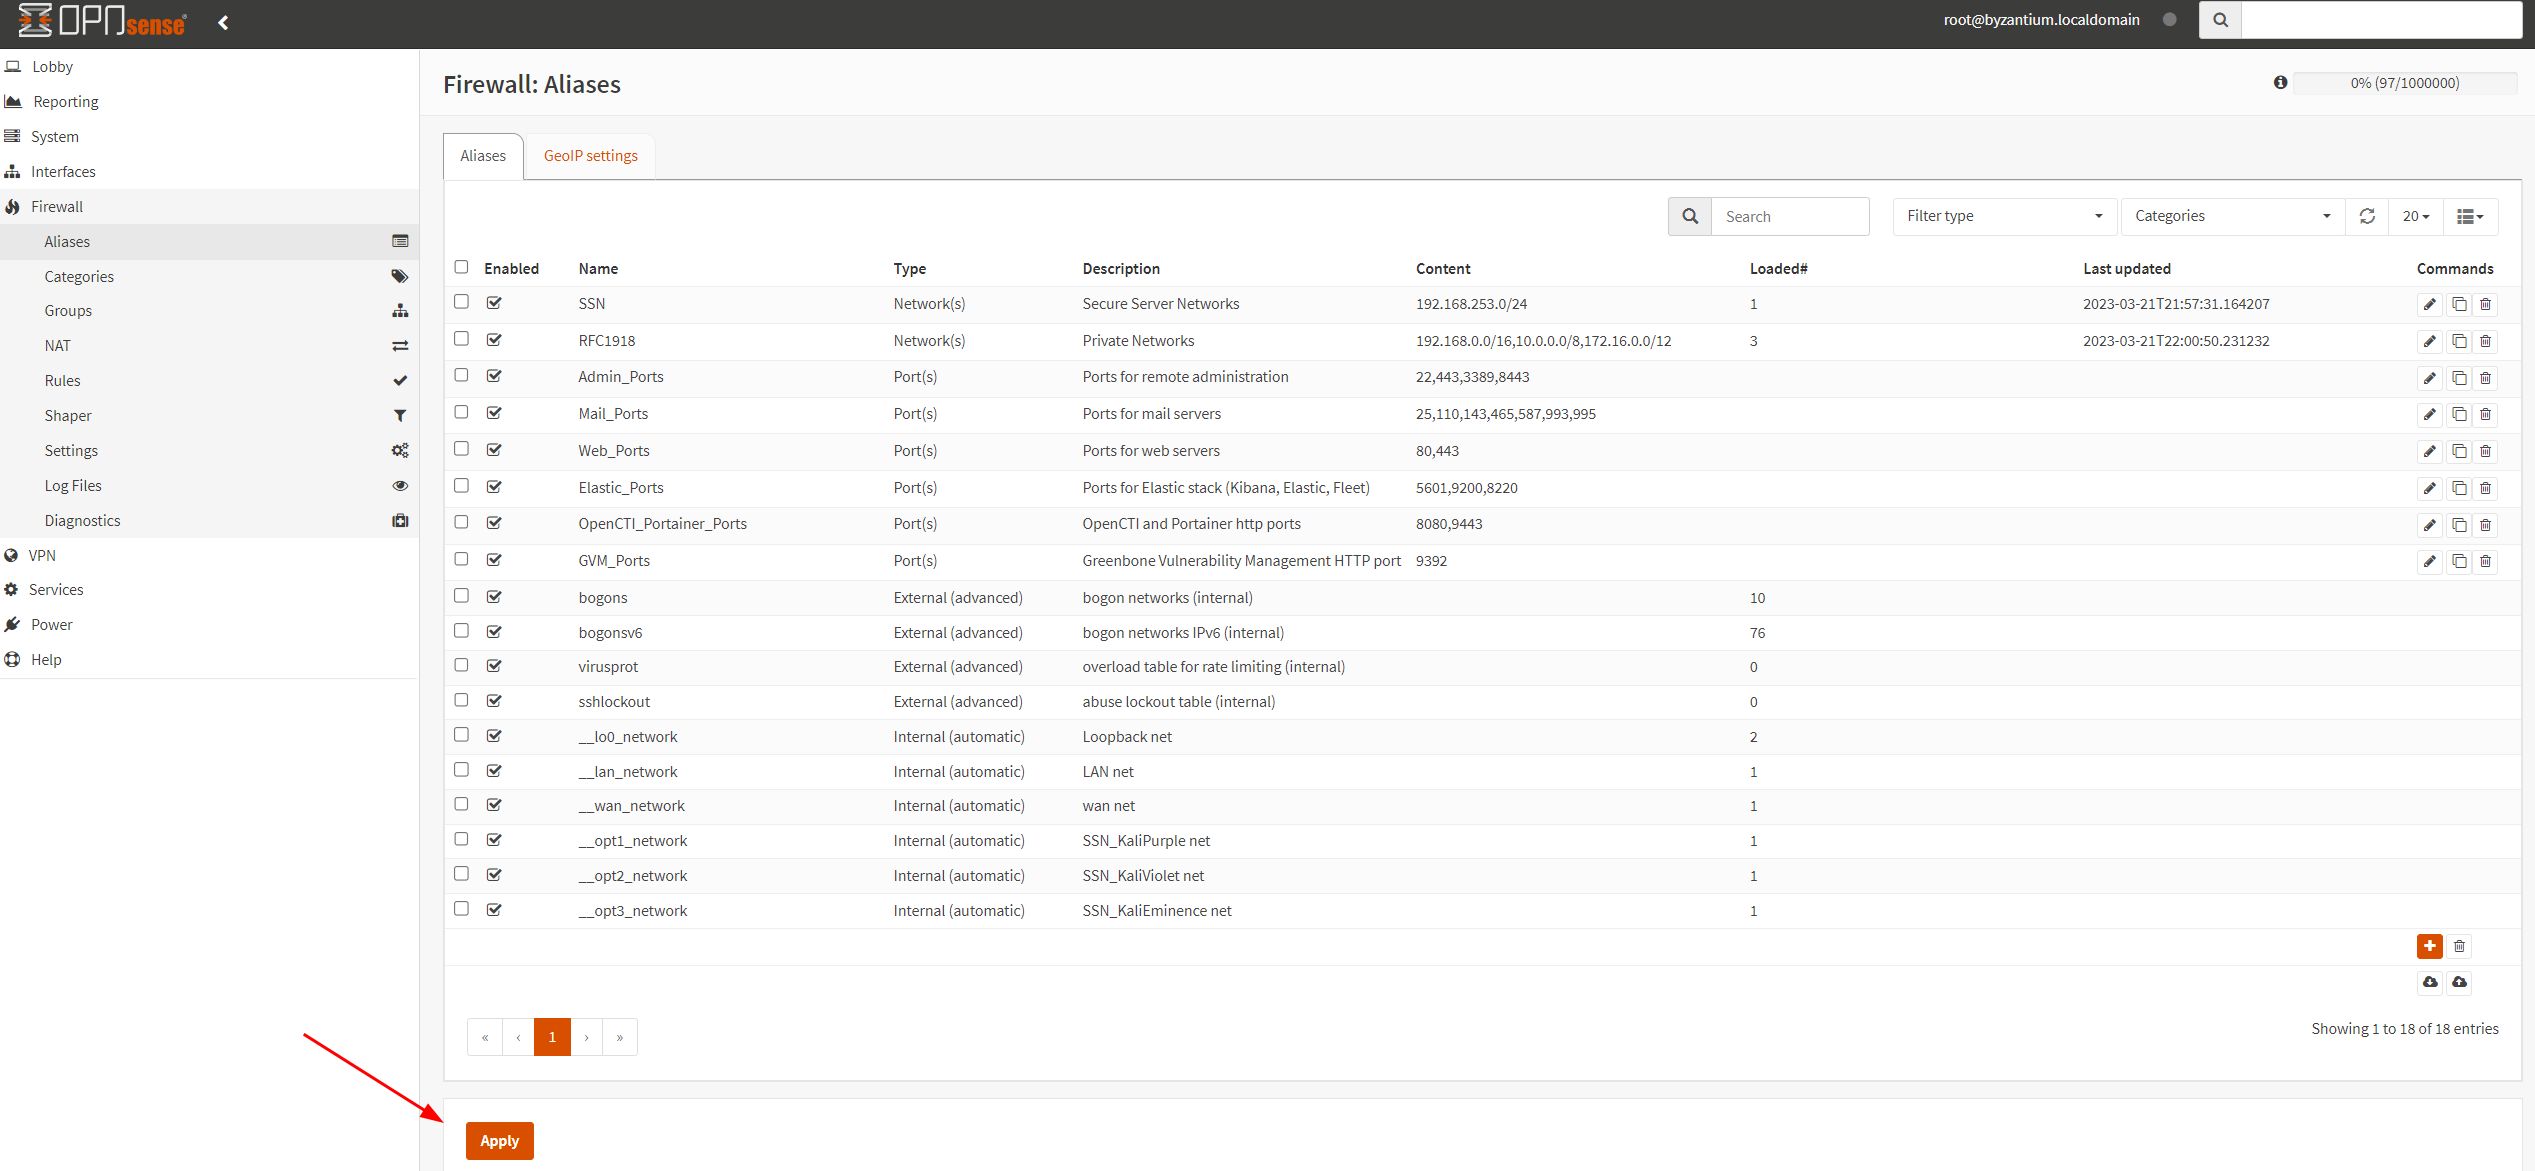
Once finished, click Apply.
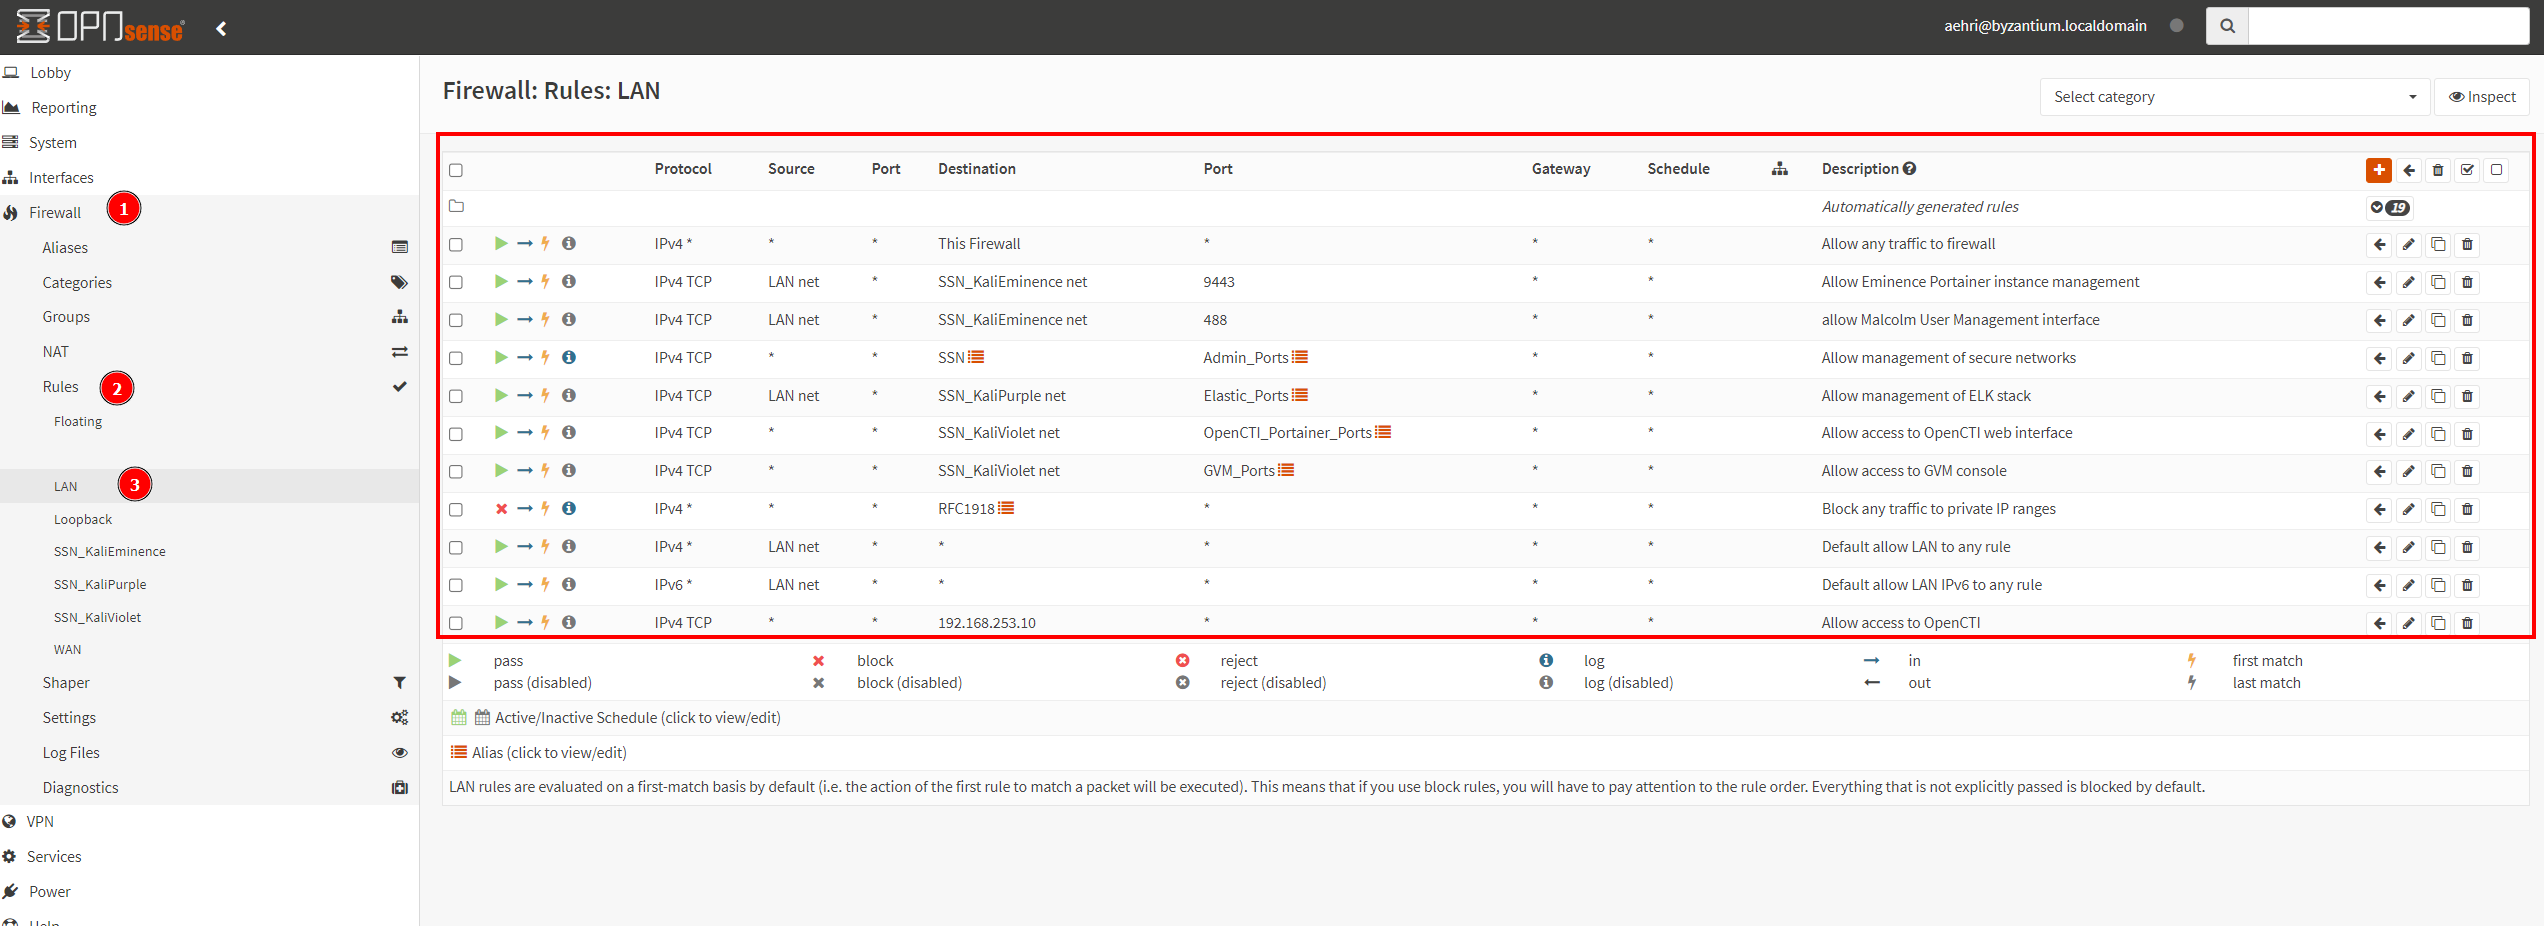
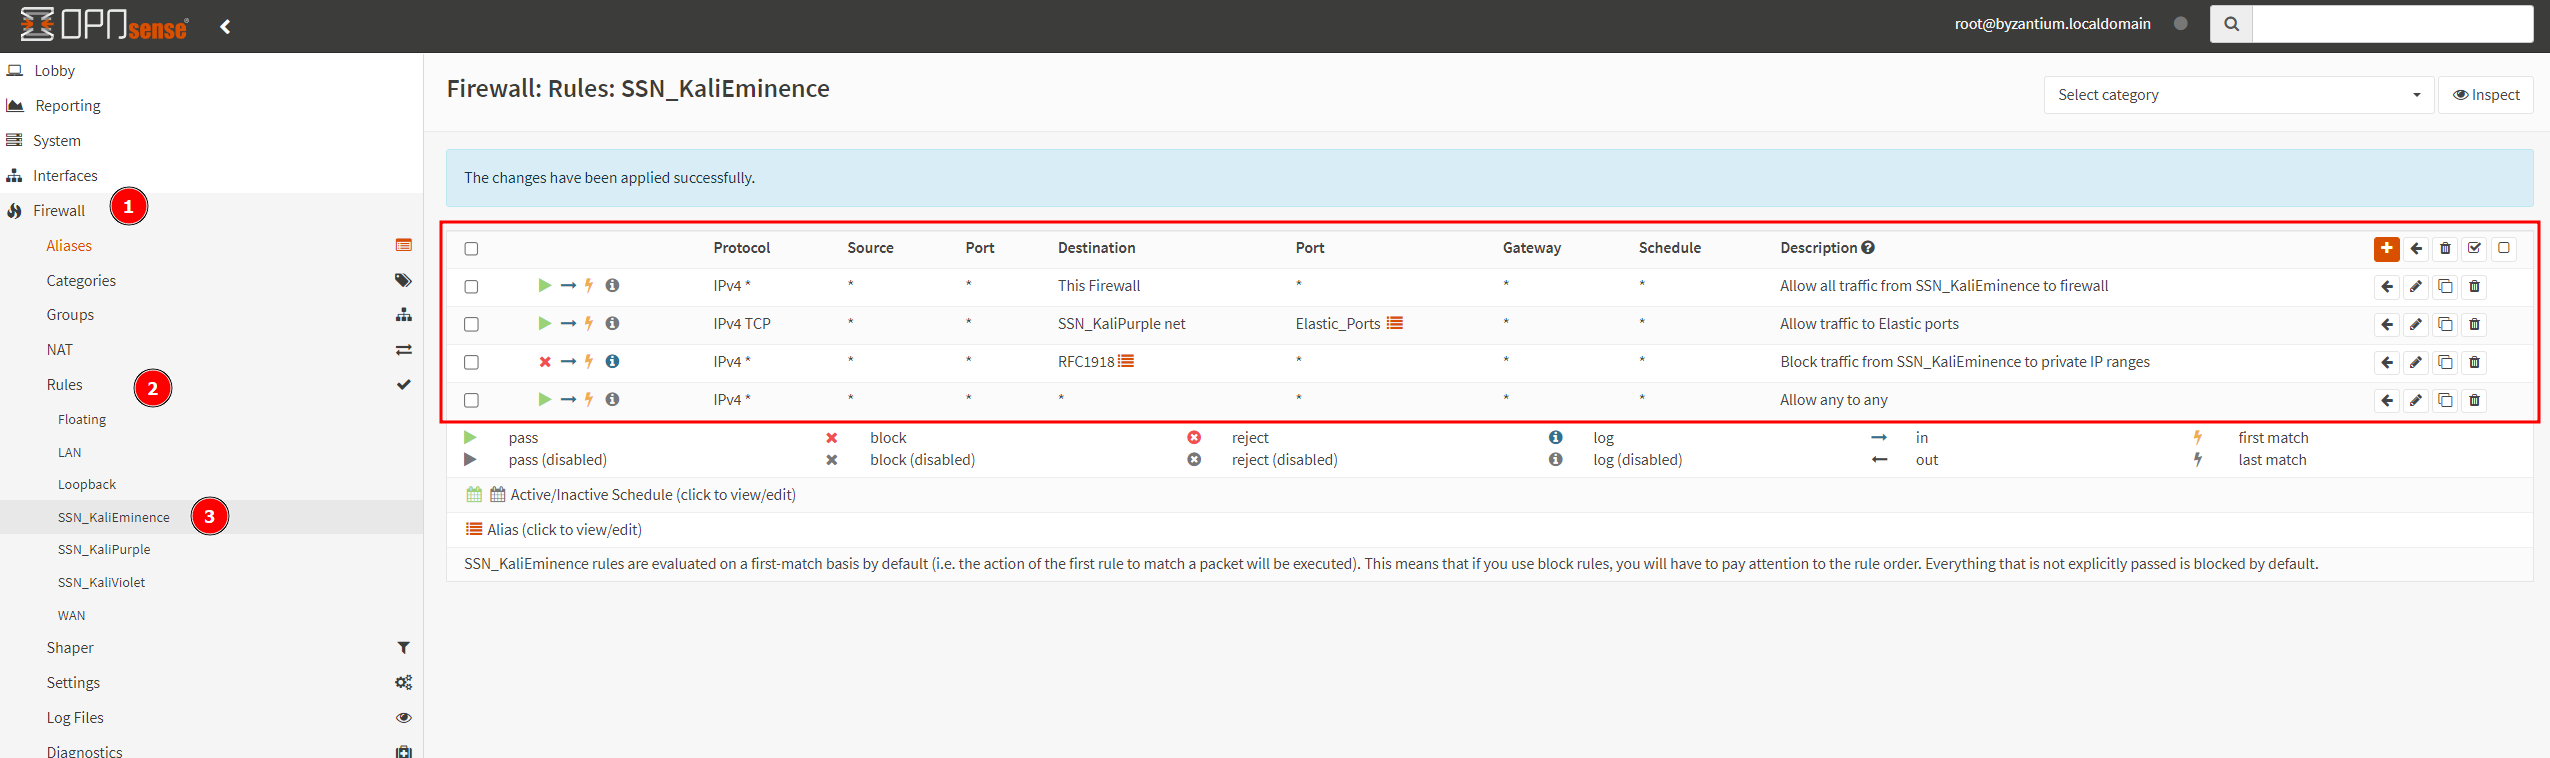
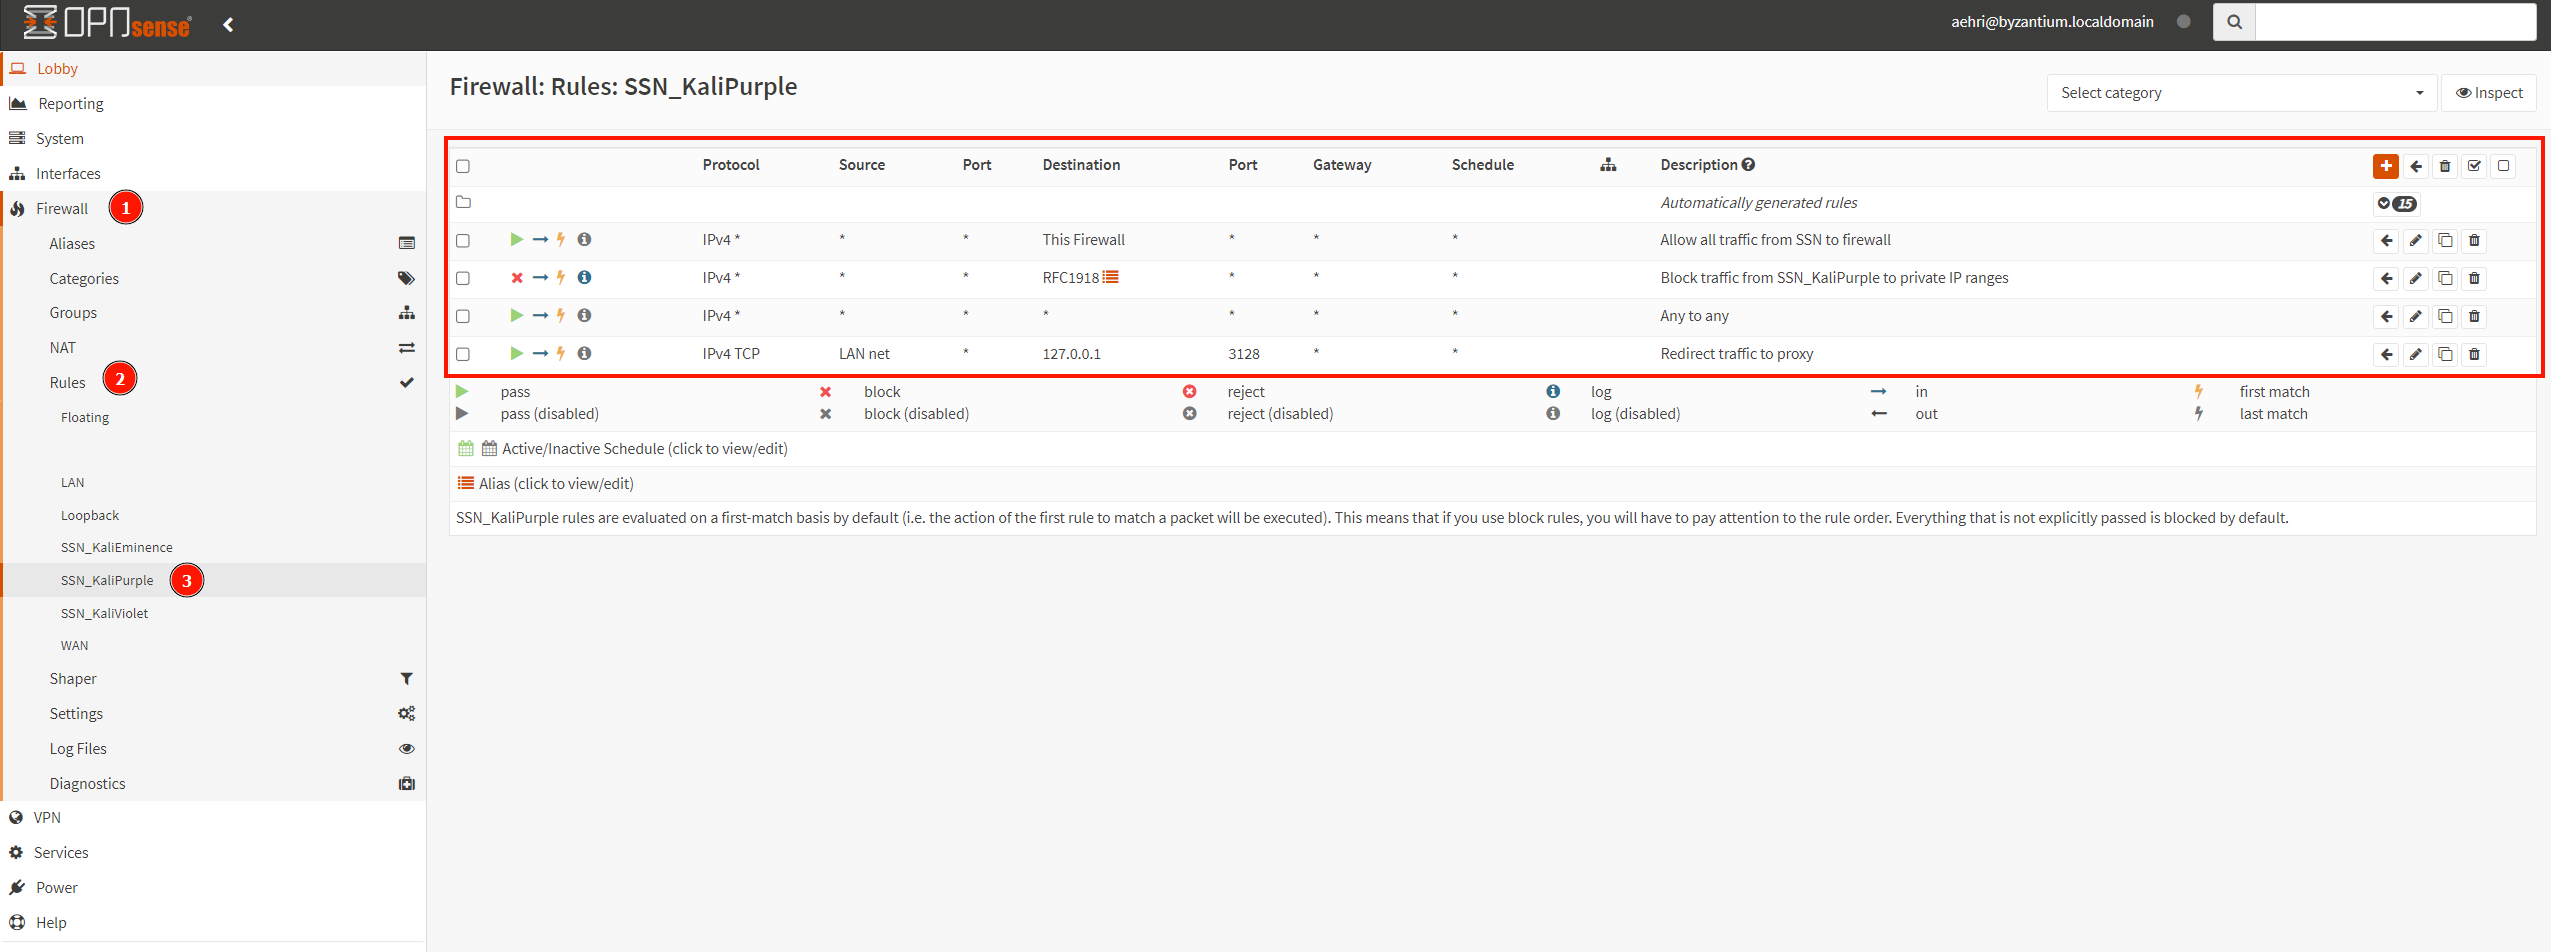
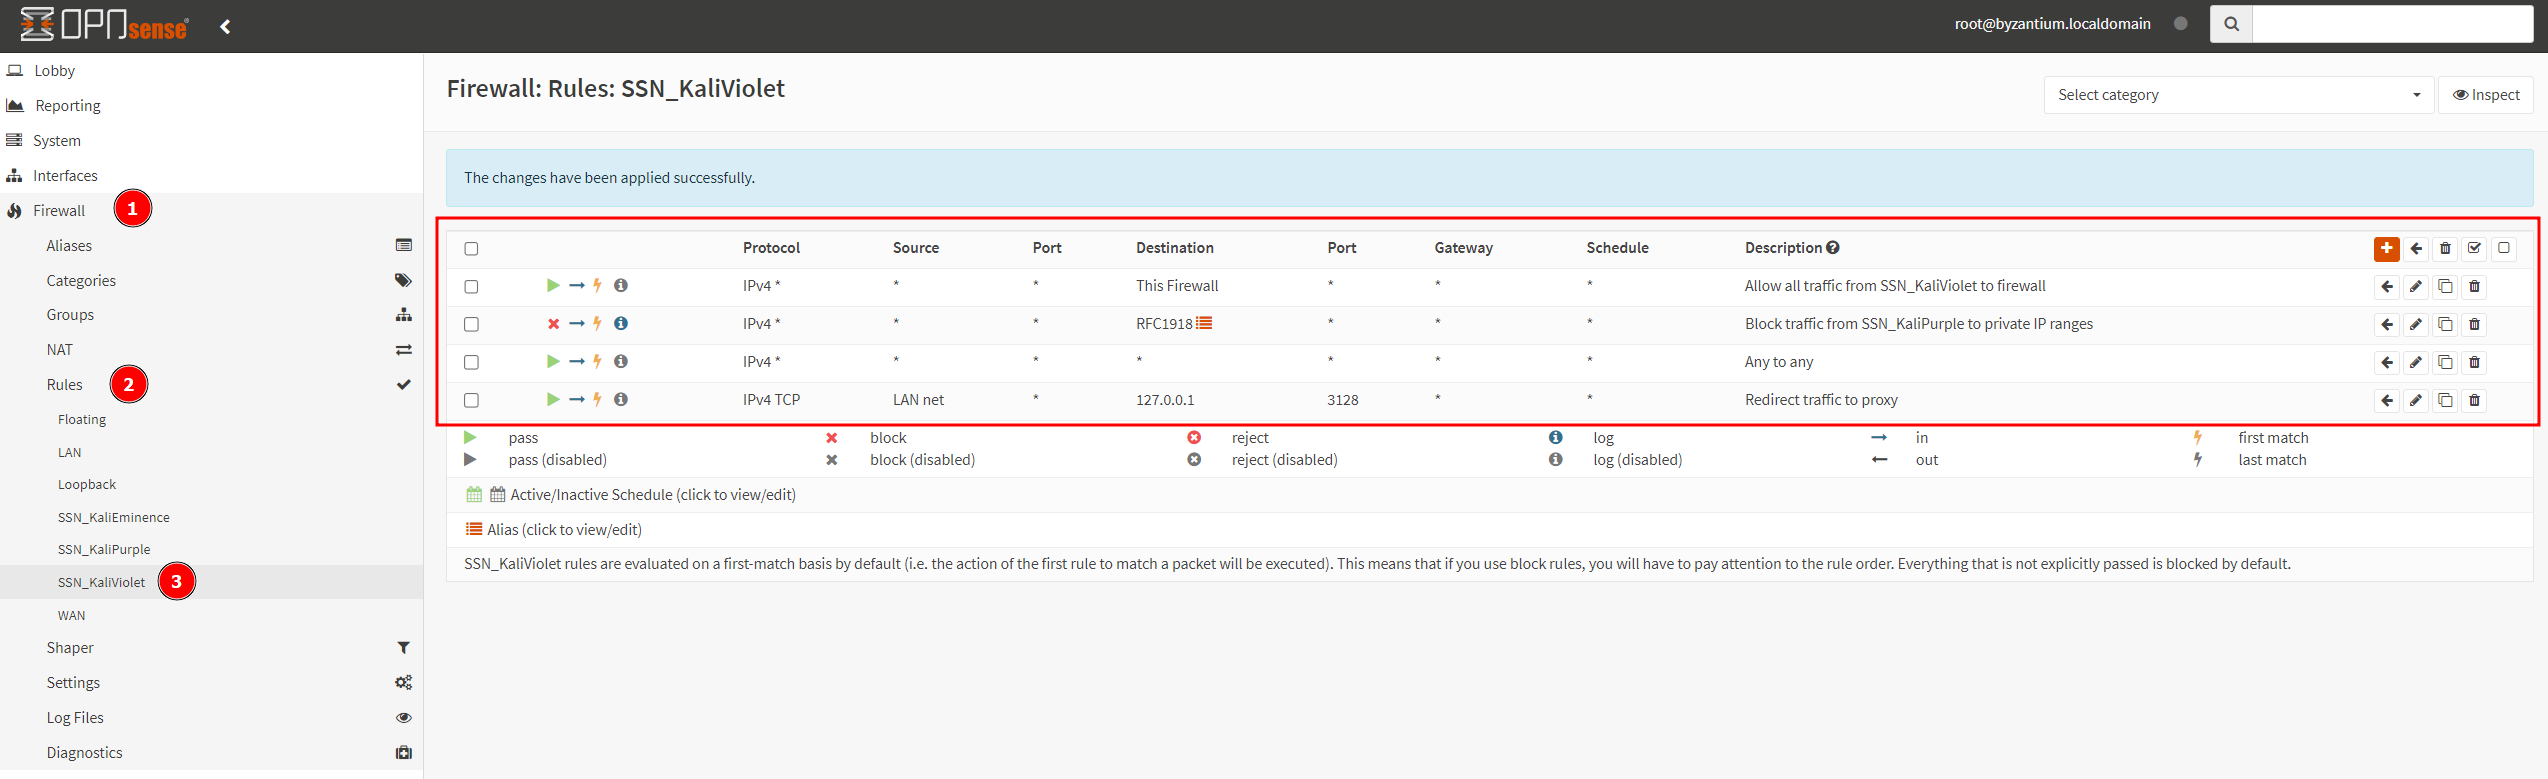
Configure Firewall Rules
The next step is to configure firewall rules for the networks. Follow the screenshots below.
LAN
SSN_KaliEminence
SSN_KaliPurple
SSN_KaliViolet
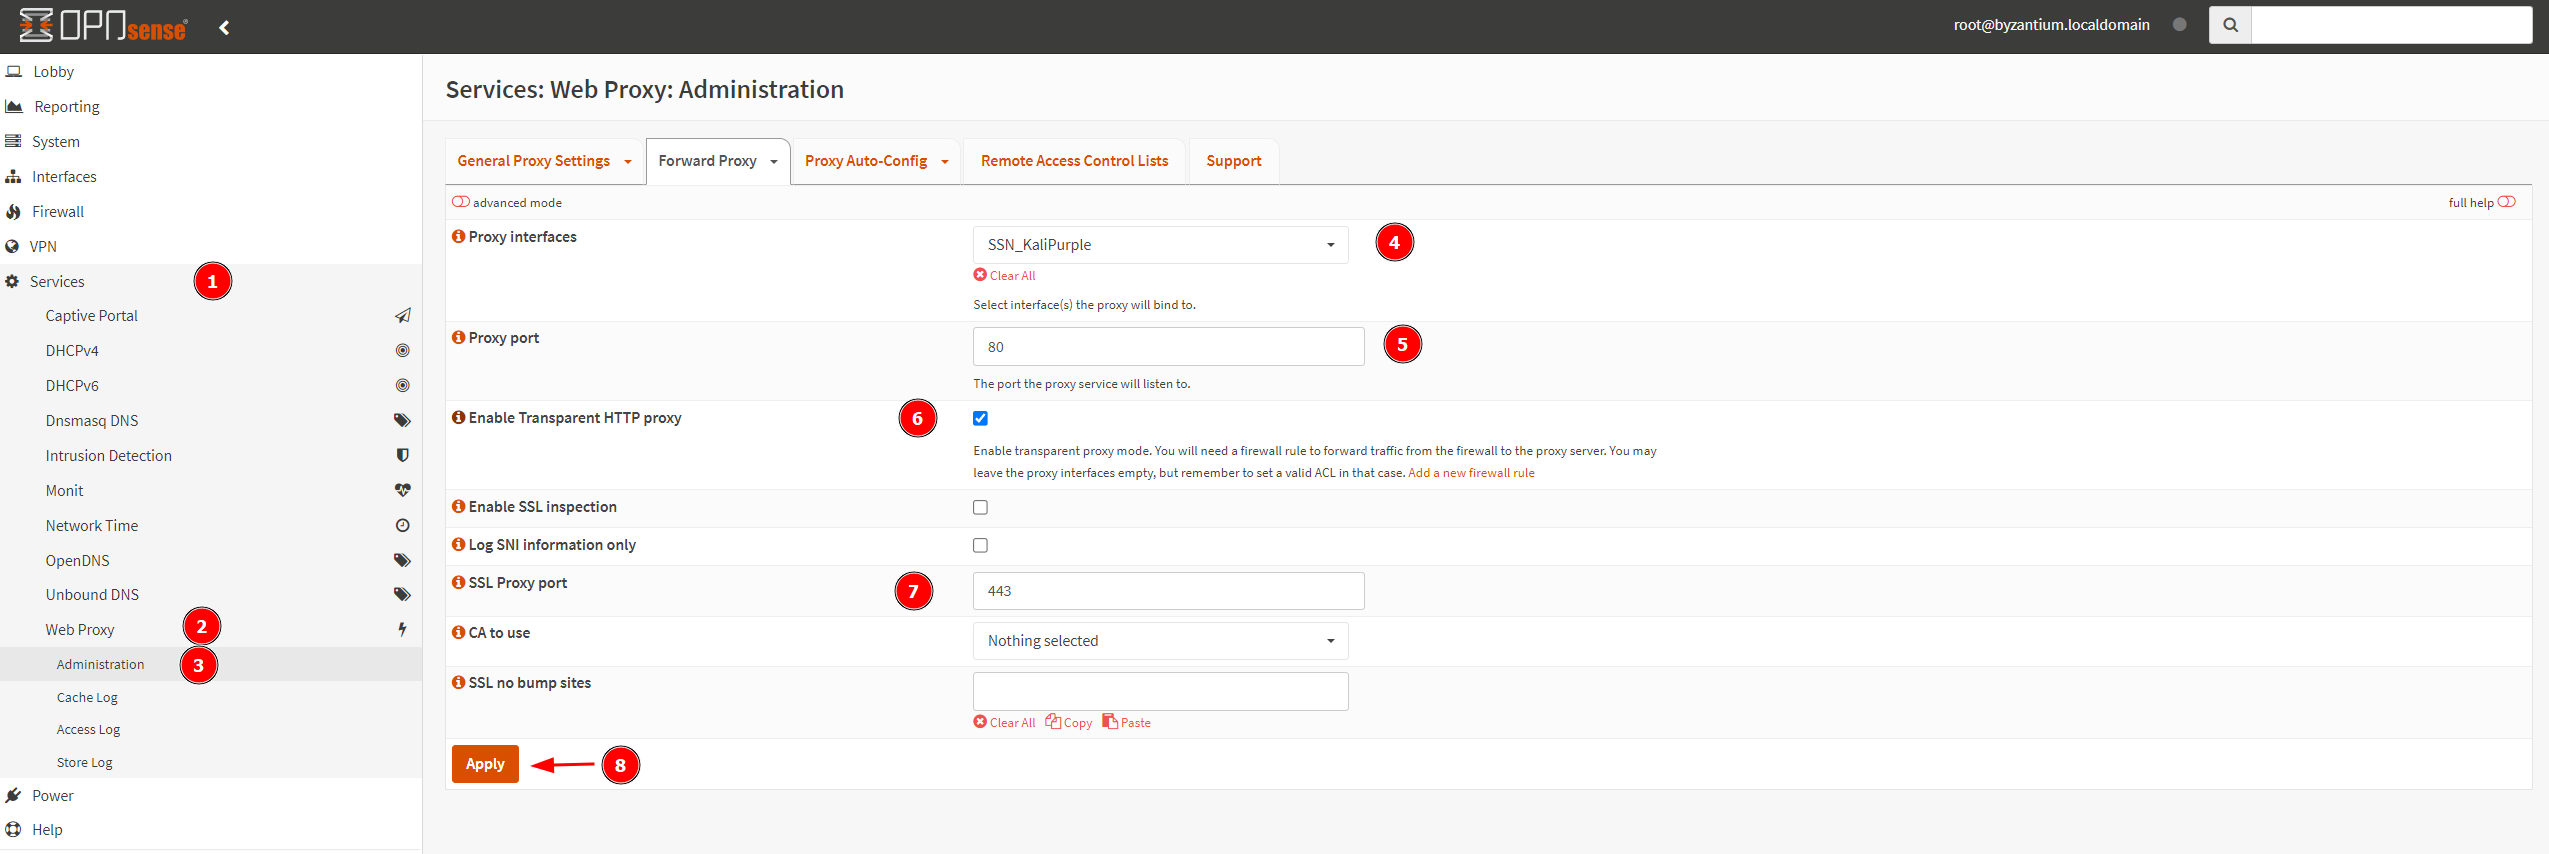
Setup Forward Proxy
Change Login Credentials
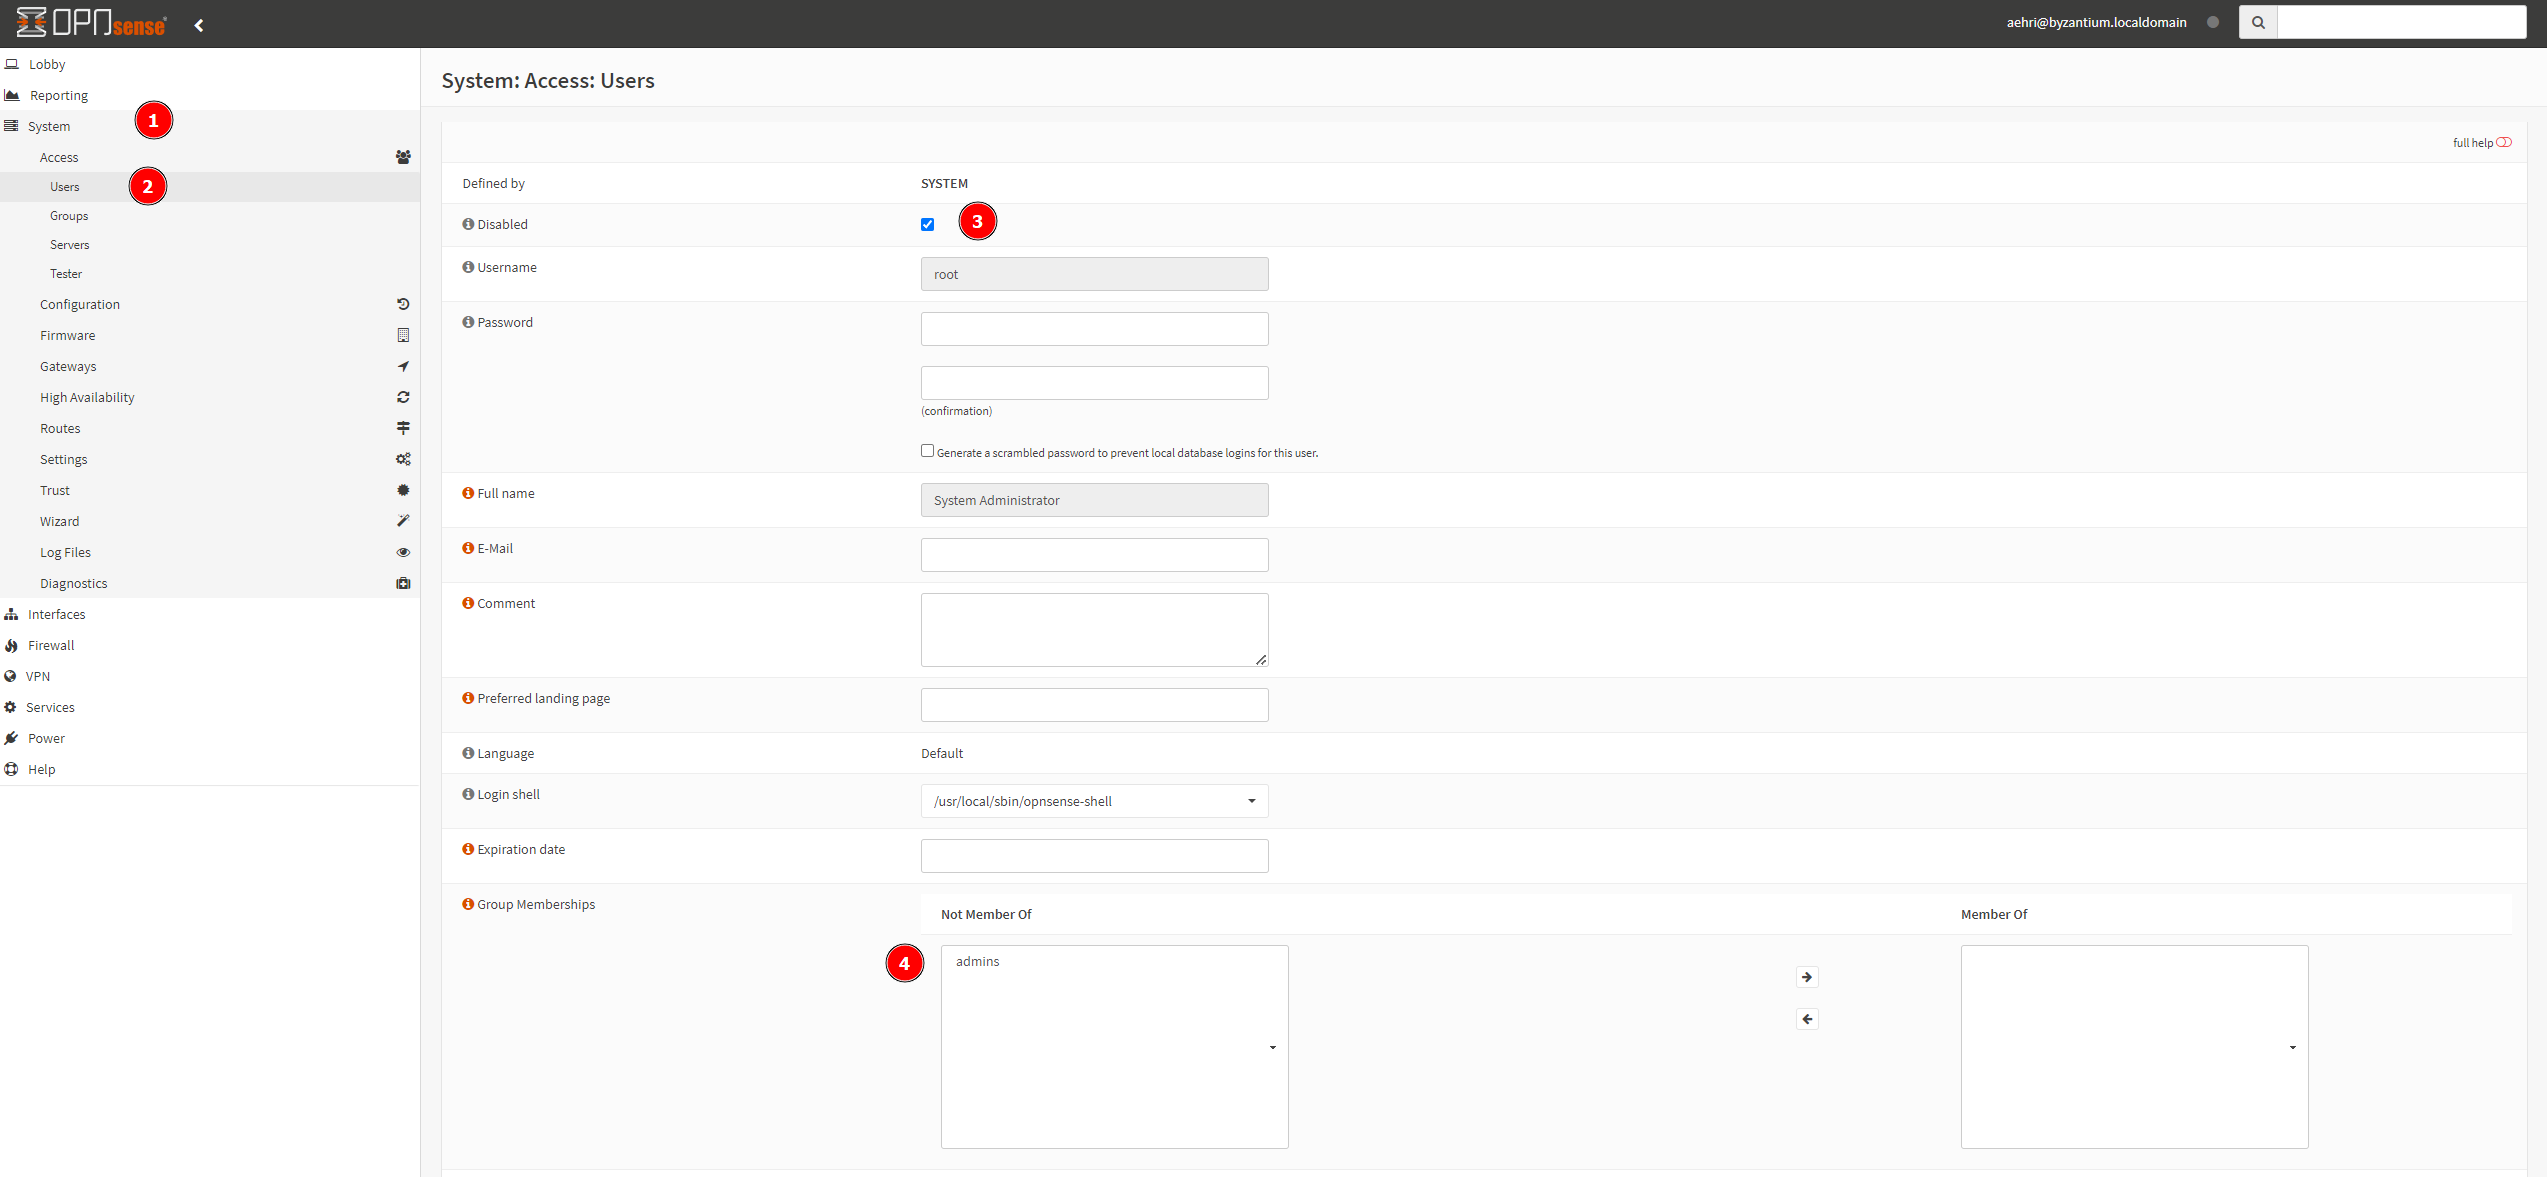
Change the credentials used to login to OPNsense from the default by creating a new user.
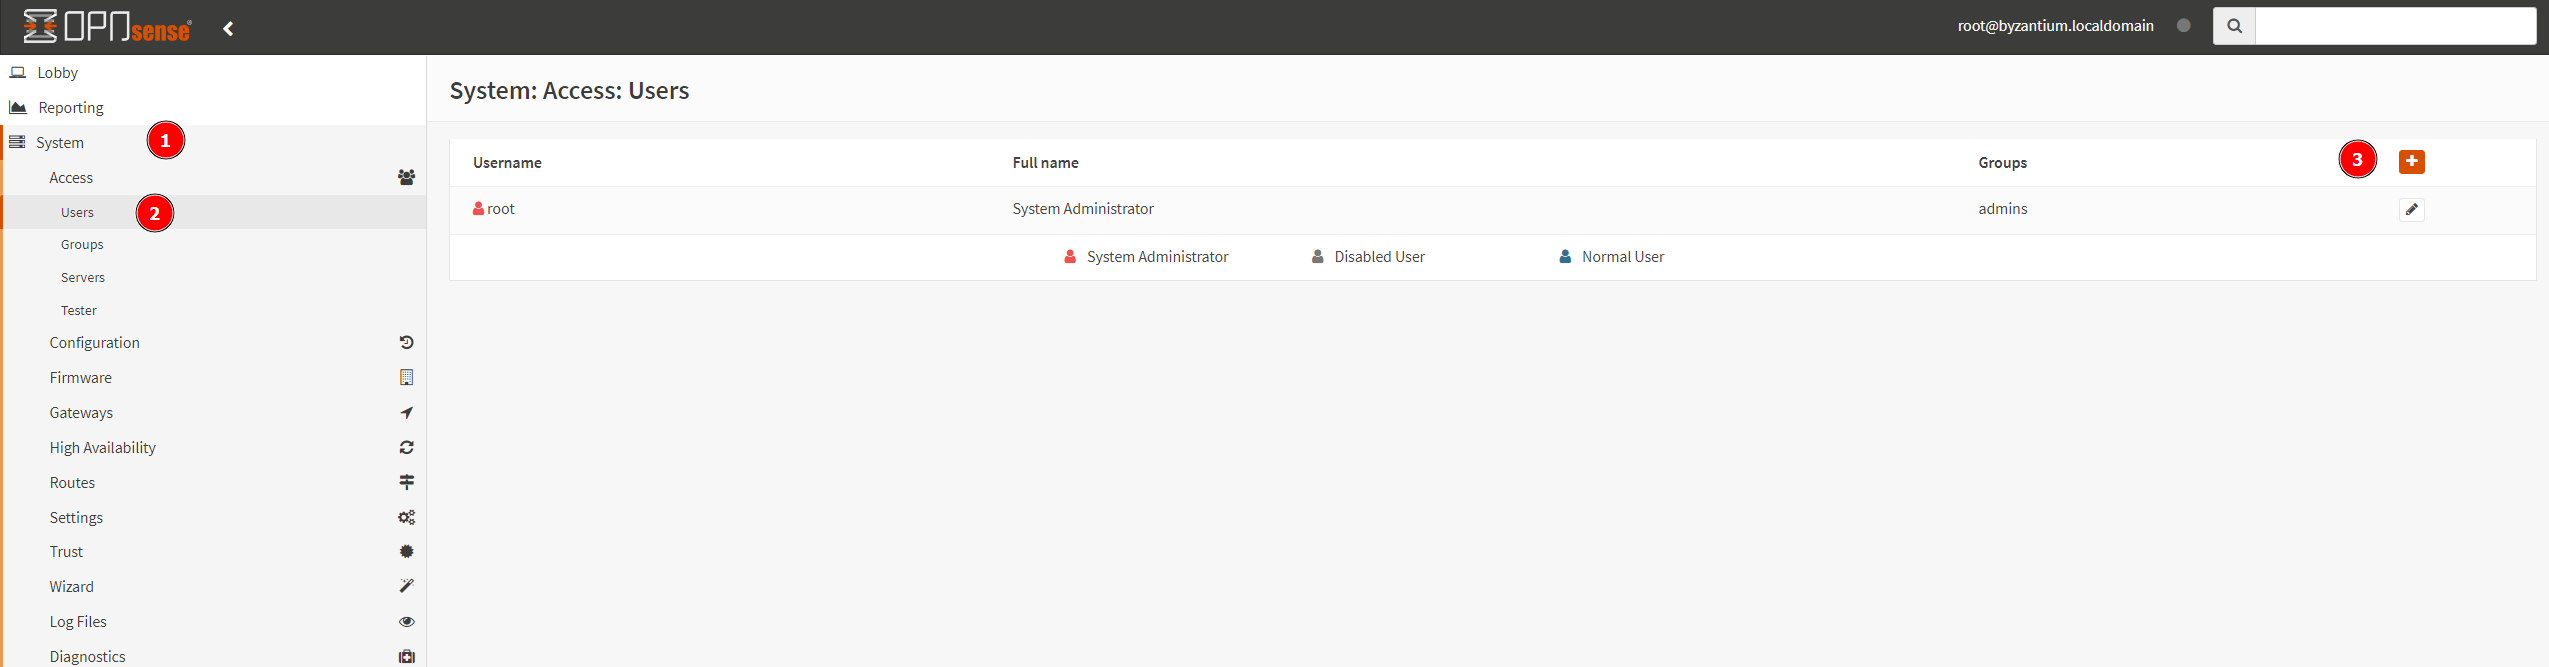
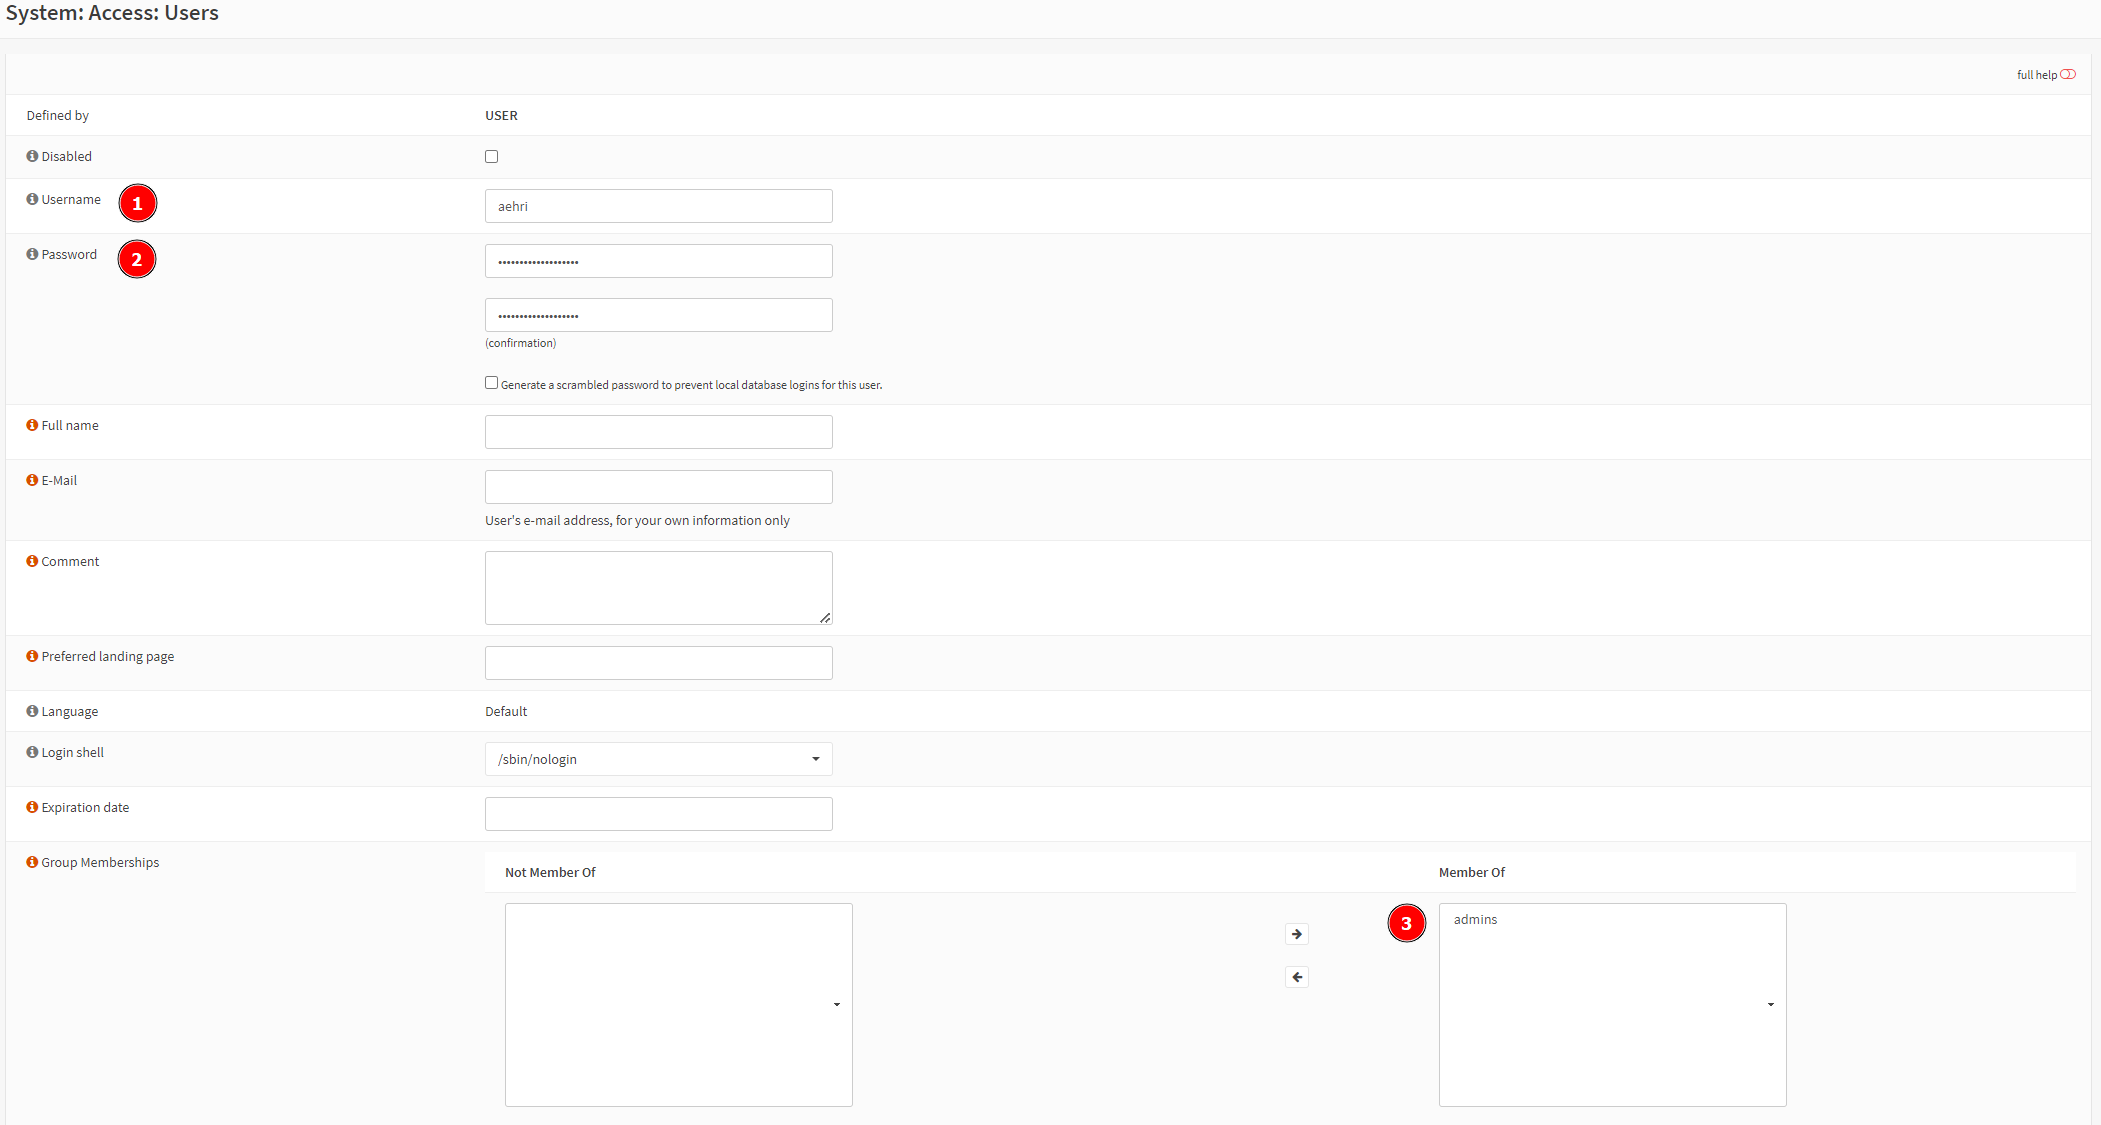
Create a new username and password. Add the user to admins group membership.
Save.
Follow the screenshot below to disable root login.
Save.
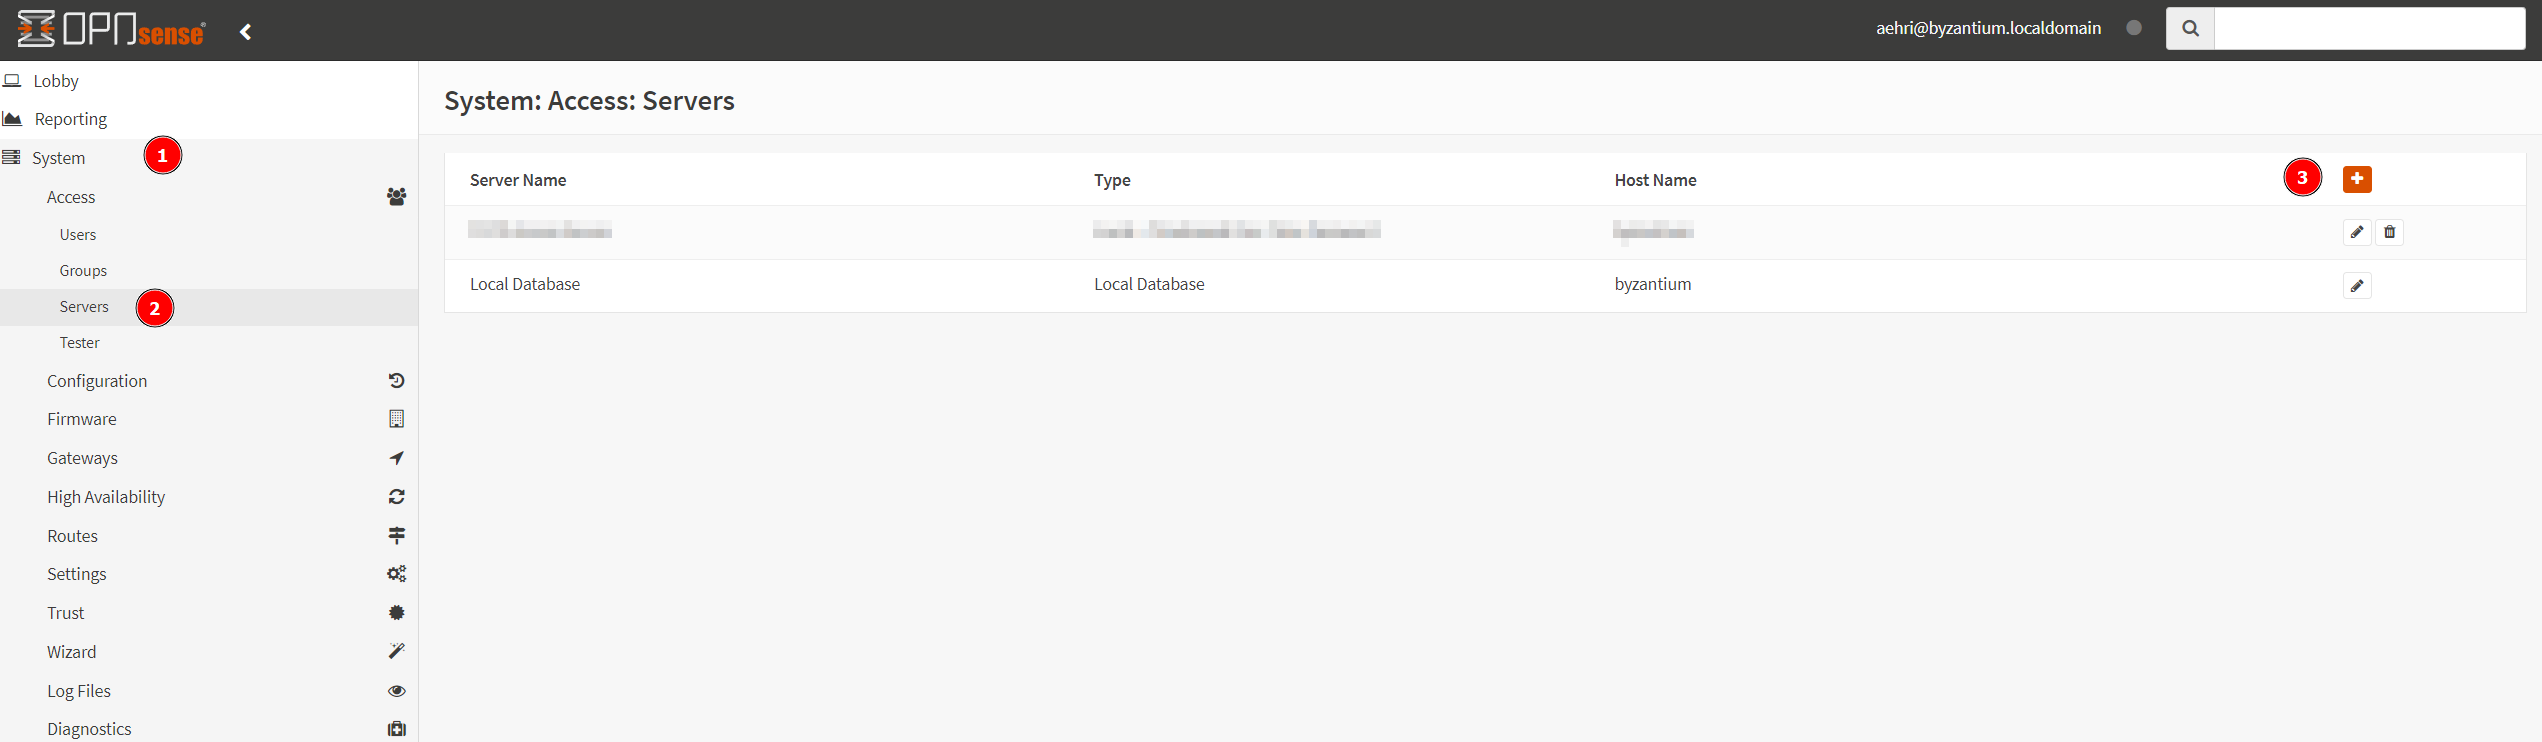
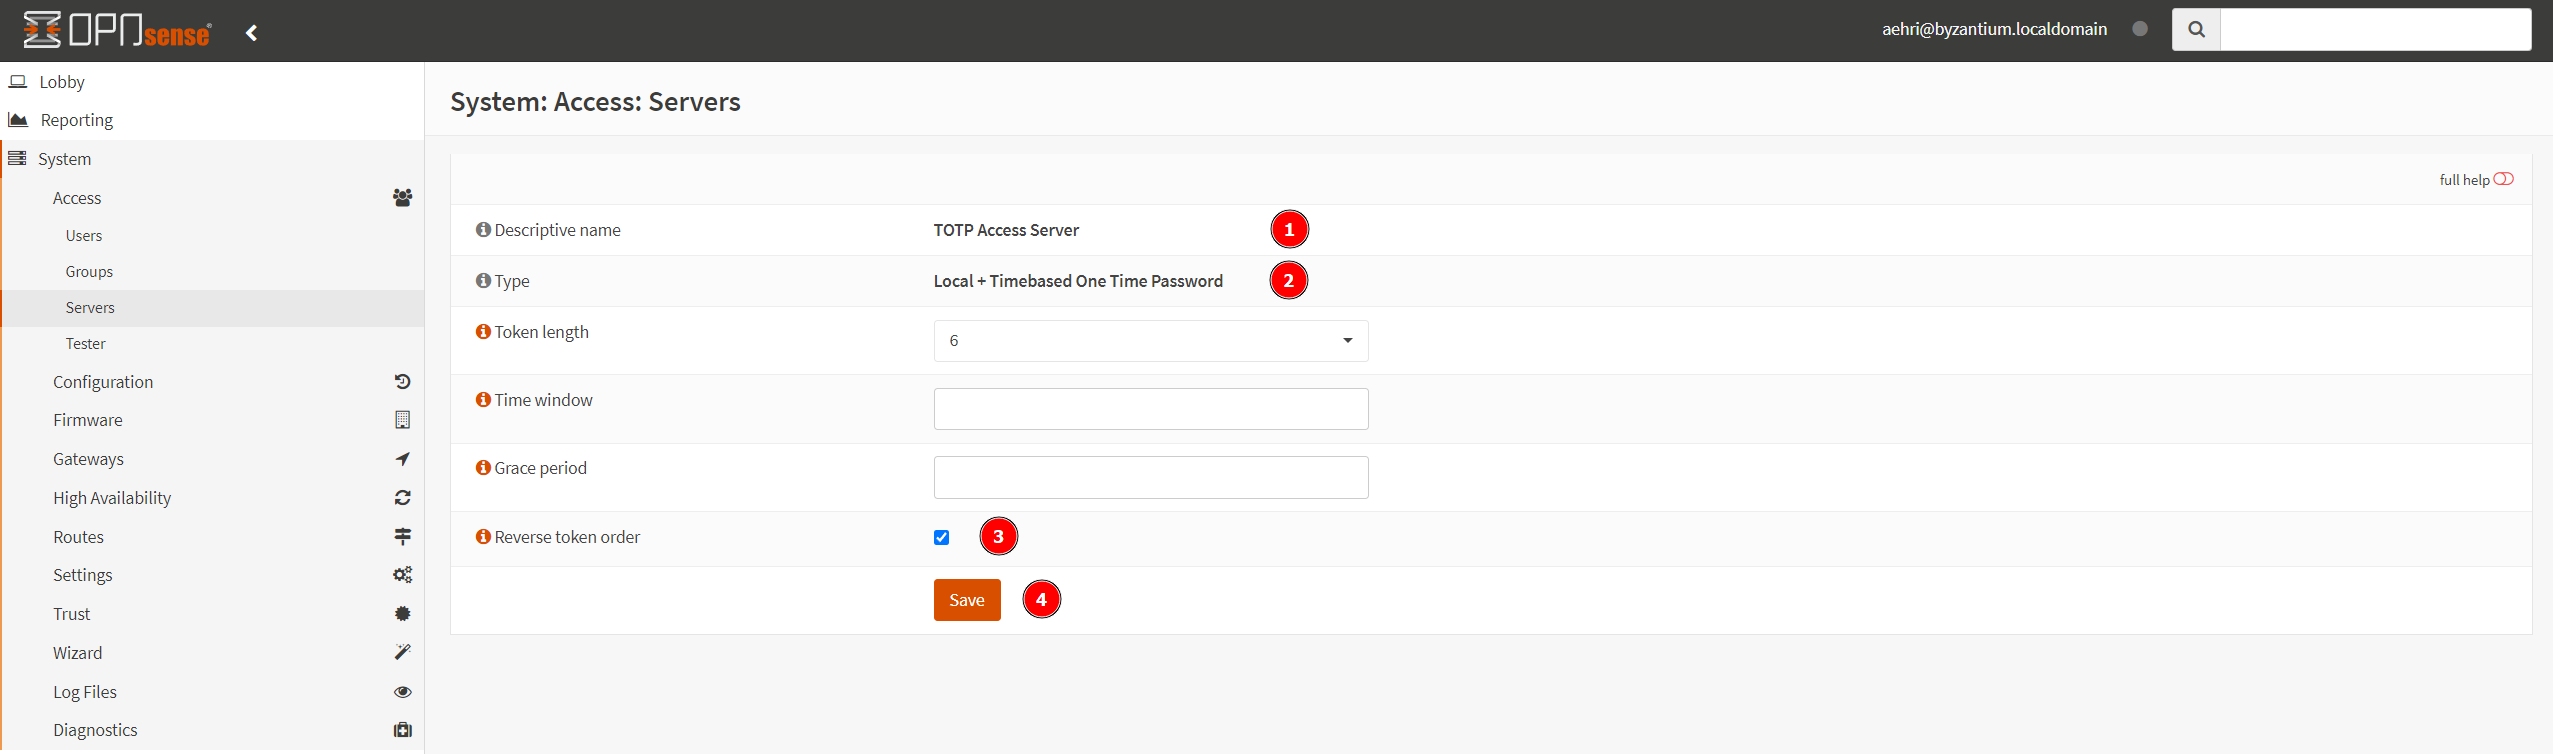
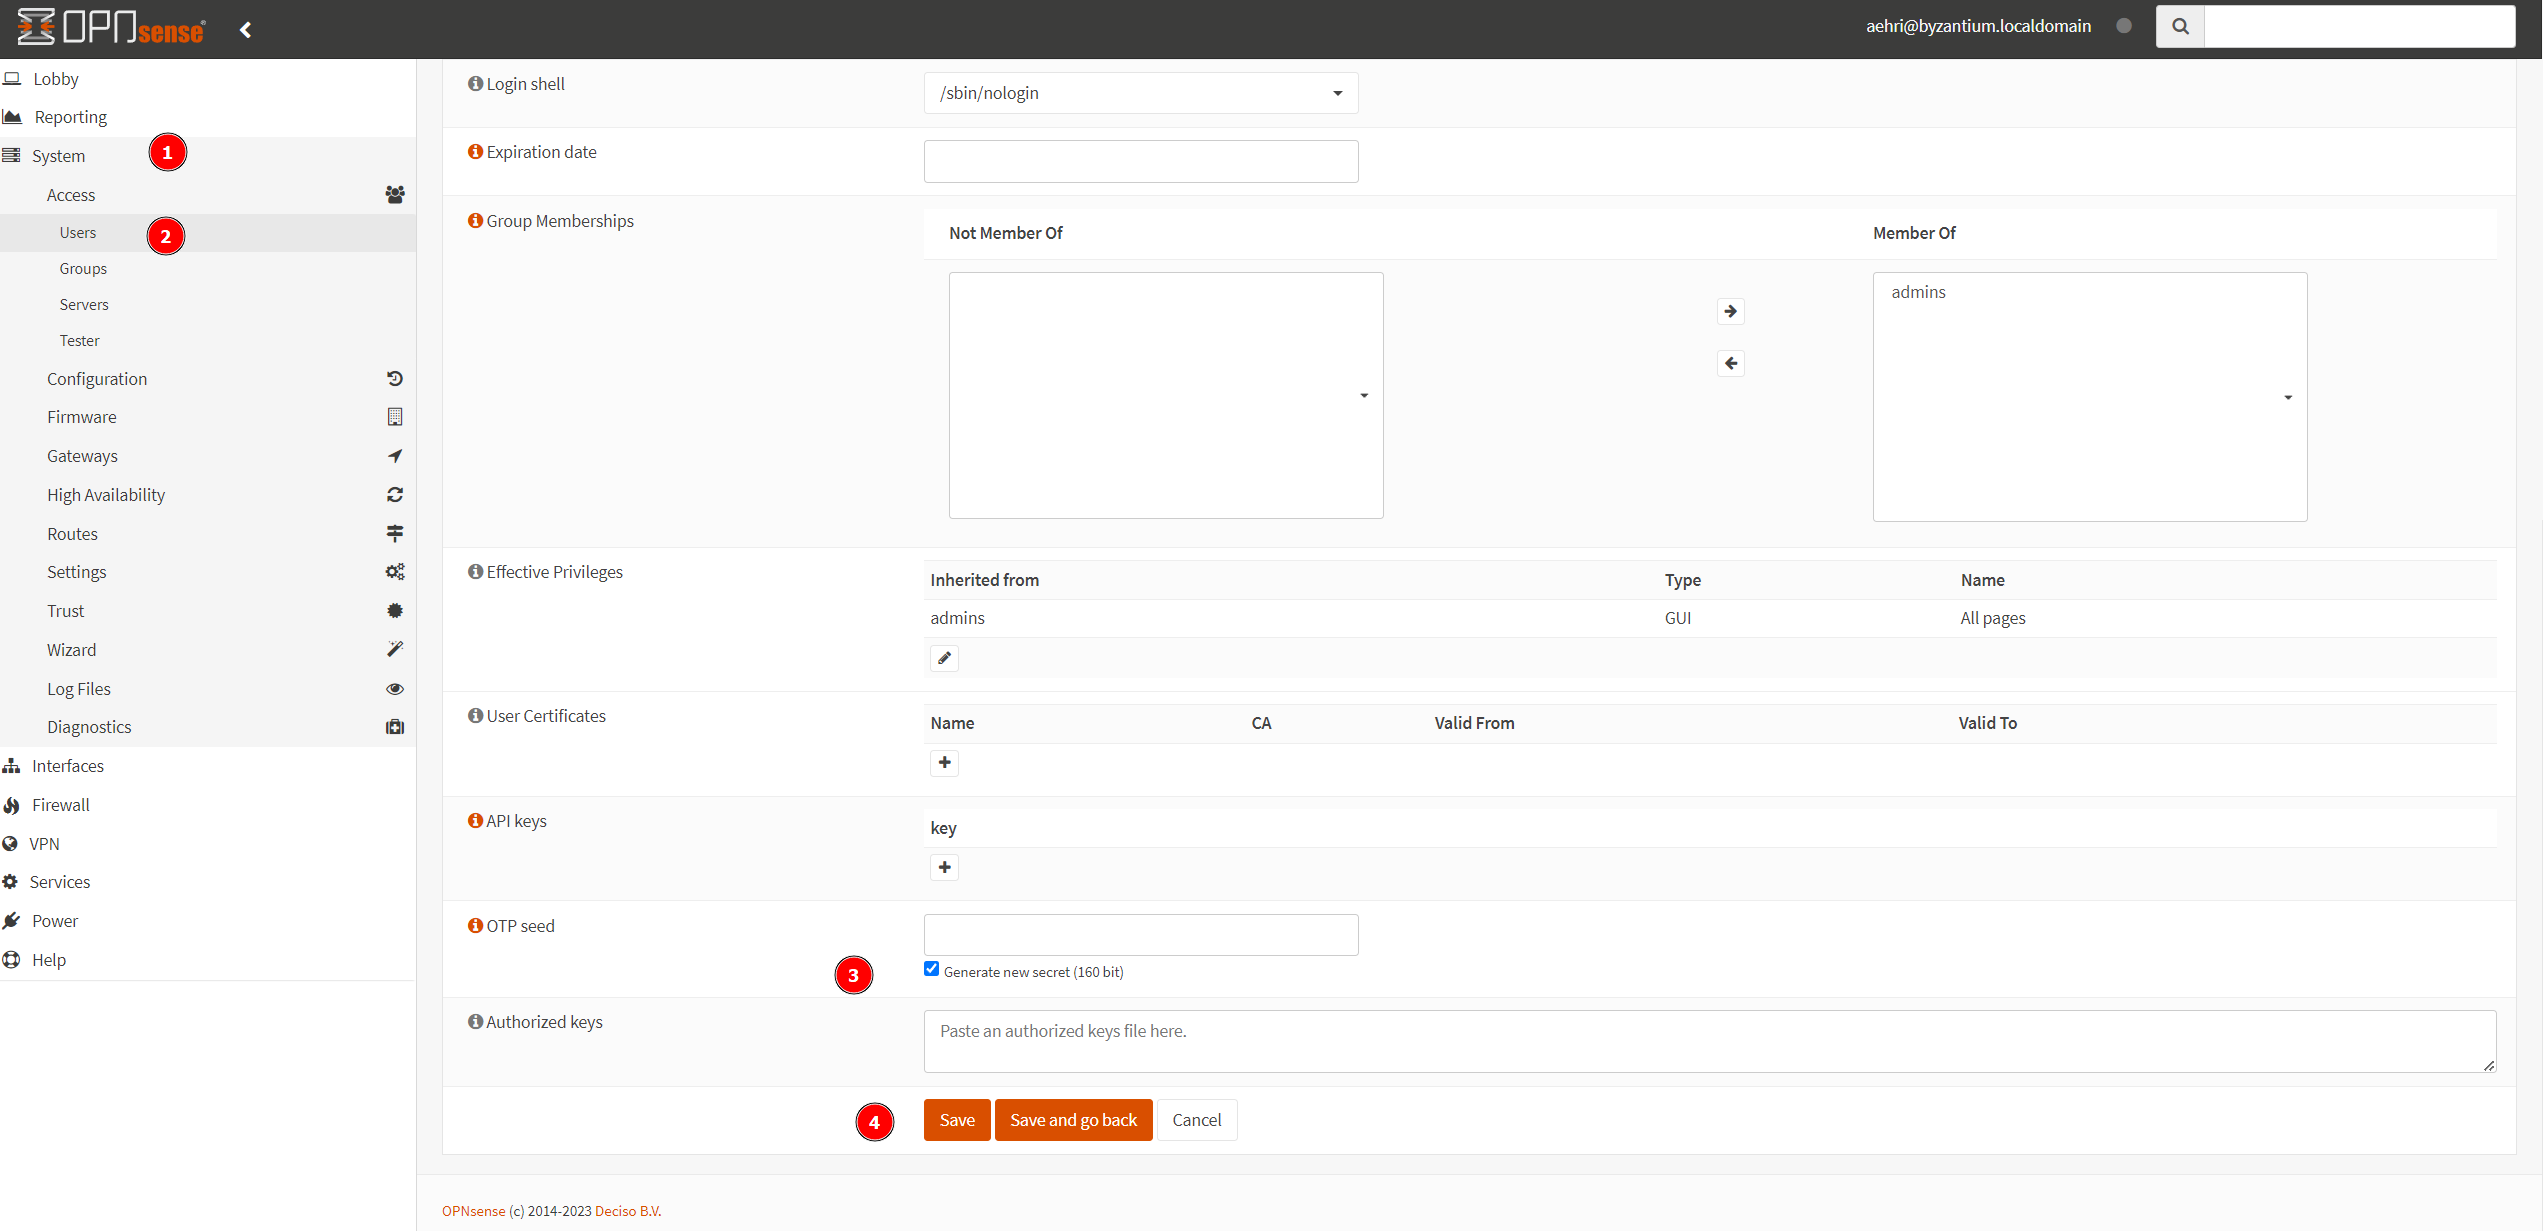
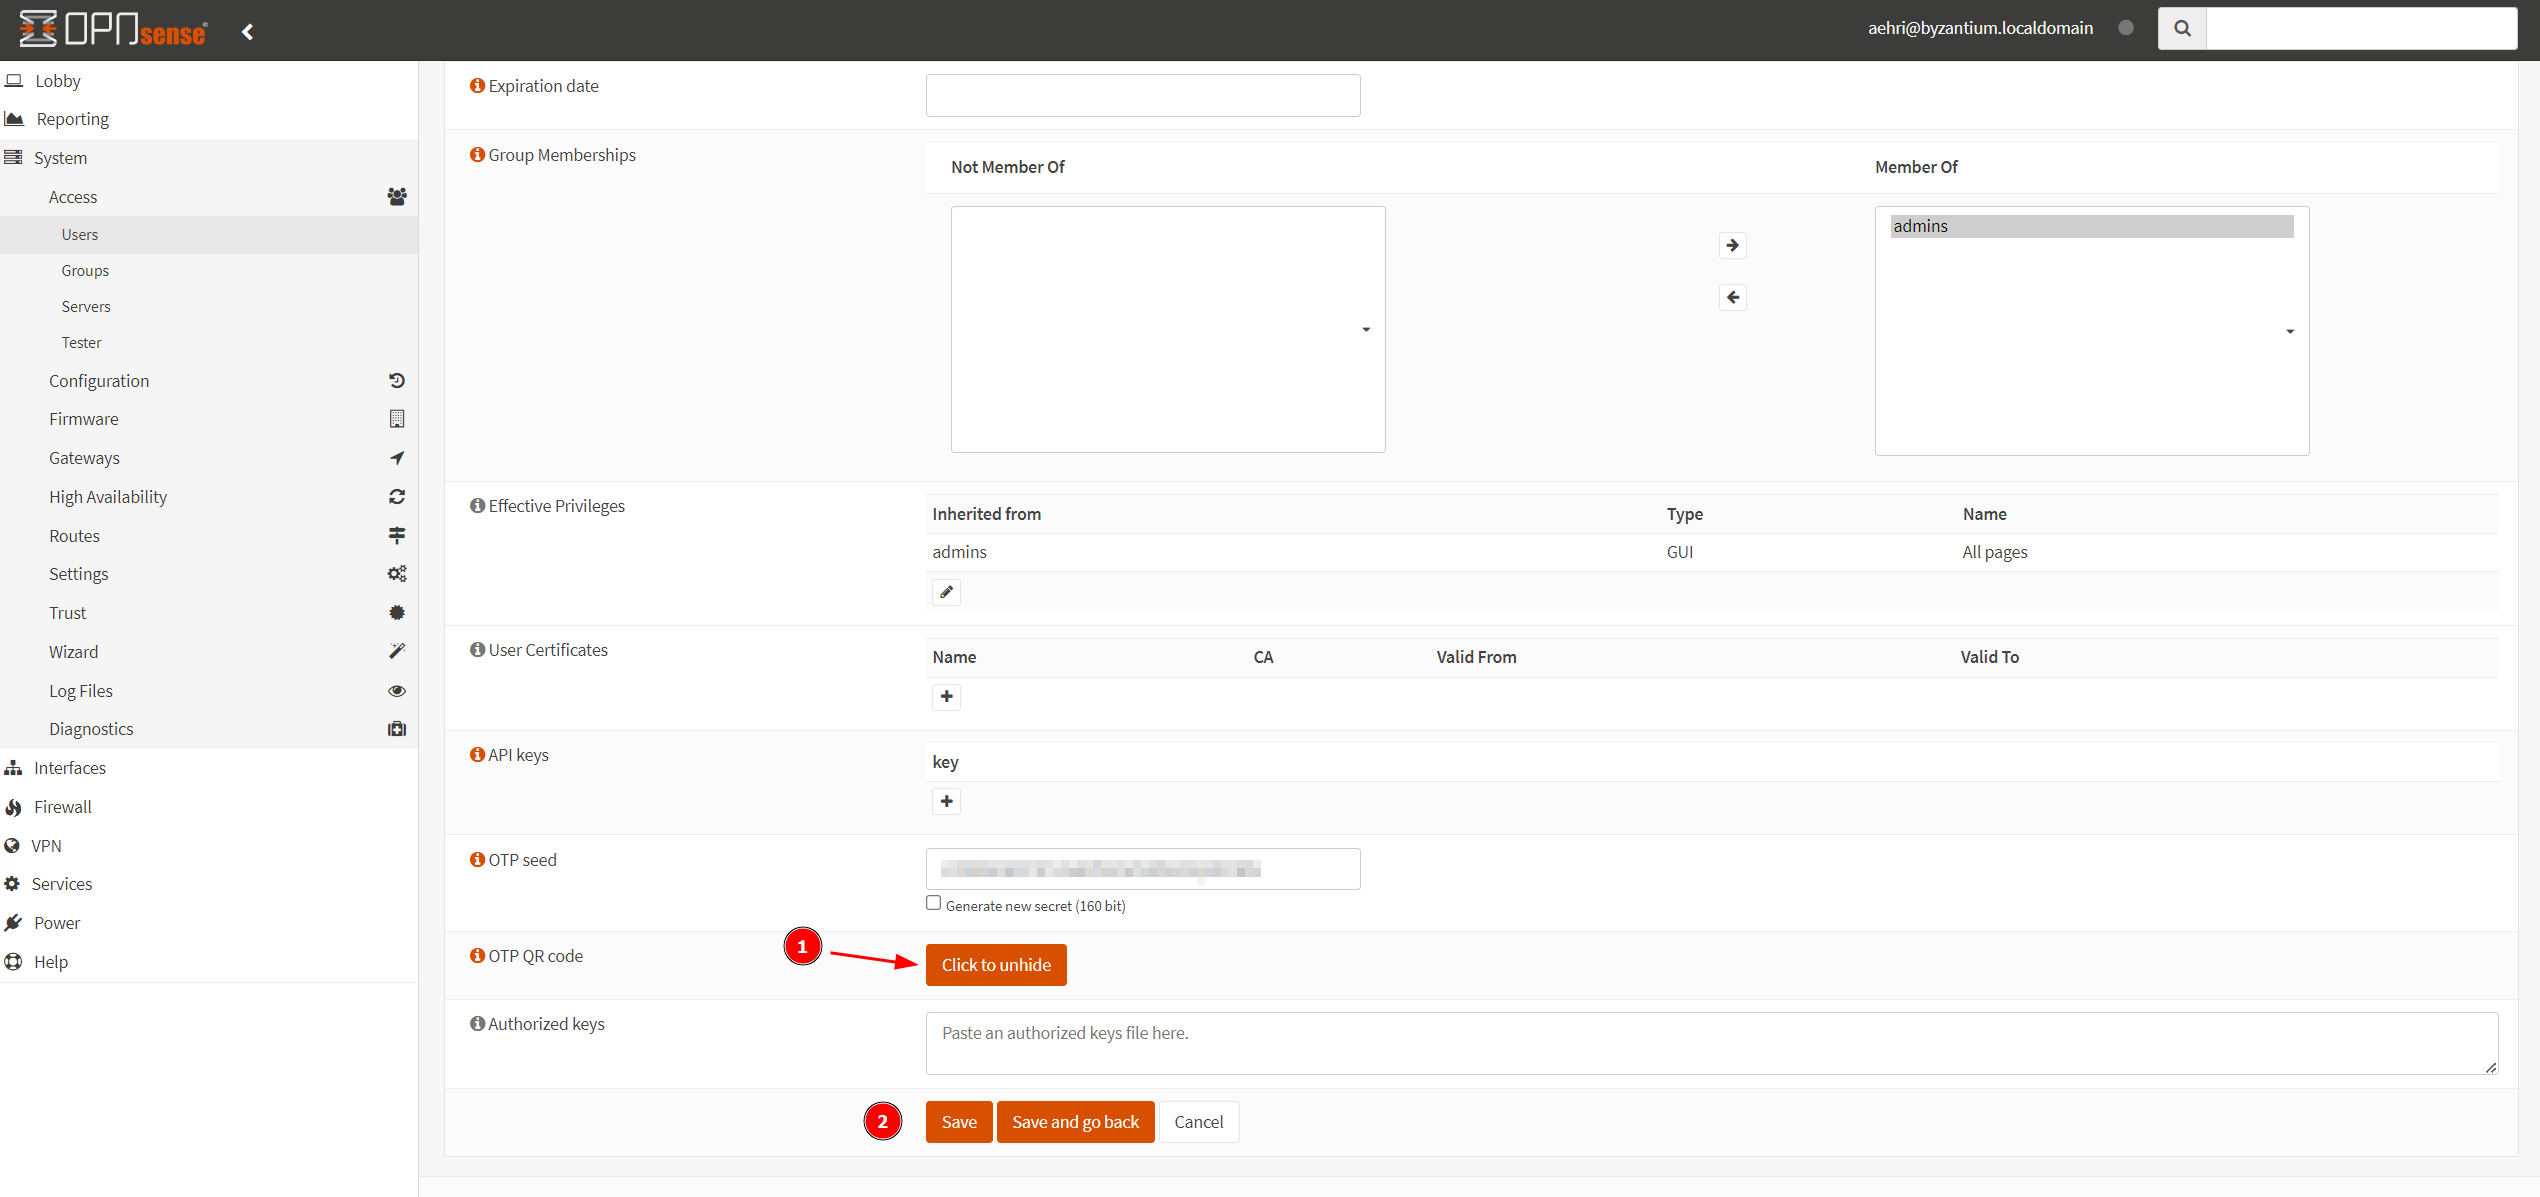
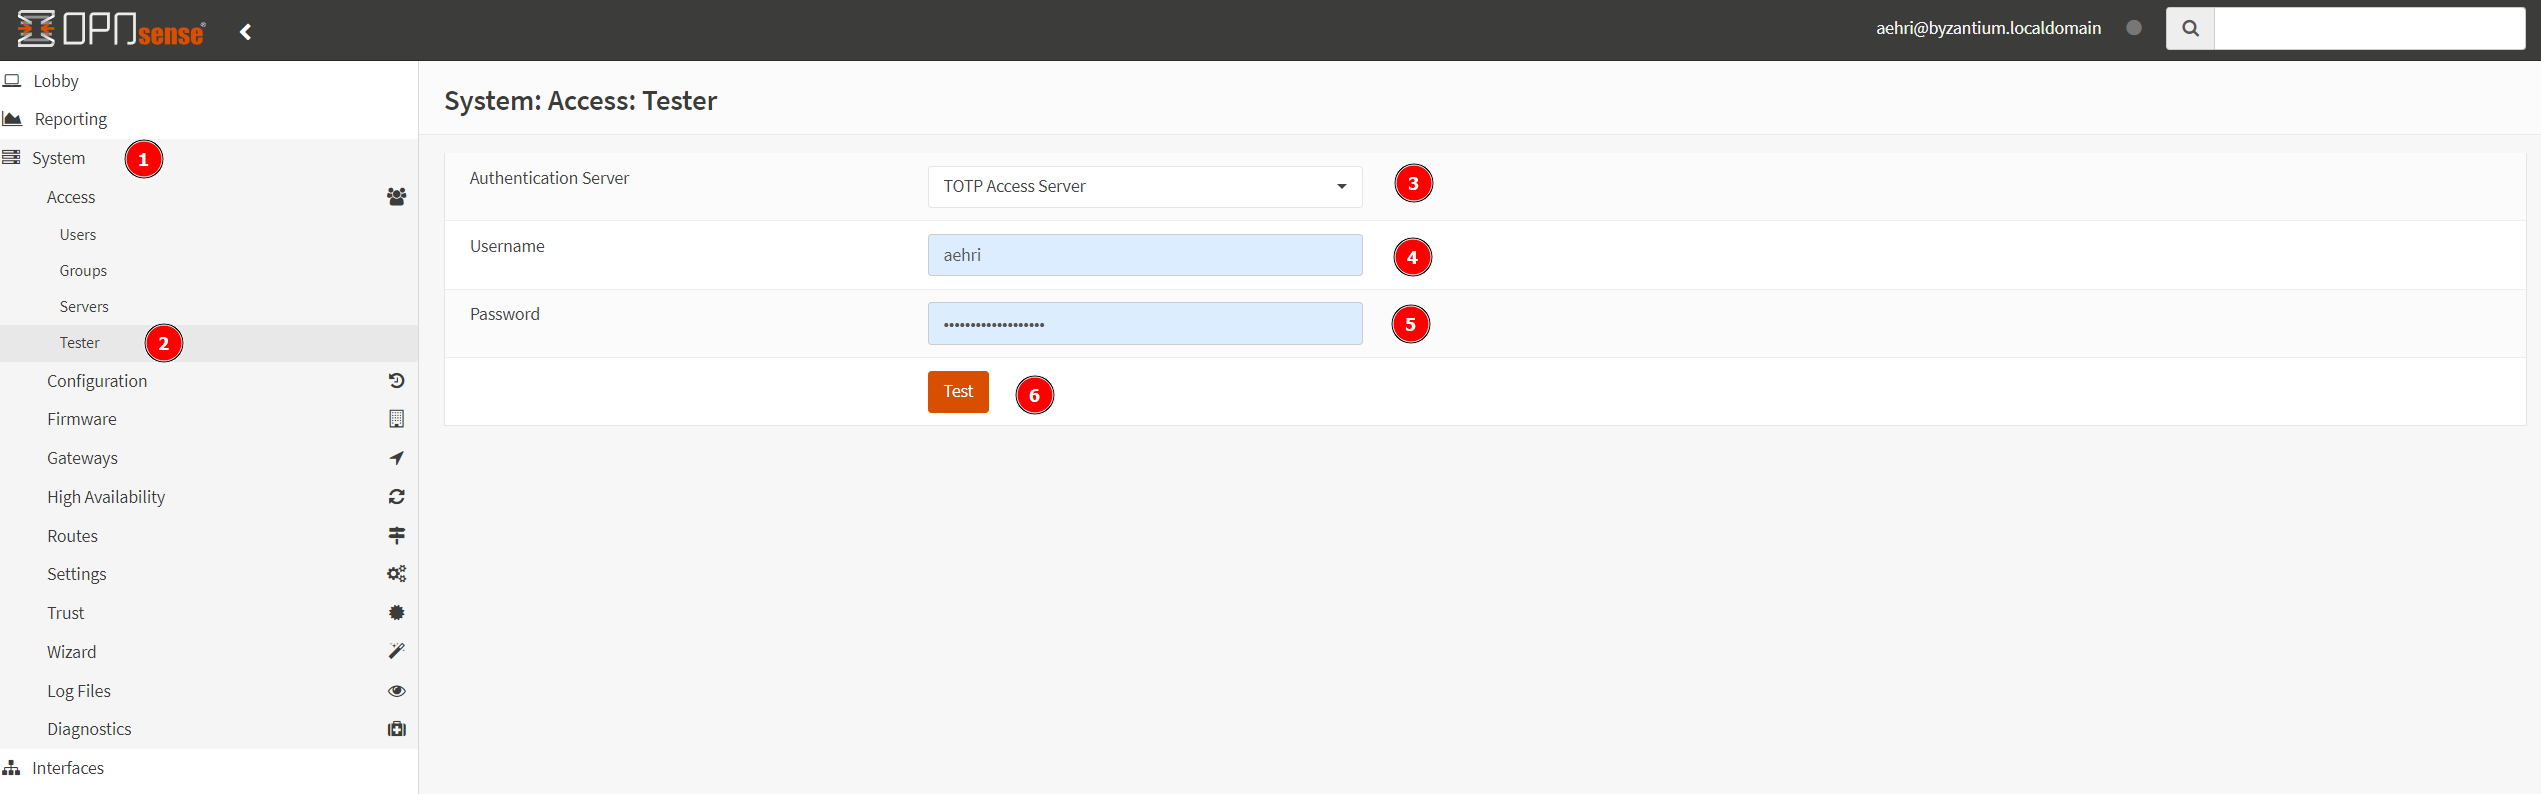
(Optional) Enable 2FA for OPNsense Account